

-
Welcome to Tacoma World!
You are currently viewing as a guest! To get full-access, you need to register for a FREE account.
As a registered member, you’ll be able to:- Participate in all Tacoma discussion topics
- Communicate privately with other Tacoma owners from around the world
- Post your own photos in our Members Gallery
- Access all special features of the site
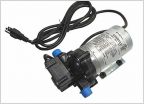 120v Shower/Washdown in Bed
 Vibration at 30-40 mph
 Intermittent Wiper Write Up??
 4.0L 1GR 2nd Gen Oil Change Guide
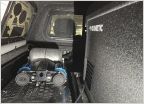 Turn the CKMP12 ARB compressor into the CKMA12?
DCLB Auto to Manual RC62F, VF2B transfer case and 3rd Gen E-Brake Swap
Discussion in 'Technical Chat' started by DesertRatliff, May 7, 2023.
Page 3 of 6
Page 3 of 6


