-
Welcome to Tacoma World!
You are currently viewing as a guest! To get full-access, you need to register for a FREE account.
As a registered member, you’ll be able to:- Participate in all Tacoma discussion topics
- Communicate privately with other Tacoma owners from around the world
- Post your own photos in our Members Gallery
- Access all special features of the site
 IK0NiK's 2015 TRD OR "Mostly Modest" Build
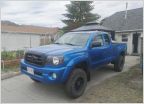 Long term project - Fix truck and the mod
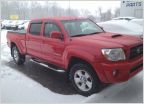 Finally My build-up of "Red"
 Longer wheel stud question...Need help
 Key-Rei's (Science Dog) Build? Thread!
 Northwesttaco's SOLD LT Build w/ 35's and BS
Dick's Dank Yank Wank Tank
Discussion in '2nd Gen. Builds (2005-2015)' started by scocar, Oct 11, 2015.
Page 30 of 414
Page 30 of 414
Products Discussed in