1. Welcome to Tacoma World!

    You are currently viewing as a guest! To get full-access, you need to register for a FREE account.

    As a registered member, you’ll be able to:
    • Participate in all Tacoma discussion topics
    • Communicate privately with other Tacoma owners from around the world
    • Post your own photos in our Members Gallery
    • Access all special features of the site

DIY Bolt-On Frame Plates for Sliders

Discussion in 'Armor' started by 1 Bored Clerk, Nov 9, 2013.

  1. Mar 9, 2014 at 6:08 PM
    #121
    1 Bored Clerk

    1 Bored Clerk [OP] Well-Known Member

    Joined:
    Sep 18, 2013
    Member:
    #112786
    Messages:
    1,999
    Gender:
    Male
    Vancouver, WA
    Vehicle:
    '13 4x4 AC TRD OR
    It's been a little while since I've been able to work on these. I was sick last weekend but I more than made up for it this weekend!

    Prepare for crappy cell phone pics galore! :rolleyes:

    IMG_0896_zpsf2e53d4c_69bafb8b51c547532f62804dc7694e01662132b0.jpg
    In the dark garage photo. Yep...can't see a thing. :D

    IMG_0909_zps3dc0cc5d_64e7688195930c4f2c8b1130ce313aeaf287a7d7.jpg
    Filthy truck close-up. Sliders are lookin good to my eyes!

    IMG_0910_zpsb64e8185_daca92d1d82d173bd1232971bf98cbb9e5199451.jpg
    Too dark. Sorry...the phone is all I ever have on me. I have a Go-Pro now so maybe I should take pics with that. :cool:

    IMG_0911_zpsa5081934_749b5c10608b6d5d65dc25f04f78f4212afaecee.jpg
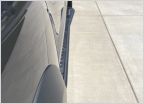
    From the rear. :eek: I REALLY dig the fit on these. The main beam is exactly even with the widest part of the front door and the kickout is 1.75" wider than that. Perfect.

    IMG_0915_zps04f62542_e588e6c9bf8d0fff6074a1a4f3766231a31adfd6.jpg
    I still can't figure out a nice way to brace the rear most part of the slider so I drilled a hole in the frame plate just in case I decide to drill the frame in the back and put a bolt through there. There just isn't much room because of the gas tank. We'll see...

    Side note: I drove the truck to dinner with the sliders bolted into place and my front two skids on (they've been on for a couple of months so I was used to them). I couldn't believe how different the truck was. It seemed stiffer...which, I guess, it should! I could hear and feel different sounds/vibrations. Nothing odd or annoying, it was just different enough to notice immediately.
     
    Last edited: Mar 9, 2014
    Slashaar likes this.
  2. Mar 9, 2014 at 6:13 PM
    #122
    bullaculla

    bullaculla IKA fabrications

    Joined:
    Oct 14, 2012
    Member:
    #89002
    Messages:
    8,155
    Gender:
    Male
    Da big big island!
    Vehicle:
    2013 MGM DCSB Tacoma 4X4 TRD Off Road
    All pro 3 link SAS kit, Diamond axle, kings on 37" MTR/K
    Looks great! One of a kind sliders for sure :)
     
  3. Mar 9, 2014 at 6:21 PM
    #123
    1 Bored Clerk

    1 Bored Clerk [OP] Well-Known Member

    Joined:
    Sep 18, 2013
    Member:
    #112786
    Messages:
    1,999
    Gender:
    Male
    Vancouver, WA
    Vehicle:
    '13 4x4 AC TRD OR
    You get to see some of the skid plate part of this project because they are attached to the sliders. The Relentless Fab transfer case skid has two arms that reach off the back of the skid to the frame. Two L brackets rest against the frame, you drill a couple of holes and you're done. Of course, since I'm trying to avoid drilling my frame, I overcomplicated the whole frickin' deal...just to avoid drilling two dang holes. :jerkoff:

    Anyway, here's a blurry, vague pictorial of what I did.

    IMG_0899_zps63cf3e4e_516b9e7dd8e67b3cdb278b07814e340dde9c8d07.jpg
    Drivers side looking forward

    IMG_0901_zps6eb54186_e08555d5de362a6bddc155fee645f46f06be5d14.jpg
    Passengers side looking forward

    IMG_0908_zpsf61f1181_e90fb37803ee441f2e55fe41d569e1105eeb88ac.jpg
    Side view of the rear skid mount from frame level. Seems tucked up pretty well to me!

    Everything bolts up nicely and seems to play well together. I couldn't be happier! Now, if I can just get powdercoat done soon...and touch up my frame paint where it's been rubbed/chipped off from this whole process...then fluid film the whole thing. Geez...I thought I was almost done! :D Hopefully we get some dry weather for a few days so I can take care of all of the painting/fluid film. Unlikely but I can hope.
     
  4. Mar 9, 2014 at 6:28 PM
    #124
    1 Bored Clerk

    1 Bored Clerk [OP] Well-Known Member

    Joined:
    Sep 18, 2013
    Member:
    #112786
    Messages:
    1,999
    Gender:
    Male
    Vancouver, WA
    Vehicle:
    '13 4x4 AC TRD OR
    I did several mods to the transfer case skid that some might find interesting.

    IMG_0900_zpsf6e15727_e8b52d66ce5cf859c99ecd6dfe4bc95d641217e1.jpg
    Trim a LOT off the side wall to clear the exhaust hanger...drivers and passengers side.

    IMG_0904_zps504b7e26_5b01813629a9c0575de097f539b45a2ec8b4026e.jpg
    IMG_0905_zps0b27c256_38aa11806f019b66705432a855b0379bd115d205.jpg
    Trim a TON off around the rear exhaust joint. On my truck, the bolts on the exhaust completely prohibited the skid from being pushed fully into place.

    IMG_0912_zps15e2568c_e4f80c8dd4eaaa5dcd54e558ac2fc76d354291e6.jpg
    This trim (the stepped area) makes mounting this skid almost easy. Part of the crossover exhaust hanger tubing wraps around the front of the crossover pipe on the drivers side right where this cut is. Making this small trim allows the skid to bypass that obstacle much easier. It's a total PITA without this trim.

    There you go. Just a few things you may want to consider if you get these skids. These trims should also help reduce/eliminate any rattling you may get from the exhaust. I bolted mine in place and shook the hell out of the exhaust and didn't hear any contact. Before the trims...I had lots of contact. We'll see how it goes when actually driving/flexing
     
    Last edited: Mar 10, 2014
  5. Mar 9, 2014 at 6:30 PM
    #125
    1 Bored Clerk

    1 Bored Clerk [OP] Well-Known Member

    Joined:
    Sep 18, 2013
    Member:
    #112786
    Messages:
    1,999
    Gender:
    Male
    Vancouver, WA
    Vehicle:
    '13 4x4 AC TRD OR
    Skids and sliders...ready to get some powder love.

    IMG_0917_zps8ecbad11_0a0be74244ff6b029b21bfc9711778c1139fcb5b.jpg
     
    Slashaar likes this.
  6. Mar 9, 2014 at 6:33 PM
    #126
    1 Bored Clerk

    1 Bored Clerk [OP] Well-Known Member

    Joined:
    Sep 18, 2013
    Member:
    #112786
    Messages:
    1,999
    Gender:
    Male
    Vancouver, WA
    Vehicle:
    '13 4x4 AC TRD OR
    Where the heck are yours?
     
  7. Mar 9, 2014 at 6:39 PM
    #127
    bullaculla

    bullaculla IKA fabrications

    Joined:
    Oct 14, 2012
    Member:
    #89002
    Messages:
    8,155
    Gender:
    Male
    Da big big island!
    Vehicle:
    2013 MGM DCSB Tacoma 4X4 TRD Off Road
    All pro 3 link SAS kit, Diamond axle, kings on 37" MTR/K
    Pretty badass adjustments! :cool:
    Last I heard, my frame plates were being sent off to get bent. Still waiting on sliders anyway. Its been "I need just one more week" for months now...
     
  8. Mar 9, 2014 at 9:40 PM
    #128
    1 Bored Clerk

    1 Bored Clerk [OP] Well-Known Member

    Joined:
    Sep 18, 2013
    Member:
    #112786
    Messages:
    1,999
    Gender:
    Male
    Vancouver, WA
    Vehicle:
    '13 4x4 AC TRD OR
    Haha...that's how favors go sometimes! The price you pay for 'free'.
     
  9. Mar 11, 2014 at 8:06 PM
    #129
    bullaculla

    bullaculla IKA fabrications

    Joined:
    Oct 14, 2012
    Member:
    #89002
    Messages:
    8,155
    Gender:
    Male
    Da big big island!
    Vehicle:
    2013 MGM DCSB Tacoma 4X4 TRD Off Road
    All pro 3 link SAS kit, Diamond axle, kings on 37" MTR/K
    Got em! Completely free of charge. Didn't even have to pay for the material :cool:
    [​IMG]
    Just holding it up to the frame, looks like everything lines up fine. Gotta remove the two bolts and then I can do a full fit up.
    But, Still waiting on my beefed sliders...
    :(
     
    Slashaar likes this.
  10. Mar 11, 2014 at 9:12 PM
    #130
    1 Bored Clerk

    1 Bored Clerk [OP] Well-Known Member

    Joined:
    Sep 18, 2013
    Member:
    #112786
    Messages:
    1,999
    Gender:
    Male
    Vancouver, WA
    Vehicle:
    '13 4x4 AC TRD OR
    Nice! Free is a very good price. At least now you have time to make all of the backing plates before your sliders arrive. Haha...enjoy!
     
  11. Mar 12, 2014 at 9:37 AM
    #131
    luka

    luka Well-Known Member

    Joined:
    Jun 17, 2011
    Member:
    #58428
    Messages:
    3,459
    Gender:
    Male
    First Name:
    Mike
    Kailua, HI
    Vehicle:
    Prerunner -> 4WD Converted
    Pelfreybilt, Warn, BAMF, DTRL toggle on/off, FJ OEM Fog/Aux Light switches, 2012 lower center console swap, wired in auto-dimming rear view mirror, Wet-Okole inside, Weathertech , Rigid, Tint, Roto-Pax, Bestop, OME, Extended SS brake lines, TRD TX Pro/Baja Graphite 16" Rims
    :drool:
     
  12. Mar 12, 2014 at 6:58 PM
    #132
    bullaculla

    bullaculla IKA fabrications

    Joined:
    Oct 14, 2012
    Member:
    #89002
    Messages:
    8,155
    Gender:
    Male
    Da big big island!
    Vehicle:
    2013 MGM DCSB Tacoma 4X4 TRD Off Road
    All pro 3 link SAS kit, Diamond axle, kings on 37" MTR/K
    You drooling over the frame plates? Or that badass hi lift jack rolling around in my truck bed :p
     
  13. Mar 14, 2014 at 2:05 PM
    #133
    1 Bored Clerk

    1 Bored Clerk [OP] Well-Known Member

    Joined:
    Sep 18, 2013
    Member:
    #112786
    Messages:
    1,999
    Gender:
    Male
    Vancouver, WA
    Vehicle:
    '13 4x4 AC TRD OR
    Just dropped off the skids and sliders for powdercoat. It'll be a black satin pebble-grain finish...very fine. They had about 6 different finishes in that general description to choose from...very subtle differences. I just didn't want smooth or shiny and they happen to be running this particular black satin-pebble next week so they could run mine at the same time! Should get them back before the weekend!!

    Now I just need to clean and touch up the frame and spray some fluid-film or similar on the frame before I bolt up the skids/sliders. Then I'll fluid film most of it again...mostly all the fasteners after the loc-tite has a chance to do it's thing. Don't want no rusty-rust on my truck!
     
  14. Mar 14, 2014 at 8:55 PM
    #134
    1 Bored Clerk

    1 Bored Clerk [OP] Well-Known Member

    Joined:
    Sep 18, 2013
    Member:
    #112786
    Messages:
    1,999
    Gender:
    Male
    Vancouver, WA
    Vehicle:
    '13 4x4 AC TRD OR
    File requests have to be around 15 but I don't have a current count.

    I've had good luck using loctite in Rust prone areas. I'll reconsider your stance on anti seize though.
     
  15. Mar 15, 2014 at 10:09 AM
    #135
    1 Bored Clerk

    1 Bored Clerk [OP] Well-Known Member

    Joined:
    Sep 18, 2013
    Member:
    #112786
    Messages:
    1,999
    Gender:
    Male
    Vancouver, WA
    Vehicle:
    '13 4x4 AC TRD OR
    Yeah, I figured the loc-tite will keep everything together and following up with the fluid-film will keep everything from staying together FOREVER. :D
     
  16. Mar 24, 2014 at 8:38 AM
    #136
    1 Bored Clerk

    1 Bored Clerk [OP] Well-Known Member

    Joined:
    Sep 18, 2013
    Member:
    #112786
    Messages:
    1,999
    Gender:
    Male
    Vancouver, WA
    Vehicle:
    '13 4x4 AC TRD OR
    Well, I got everything mounted up for good this weekend! I'll post pics this evening. They may be crappy pics but, if you follow my threads, you're used to that. :rolleyes:
     
  17. Mar 24, 2014 at 8:03 PM
    #137
    1 Bored Clerk

    1 Bored Clerk [OP] Well-Known Member

    Joined:
    Sep 18, 2013
    Member:
    #112786
    Messages:
    1,999
    Gender:
    Male
    Vancouver, WA
    Vehicle:
    '13 4x4 AC TRD OR
    I picked up my skids and sliders from powdercoat. First thing I notice when we load up the very first piece...a part of the slider is bent. :mad: Total denial that they did it (with a follow-up statement of 'well, they are really heavy) and then they offered to 'hit it with a hammer'. Uh...no. 'Well, how about a rubber mallet?'. On 3/16" steel? Uh...no. Why is it so hard to get something done correctly?

    IMG_0951_zps2a397508_fad7248c9be570df497917c6051f321803ff3406.jpg
    They should both look like the one on the left. Oops.

    IMG_0955_zpsdcd51da0_08ad8084fb9c8663904700bde2c6346620b7d117.jpg
    IMG_0956_zpsd5c282f2_eaa2fda8d2c9fb6f5a37a182873aa15935c578f4.jpg
    Take four heavy duty quick grips and a nice piece of hardwood and get to tweaking! Easy bend and it was back in shape in no time.

    IMG_0957_zps62774fc7_ebc183fb5e2fd715c0e48c9342e03ee461057691.jpg
    Here they are in all their glory! The powdercoating is pretty nice but it REALLY shows off my wickedly amateur welding and grinding skills. I guess that's okay since I'm a wicked amateur welder and grinder. :D They look plenty good to bash on rocks. :rolleyes:

    After a few hours of fluid filming the frame and fitting the three piece skids and two sliders together, here they are! Really crappy picture alert!!
    IMG_0961_zps10f1e923_9459c20b2a09bb05ffa7a0a5989db3fc16a8bdd6.jpg
    I swear there are sliders in this picture somewhere. It's a bit like a where's Waldo game, though. I promise I'll get better pics next time it's nice out and I'm somewhere cool.

    Thanks to everyone that has followed along and offered insight. I hope those of you out there that got the files post up your projects here (or at least a link) to keep this alive! I'll continue to offer the files as long as I'm around so please keep the requests coming. I'll post up better pics as well as updates on the design and how they hold up as I use them.
     
    Last edited: Mar 24, 2014
    Slashaar and Grumpy like this.
  18. Mar 24, 2014 at 8:19 PM
    #138
    bullaculla

    bullaculla IKA fabrications

    Joined:
    Oct 14, 2012
    Member:
    #89002
    Messages:
    8,155
    Gender:
    Male
    Da big big island!
    Vehicle:
    2013 MGM DCSB Tacoma 4X4 TRD Off Road
    All pro 3 link SAS kit, Diamond axle, kings on 37" MTR/K
    That came out really nice! Great job.
     
  19. Mar 24, 2014 at 8:25 PM
    #139
    1 Bored Clerk

    1 Bored Clerk [OP] Well-Known Member

    Joined:
    Sep 18, 2013
    Member:
    #112786
    Messages:
    1,999
    Gender:
    Male
    Vancouver, WA
    Vehicle:
    '13 4x4 AC TRD OR
    The first hit will be rough. I just hope they don't crumble off the truck at the first sign of use. Haha! I didn't weigh them...no need to abuse myself like that. I'm going to be content with my triumph.
     
  20. Mar 24, 2014 at 8:27 PM
    #140
    1 Bored Clerk

    1 Bored Clerk [OP] Well-Known Member

    Joined:
    Sep 18, 2013
    Member:
    #112786
    Messages:
    1,999
    Gender:
    Male
    Vancouver, WA
    Vehicle:
    '13 4x4 AC TRD OR

    Thanks, man!
     

Products Discussed in

To Top