

-
Welcome to Tacoma World!
You are currently viewing as a guest! To get full-access, you need to register for a FREE account.
As a registered member, you’ll be able to:- Participate in all Tacoma discussion topics
- Communicate privately with other Tacoma owners from around the world
- Post your own photos in our Members Gallery
- Access all special features of the site
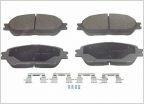 Wrong brake pads?
 Can't remove splash guard without removing flare, also the opposite?
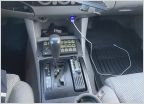 Switch panel
 DIY Rear Seat Delete/Dog Platform
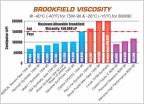 Added MT90 Fluid, Now 3rd Gear Grinds
 Serpentine belt
DIY: Full Flush for Automatic Transmission
Discussion in '2nd Gen. Tacomas (2005-2015)' started by mountain lion, Jan 5, 2010.
Page 21 of 72
Page 21 of 72
Products Discussed in


