1. Welcome to Tacoma World!

    You are currently viewing as a guest! To get full-access, you need to register for a FREE account.

    As a registered member, you’ll be able to:
    • Participate in all Tacoma discussion topics
    • Communicate privately with other Tacoma owners from around the world
    • Post your own photos in our Members Gallery
    • Access all special features of the site

DIY Gear Loft/Hammock

Discussion in '3rd Gen. Tacomas (2016-2023)' started by SpicyViking, Mar 5, 2022.

  1. Mar 5, 2022 at 10:00 PM
    #1
    SpicyViking

    SpicyViking [OP] New Member

    Joined:
    Mar 26, 2021
    Member:
    #360612
    Messages:
    2
    Gender:
    Male
    Vehicle:
    2018 Toyota Tacoma crew cab, 4x4 TRD
    Ladder rack, fishing rod holder, and shower
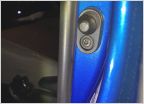
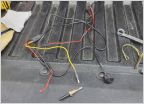
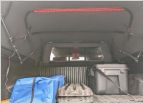
    Hello. I saw a Gear Hammock for a 4 door 3rd Gen Tacoma. But I did not like how it attached to the rear grab handles. So I decided to make one myself. I estimate the cost of materials to be around, $30 give or take. I made a template which is attached and there are some photos. The biggest issue I faced was taking off the grab handles and rear clothes hooks.

    The plastic wedge/shim that holds the clips in break very easily. I suggest getting a curved hook, that can get into the part and gently remove. Otherwise, to replace the clips for the handles and the whole rear clothing hooks is $40. I had to hand stitch the belt clasp to the seatbelt fabric. Making it tight to the attachments as possible.

    My plans show the start of the buckle, which is at the base nearest the attachments. Best thing to do is make your buckle attachments, install them and check your final measurements to sew. Hope yall enjoy.

    P.S. EDIT: When reinstalling the clips for the grab handle and rear clothing hooks. utilize the needle nose pliers to push it back into place and allow it to "snap" into place. You'll hear a click. You will have to use some force as the seatbelt material adds a cushion and doesn't allow it to go back with ease.


    Attached Files:

    Last edited: Mar 6, 2022
  2. Mar 6, 2022 at 1:22 AM
    #2
    Montana_Actual

    Montana_Actual ;)

    Joined:
    Nov 2, 2021
    Member:
    #381174
    Messages:
    2,124
    Pretty cool.
    So the one you mentioned used the actual handle part instead of the handle bolt? That doesn't seem practical at all, lol. Good job creating a cool design that still allows you to utilize the grab handles. Also, I think it's just a cool skillset you have to just "create"! :thumbsup:
     
  3. Mar 6, 2022 at 5:11 AM
    #3
    mquibble

    mquibble Well-Known Member

    Joined:
    Dec 26, 2020
    Member:
    #350714
    Messages:
    1,603
    First Name:
    Michael
    Vehicle:
    2021 TacomaTRD Pro
    This is why I love this site so much. People helping people. What a great detailed write up. Thanks for taking all the time to share.
     
    SpicyViking[OP] likes this.
  4. Mar 6, 2022 at 5:23 AM
    #4
    Buck Henry

    Buck Henry Well-Known Member

    Joined:
    Dec 10, 2020
    Member:
    #349241
    Messages:
    3,604
    Gender:
    Male
    Vehicle:
    2019 White TRD Off Road
    Well done OP! And I see that you are smart enough to only put soft / light stuff in your "attic " for safety.
     
    SpicyViking[OP] likes this.
  5. Mar 6, 2022 at 6:08 PM
    #5
    SpicyViking

    SpicyViking [OP] New Member

    Joined:
    Mar 26, 2021
    Member:
    #360612
    Messages:
    2
    Gender:
    Male
    Vehicle:
    2018 Toyota Tacoma crew cab, 4x4 TRD
    Ladder rack, fishing rod holder, and shower
    @Buck Henry, yeah only soft items. I could put my fly rod and travel case in-between the bottom straps. But I don't want any debris moving forward from a quick stop or wreck. Otherwise anything not soft could cause injury.
     

Products Discussed in

To Top