1. Welcome to Tacoma World!

    You are currently viewing as a guest! To get full-access, you need to register for a FREE account.

    As a registered member, you’ll be able to:
    • Participate in all Tacoma discussion topics
    • Communicate privately with other Tacoma owners from around the world
    • Post your own photos in our Members Gallery
    • Access all special features of the site

DIY relentless plate bumper help.

Discussion in 'Armor' started by RMorris11, Mar 11, 2016.

  1. Mar 11, 2016 at 6:33 AM
    #1
    RMorris11

    RMorris11 [OP] Well-Known Member

    Joined:
    Dec 11, 2012
    Member:
    #92882
    Messages:
    64
    Gender:
    Male
    First Name:
    Ryan
    Colorado Springs
    Vehicle:
    "10" Pyrite Mica TRD-S DBL CAB
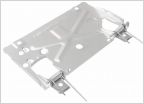
    I have a lot of extra bolts and washers along with 4 little L shaped tabs and 2 bigger brackets with 2 slotted holes on one side and with 1 slotted hole on the other side. I'm still building the bumper and their instructions are terrible nor do they even show or mention these parts I have left. What's the deal here? I'm assuming it's all important stuff yet no mention of them. What do the NON DIY instructions look like?
     
  2. Mar 22, 2016 at 7:07 PM
    #2
    weldo

    weldo Well-Known Member

    Joined:
    Oct 15, 2014
    Member:
    #140423
    Messages:
    1,337
    Gender:
    Male
    First Name:
    Mike
    Pittsburgh, pa
    Vehicle:
    2014 base ac 2.7 5-speed 4x4
    If you still need info on this, the 4 small L shaped brackets are for mounting fog lights, I'm guessing you opted for the cutouts.

    The 2 larger brackets, if they are the ones I think they are, are meant to bolt to the front of the bumper using the bolts you see as you look head on at the bumper. The bracket then dog legs back to the frame where one long 1/2" bolt goes through the bracket and then through a hole in the boxed section of the frame. The idea is that these brackets add support for winching by tying the bumper into the frame at an additional point.
     
  3. Mar 22, 2016 at 7:22 PM
    #3
    weldo

    weldo Well-Known Member

    Joined:
    Oct 15, 2014
    Member:
    #140423
    Messages:
    1,337
    Gender:
    Male
    First Name:
    Mike
    Pittsburgh, pa
    Vehicle:
    2014 base ac 2.7 5-speed 4x4
    Here's a pic of my build. The larger brackets bolt to the 2 bolts you see here and then stretches back to run parallel to the frame. I believe the hole that goes through the frame is a rectangular hole. You can't see the frame hole in this pic.

    [​IMG]

    Another view of the location for longer bracket. It just ties the bumper to the frame at an additional point. If you don't plan on winching you could probably leave them off.

    [​IMG]
     
    SonnyBones likes this.
  4. Apr 9, 2016 at 10:55 AM
    #4
    SonnyBones

    SonnyBones I VOID WARRANTIES

    Joined:
    Nov 21, 2015
    Member:
    #170342
    Messages:
    833
    Gender:
    Male
    First Name:
    Jeffery
    Vehicle:
    2015 TACOMA ACCESS CAB
    Really want to do a DIY kit myself, but it seems like unless you build bumper for a living, building one might not be worth it. Then again, you are building it, and there's a lot of satisfaction in that for sure!
     
  5. Apr 9, 2016 at 12:39 PM
    #5
    weldo

    weldo Well-Known Member

    Joined:
    Oct 15, 2014
    Member:
    #140423
    Messages:
    1,337
    Gender:
    Male
    First Name:
    Mike
    Pittsburgh, pa
    Vehicle:
    2014 base ac 2.7 5-speed 4x4
    Yea man, it's a great feeling when complete. Really not that hard either. All the pieces fit like a puzzle. Just bolt on the center section and line it up best you can then start lining up the other sections and tacking them in place. Measurements aren't hugely important, it's more important that it lines up with your particular truck.

    The steel version would be easier than the aluminum one just because the welding was tedious. I tig welded mine completely and it was a pain to get into some areas on the inside. I didn't have an aluminum mig setup. The steel version could be stick welded or mig welded and it would be way easier and quicker too. Just take your time and jump from side to side as make welds so it doesn't warp.
     
  6. Apr 9, 2016 at 3:38 PM
    #6
    SonnyBones

    SonnyBones I VOID WARRANTIES

    Joined:
    Nov 21, 2015
    Member:
    #170342
    Messages:
    833
    Gender:
    Male
    First Name:
    Jeffery
    Vehicle:
    2015 TACOMA ACCESS CAB
    Yeah, really thinking of pulling the trigger on the "Summit" model from @RelentlessFab . Depending on the weight, I'll have to decided whether to go steel or aluminum. IMO DIY is the way to go if you really want the custom clean fit for that specific truck, as all are not exactly the same. Shipping to Hawaii I assume would also be cheaper lol

    Man I really did your work you put into your bumper!! Have you got a thread going from start to finish on the piece? Wanna make sure I know what I'm in for when I go to weld things up.

    Tx
     
  7. Apr 9, 2016 at 5:36 PM
    #7
    weldo

    weldo Well-Known Member

    Joined:
    Oct 15, 2014
    Member:
    #140423
    Messages:
    1,337
    Gender:
    Male
    First Name:
    Mike
    Pittsburgh, pa
    Vehicle:
    2014 base ac 2.7 5-speed 4x4
    This is all the pics I took during the build. I wish I had done more but to be honest I was so frustrated during some of it that I'm lucky I didn't smash my welding machine with a sledge hammer!

    The main difficulty for me was that sometimes the metal just would not clean up. If you have some aluminum welding experience then you know when you try to weld dirty aluminum it's very difficult to impossible. I sanded all the rough plasma cut edges with a flap wheel and 90% of it welded very nicely. But every so often I'd be welding a joint then hit a spot where the puddle would just skin over and not flow like I wanted it. I'd have to stop sand it down and try again in that spot. Later when I explained this problem to a very experienced welder friend he told me to check the rubber gas line where it enters the torch body. Sometimes high heat and age can cause the rubber to crack around the fitting at the torch and allow air to mix with the shielding gas which may have been the cause of my troubles. I still haven't checked my hose yet though since I learned of this after my bumper was done.

    Also at times I had to use every bit of my machine's 300 amps, especially on the 1" thick recovery points. I would have liked to get a 3/16" tungsten but because of availability I had to use 1/8". 2% Lanthanated seemed to have the best current capacity for a given diameter so that's what I used but the electrode still melted and balled up frequently, requiring me to break it off and reshape the tip. I also really like the clear pyrex cups from USAweld.com. They allow for maximum visibility which comes in handy on some of the inside joints.


  8. Apr 10, 2016 at 7:40 PM
    #8
    SonnyBones

    SonnyBones I VOID WARRANTIES

    Joined:
    Nov 21, 2015
    Member:
    #170342
    Messages:
    833
    Gender:
    Male
    First Name:
    Jeffery
    Vehicle:
    2015 TACOMA ACCESS CAB
    Thanks Mike for the insight, and pictures!! To be honest, I haven't spent much time behind a tig and aluminum of the thickness these bumpers are at. I've used mig spool gun on my miller to do welding when I do work with aluminum every so often. With that being said I think ill still go with aluminum as the weight savings over steel is the biggest draw for me. I can basically tack everything into place, and have my friend tig up the rest.

    One question, after you've tacked everything into place, did you remove bumper and finished the rest off the truck? You'll obviously will have to take off the bumper to weld up the backside of the bumper, but what about the front?

    Aloha,
    Sonny
     
  9. Apr 11, 2016 at 3:06 PM
    #9
    weldo

    weldo Well-Known Member

    Joined:
    Oct 15, 2014
    Member:
    #140423
    Messages:
    1,337
    Gender:
    Male
    First Name:
    Mike
    Pittsburgh, pa
    Vehicle:
    2014 base ac 2.7 5-speed 4x4
    Yea I did remove it completely to weld the outside and inside. Just jump around a lot to avoid warpage. Weld a few inches on the left then a few on the right and so on. I don't think I ever welded more than 8" in any one weld at one time.

    I'd say try the spool gun, man! If that's what you have experience in, it should work just fine as long as the machine has enough power to weld the 1/4" material. Keep in mind most of the weld on the outside will get ground down and smoothed over and the inside will never be seen. I'd say see how it goes when you tack it up. If it seems to run OK and produce good strong tacks, try to weld a bit and see how it works.
     

Products Discussed in

To Top