

-
Welcome to Tacoma World!
You are currently viewing as a guest! To get full-access, you need to register for a FREE account.
As a registered member, you’ll be able to:- Participate in all Tacoma discussion topics
- Communicate privately with other Tacoma owners from around the world
- Post your own photos in our Members Gallery
- Access all special features of the site
 Mod Wiring!
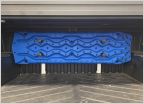 Who’s had luck mounting traction boards under the OEM Tonneau?
 Icon stage 2 poor ride. Recommend upper control arms?
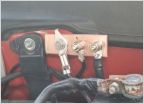
 Custom Made CB Holder
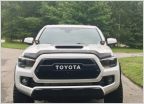 Must Have Accessories for Tacoma
 Question about tacoma 2019 grill change
DIY Tablet Mount, cheap and simple
Discussion in '3rd Gen. Tacomas (2016-2023)' started by boston904, Aug 23, 2023.


