1. Welcome to Tacoma World!

    You are currently viewing as a guest! To get full-access, you need to register for a FREE account.

    As a registered member, you’ll be able to:
    • Participate in all Tacoma discussion topics
    • Communicate privately with other Tacoma owners from around the world
    • Post your own photos in our Members Gallery
    • Access all special features of the site

Dobinson IMS lift with Archive Garage Bump Stops

Discussion in 'Suspension' started by Chukwithak, Jul 18, 2023.

  1. Jul 18, 2023 at 3:35 PM
    #1
    Chukwithak

    Chukwithak [OP] Well-Known Member

    Joined:
    Jan 14, 2015
    Member:
    #146343
    Messages:
    114
    Gender:
    Male
    First Name:
    Charlie
    Eldorado Hills, CA
    Vehicle:
    ‘21 Cement DC TRD OR 4x4
    Leitner ACS, iKamper BDV, Switch Pro, Decked
    Just jotting down a few notes of information over the weekend that I had to deal with on a DIY leaf install. Front suspension has not been done yet. No instructions is a pain. I'll be coming back to edit notes and comments.

    Thanks to @Crikeymike and Dobinson for helping me gather some of the missing info.

    Tools
    5mm allen
    10mm Flare wrench (brake lines)
    Needle nose pliers (brake lines)
    7mm wrench (zerker fittings)
    19mm socket/wrench
    21mm socket/wrench
    7/8 deep socket (u bar nuts)
    1/2' torque wrench

    Parts installed

    Front

    Dobinson Billet Aluminum Adjustable UCA's
    -----Dobinson PS59-4030 1/2" Lift Alloy Strut Top Mount Spacer
    Dobinson C59-354 Front Lifted Coil Springs
    Dobinson IMS59-50220 Front IMS Struts

    Rear
    Dobinson Tacoma L59-112-R Heavy Duty Leaf Springs
    Dobinson IMS59-50941 Long Travel Rear IMS Shocks
    Dobinson Toyota Tacoma 2005-2023 Rear Poly Leaf Spring Bush Kit
    Dobinson Greasable Bolt Kit
    Archive garage ubolt Flip Kit + Option 3
    Extended Rear Brake Lines +4" for Toyota Tacoma 2005+ (Black)

    Order of install
    Everything should be tightened but not torqued until the vehicle is on the ground so that the components can sit in place, then be torqued to specs.

    REAR:
    1. Leaf bushings
    2. Shackle attached to leaf
    3. Leaf on axle
    4. Front bolt of leaf
    5. Rear bolt of leaf
    6. U-Bolt flip kit
    7. Top of shock
    8. Bottom of Shock
    9. Tire
    10. TORQUE!
    This sequence was very smooth. Utilizing the jack under the axle to lift/lower the spring/shock made it simple to use a rubber mallet and tap components into place.

    Dobinson Greasable Bolt Kit
    • 7mm Wrench
    • 19mm wrench/socket
    • 21mm wrench/socket

    These bolts are very nice. The zerker fittings can be removed with a 19mm wrench and 7mm wrench so that they can be tapped into place if needed. A 21mm wrench is needed for the nut. I mounted these in the front portion of the leaf, and the shackle/frame connection. My shackle bushing already contains a zerker fitting. I also faced the zerker exteriorly and had no issue with the screw/nut side rubbing.

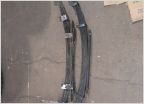
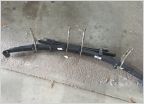
    Dobinson Tacoma L59-112-R Heavy Duty Leaf Springs
    I actually needed a medium rate spring (L59-111-R) but they are on back order and will eventually need the heavy rate (L59-112-R). I decided to purchase the heavy rate spring and remove to the appropriate leaf to convert to the medium rate. When viewing the part number of the add-a-leafs, the last digits of the part number represent the leaf position counting from the top of the leaf as if it was mounted on the vehicle.

    The medium rate with the add a leaf to make it a heavy rate is L59-112-R-R5, and the R5 representing the 5th leaf in the stack. So to go backwards I needed to remove the 5th leaf to go from heavy to medium. The L59-113-R-R6 would be the 6th leaf in the stack if upgraded.

    I had a very hard time getting the OE shackles over the Dobs bushings of the leaf. My father trying to help actually damaged them and I had to quickly seek replacements. I ended up with BAMF HD shackles which had a bushing and zerker fitting in them. This allowed me to utilize my 4 greasable bolts for the frame mounts and all 6 bushings are now greasable. They were MUCH easier to install than the OE. For the $130 it costs, I wouldnt even blink to go that route.

    All points are torqued to 89ft lbs.

    Archive garage ubolt Flip Kit + Option 3
    • 7/8 Deep socket
    Talking with Eric on the phone, he wants a shock collapse length of 15" or less.
    • Torque = 80ft lb
    • Retorque at 100 miles and 500 miles
    • Trim ubolts to 1/2" above nuts
    • Bump stop retainer ring bolts = 3/8-16
    • Bump stop compression size = 1.75"

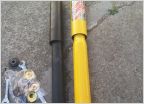
    Dobinson IMS59-50941 Long Travel Rear IMS Shocks

    This shock requires a bump stop +2" taller than the stock bump stop.
    4" Brake line extensions are recommended.

    • 5mm Allen
    • 17mm wrench
    • 17mm socket
    Organization of the top mount is as follows :
    1. Nut
    2. Curved washer
    3. Bushing
    4. Frame mount
    5. Bushing
    6. Curved washer
    The curvature of the bushings match curvature of the washers and the flat portion of both bushing rest on the frame mount.

    The bottom portion of the the shock installs with a 17mm wrench and 17mm socket and torque to 74ft lb.

    Extended Rear Brake Lines +4" for Toyota Tacoma 2005+ (Black)
    • 10mm Flare Wrench
    These lines are made to be driver/passenger side specific. If you look closely at the housing you will notice the housing on one line is different than the other. The housings have particular shapes which align to the matching shape within the bracket. It's like fitting a square block in a square hole. (except they're not square). I of course put the wrong line on the wrong side and discovered this the hard way.

    Bleeding the brakes was VERY easy and straight forward with the driver side shock and leaf off. I also had the e-brake disengaged to prevent pressure in the line.

    1. Pull the retaining clips with needle nose pliers (with curved or straight).
    2. Remove all 4 clips to free the lines from the mounting brackets.
    3. Disconnect the lines on the axle side with a 10mm flare wrench.
    4. Note the shape of the housing at the bracket and match the correct NEW brake extension cable to the appropriate side.
    5. Disconnect the brake line up top. I suggest doing one at a time to help facilitate the correct lines.
    6. Connect the new line up top and allow the brake fluid to run, ensuring the line is full before connecting the new brake line on the axle side. If you do not allow the fluid to fill the line before connecting axle side you create a large air pocket within the line.
    7. Connect the new brake line on the axle side ensuring it matches the corresponding side.
    8. Open the flare on the back of the drum with a 10mm flare wrench until you get a continuous stream. NO BUBBLES! This needs to be done on both sides.
    9. Fit the housings within the bracket and re-attach the retaining clips.
     
    Last edited: Jul 18, 2023
    BlueFourMike likes this.

Products Discussed in

To Top