

-
Welcome to Tacoma World!
You are currently viewing as a guest! To get full-access, you need to register for a FREE account.
As a registered member, you’ll be able to:- Participate in all Tacoma discussion topics
- Communicate privately with other Tacoma owners from around the world
- Post your own photos in our Members Gallery
- Access all special features of the site
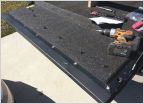 Dynolock Automatic Tailgate Lock - Product Review
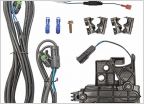 Aftermarket bed light kit and auto locking tailgate
 GearTie (reusable rubber twist tie)
 Touch up Paint?
 Battery Operated Under Hood Animal Repeller
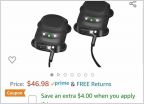 Underhood Ultrasonic rodent repellents
DynoLock Electric Tail Gate Lock Install
Discussion in 'Product Reviews' started by Wrekreation, May 10, 2009.
Page 3 of 5
Page 3 of 5


