

-
Welcome to Tacoma World!
You are currently viewing as a guest! To get full-access, you need to register for a FREE account.
As a registered member, you’ll be able to:- Participate in all Tacoma discussion topics
- Communicate privately with other Tacoma owners from around the world
- Post your own photos in our Members Gallery
- Access all special features of the site
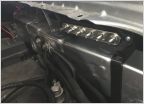 FS: Custom mounts for negative buss bar on frame $22
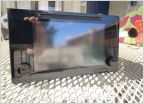 FS: Entune Premium (non-JBL) - SOLD
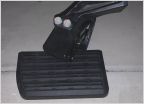 Tacoma BED STEP —SOLLLLDDDD
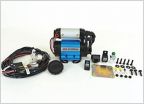 WTB ARB Compressor
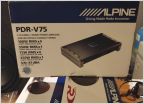 SuperCrewSounds Sub enclosure,Alpine amp, AMP Research Bed Extender, Sun shield
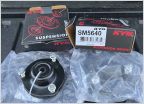 KYB strut top hats SOLD SOLD
ECT Stealth PRO shift knob
Discussion in '3rd Gen Tacoma Parts Marketplace (2016-2023)' started by MESO, Mar 8, 2019.
Page 54 of 135
Page 54 of 135
Products Discussed in


