

-
Welcome to Tacoma World!
You are currently viewing as a guest! To get full-access, you need to register for a FREE account.
As a registered member, you’ll be able to:- Participate in all Tacoma discussion topics
- Communicate privately with other Tacoma owners from around the world
- Post your own photos in our Members Gallery
- Access all special features of the site
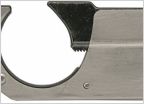 Is there a Tailgate Lock for a 2013 PreRunner that works?!?
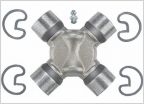 How many u joints when removing propeller shaft to do carrier bearing replacement?
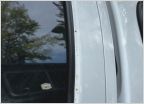 Fixing Rust/Touch up paint around windows?
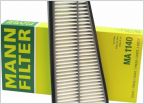 Whats your go to air filter?
 Bed Plug Addition
 Shop vacs & bed outlet
For those with CBI ditch light brackets (project done)
Discussion in '2nd Gen. Tacomas (2005-2015)' started by ChiefManyWrenches, Jan 26, 2015.


