1. Welcome to Tacoma World!

    You are currently viewing as a guest! To get full-access, you need to register for a FREE account.

    As a registered member, you’ll be able to:
    • Participate in all Tacoma discussion topics
    • Communicate privately with other Tacoma owners from around the world
    • Post your own photos in our Members Gallery
    • Access all special features of the site

*Four Wheel Camper Rebuild*

Discussion in 'Other Builds' started by John taco, Aug 22, 2018.

  1. Aug 22, 2018 at 11:16 AM
    #1
    John taco

    John taco [OP] Well-Known Member

    Joined:
    May 16, 2014
    Member:
    #129986
    Messages:
    860
    First Name:
    JT - Johnny
    King of Prussia PA
    I decided I would like to share my 1988 Four Wheel Camper Fleet complete gut job rebuild.

    Back story, we lived in Oahu Hawaii for some years and decided to move back to the mainland to PA. So we decided to ship our 2014 tacoma DCSB to San Diego where be began our cross country road trip! Along the way why not pick up a Four Wheel Camper?! I found a FWC in Colorado on criagslist and that was the end of that story. We traveled just over 5,000 miles with all our stops and visits in between. I apologize for the quality of photos ahead of time. I get tied up with the project and forget to take picture.

    ** I would like to give a big thank you to Tim Morrissey for sharing his FWC build. I thought I was alone on this build until I came upon Tims FCW build on youtube which helped me out a lot especially with the pop up mechanism! Thank you Tim hope to meet you one day when we head out west.**

    Let the build begin!

    Picking up the camper in CO
    IMG_2294.jpg Yes, that is a washer or dryer that the previous owner had the camper sitting on. He was hauling this camper with his 2000 tacoma access cab by the way.IMG_6762.jpg
    Camper is about 95" in length & weighs in about 900lb
    I had my doubts and was worried about the safety of loading this camper on due to the fact that I had a DCSB but I do have plans for that in the future. I had proper tie down points for the turn buckles to D ring hooks attached to the bed frame bolts. The tacoma is supported by Firestone Air Bags and add a leaf which helped a lot. Honestly the truck drove perfectly fine but it did look goofy. I drove across the country with zero issues what so ever. Obviously with the extra weight and length there is a noticeable change in accelerating, turning and defiantly braking.
    IMG_6768.jpg
    We had about 4 check-in bags and 4 carry on bags from our move. We tried to distribute the weight has even as possible within the cab and camper.
    IMG_6767.jpg
    Late night Home Depot DIY fix to properly mount the rear turn buckle.
    IMG_6916.jpg
    Visit to some family and friends
    IMG_6961.jpg
    Florida anyone?
    IMG_6964.jpg
    Finally made it back to PA, unloaded the pig!
    IMG_6975.jpg Need the truck to be a truck for a little, easy transition
    IMG_7146 2.jpg
    Unfortunately our only option of storing the camper at the moment. Built 2x4 saw horses/test fit
    IMG_7149.jpg
    Removed the sagging sleeping platform and gutted the inside... Hit the fast forward button because we did not take any other picture of the progress :(
    IMG_7254.jpg
    IMG_7159.jpg
    Bead board walls
    IMG_7264.jpg
    Relocated to the side of the house. Removal of the top for upholstery
    IMG_7263.jpg
    IMG_7266.jpg
    Removal of the pop up vinyl material
    IMG_7299.jpg
    In with the newIMG_7315.jpg IMG_7348.jpg
    Double stitching with polyester UV thread. There was a lot of measuring, cutting, folding, and taping involved with this project.IMG_7349.jpg IMG_7347.jpg Luckily my mother has 35+ years experience in sewing, she offered to help me sew up the new pop up siding. We added height to the camper so now the inside height measure at 6.5'! plenty of head room, I am only 5'5". Windows are larger as well, polyester mesh screen, velcro clear, and velcro covers. Material used was 22oz polyester vinyl coated. The pop up vinyl was made in one piece with one single seam at the back middle. The measuring, cutting, taping, and sewing was tough but a learning experience well worth it. I am very happy how the pop up came out at the end!
    IMG_7177.jpg Working on the top
    IMG_7305.jpg Marine grade perforated white vinyl
    IMG_7306 2.jpg Electric exhaust and inlet vent fans, LED lighting, trim
    IMG_7308 2.jpg
    Top back installed, getting there!
    IMG_7396.jpg IMG_7397.jpg
    I tried my best to remove the wrinkles but with the material used, sewing the windows, and mounting the flexing of the vinyl was not happening. So nothing I could do other then mount the pop up and let the sun and weather try to work the material. Any other ideas?
    IMG_7407.jpg
    Some paint and install of the pop up. I need some color. Also I am looking for a replacement FWC logo sticker to put on the back of the camper. If anyone knows where to get one or can make one for me I would like to purchase one.
    IMG_7268.jpg
    Storage/ bench/ bed
    IMG_7576.jpg
    Flooring
    IMG_7352.jpg Pop up mechanism credited to Tim M. thank you again. I looked into custom lift gas struts like the new FWC but the price for a 40 some inch strut is unreal plus I would need 4 of them
    IMG_7354.jpg
    What a mess IMG_7581.jpg open slide out sleep plat form
    IMG_7590.jpg closed Slide out sleep plat form - White interior
    IMG_7585.jpg
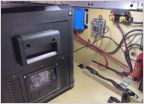
    Queen size memory foam purchased on Amazon, cut in 2 to fit the slide out sleeping plat foam. Custom made removable bed sheetsIMG_7587.jpg Slide out, under head room...IMG_7591.jpg Power supply. Will be running a Isolator from the trucks main battery to charge the battery when driving. May add a small solar panel up top later but for now I'll keep it simple
    IMG_7592.jpg
    Lastly and slowly, working on the "Kitchen" plan to set up from left to right- burner/sink/counter top/ARB 63qt fridge
    IMG_7599.jpg
    Currently being used has a beer/drink/ food fridge in the house. Honestly the best money spent. I have used this fridge/freezer for a few fishing and trips already without the camper.

    Well that is all I have for now. I will update as I get more time to work on the camper.

    Hoping to plan a road trip back west at the end of November sometime with the camper.
    *FYI this is our first camper ever so any suggestions even criticism to my build and travels are greatly appreciated.

    Thanks for viewing my build!
     

    Attached Files:

    Last edited: Aug 22, 2018
    asudevil and frusteri4 like this.
  2. Aug 22, 2018 at 11:32 AM
    #2
    the_white_shadow

    the_white_shadow Well-Known Member

    Joined:
    Jul 30, 2018
    Member:
    #261052
    Messages:
    920
    Gender:
    Male
    Lots of great work. Are the uprights for the roof temporary or permanent? I understand proper gas struts may be expensive, but i dont see that staying upright very long if the weather gets bad at the campsite. Other than that, nice job.
     
  3. Aug 22, 2018 at 11:40 AM
    #3
    John taco

    John taco [OP] Well-Known Member

    Joined:
    May 16, 2014
    Member:
    #129986
    Messages:
    860
    First Name:
    JT - Johnny
    King of Prussia PA
    Great point, the pop up mechanism is actually my permanent lift set up as of now. With the pop-up vinyl installed the lift mechanism is much more sturdy than they look. There is no shifting or flexing of the top or lift support at all. I left the pop-up up for a month to check for water leaks and durability of the camper resulted with no issues. We had multiple rain storms and high winds close to 20mph probably. I did not have any thought of reinforcing the lift but maybe Ill look into it because the last thing I want is being crushed by my camper top while sleeping.
     
    asudevil likes this.
  4. Aug 22, 2018 at 11:42 AM
    #4
    the_white_shadow

    the_white_shadow Well-Known Member

    Joined:
    Jul 30, 2018
    Member:
    #261052
    Messages:
    920
    Gender:
    Male
    Good deal. Maybe i just missed it in the pics, but what keep it supported laterally (long ways)? All i can see are the uprights on the short sides.
     
  5. Aug 22, 2018 at 11:48 AM
    #5
    John taco

    John taco [OP] Well-Known Member

    Joined:
    May 16, 2014
    Member:
    #129986
    Messages:
    860
    First Name:
    JT - Johnny
    King of Prussia PA
    The vinyl pop-up material itself holds the whole top together nice and firm. On the outside there is a metal edge trim frame that runs along the top and along the camper where the pop-up material mounts fastening the pop-up walls down. There is a screw every 10ins. The lifting mechanism is to lift and lock the top up. There is a cotter pin holding the arms up right. Hope that answer your question.
     
    Last edited: Aug 22, 2018
    asudevil likes this.
  6. Mar 9, 2020 at 8:38 PM
    #6
    asudevil

    asudevil Well-Known Member

    Joined:
    Feb 4, 2009
    Member:
    #13278
    Messages:
    333
    Gender:
    Male
    From AZ to Central Texas/Waco
    Vehicle:
    06' TRD Off-Road w/ 15' front clip swap
    Wow! Amazing work! I just found myself a fwc project and would love to share some ideas with you and seek out your advice. Hope you are enjoying it!
     
    Estephe21 likes this.

Products Discussed in

To Top