1. Welcome to Tacoma World!

    You are currently viewing as a guest! To get full-access, you need to register for a FREE account.

    As a registered member, you’ll be able to:
    • Participate in all Tacoma discussion topics
    • Communicate privately with other Tacoma owners from around the world
    • Post your own photos in our Members Gallery
    • Access all special features of the site

From Rags to Riches (2018 Cement TrdOR Build)

Discussion in '3rd Gen. Builds (2016-2023)' started by StuckBuck, Jul 28, 2018.

  1. Aug 1, 2018 at 10:17 PM
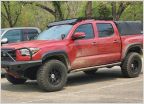
    #41
    StuckBuck

    StuckBuck [OP] Well-Known Member

    Joined:
    Jul 26, 2018
    Member:
    #260661
    Messages:
    56
    Gender:
    Male
    Oregon
    Vehicle:
    2018 Cement TRD OR DCLB
    So right now im scouring the forums trying to find a 3 position switch that will fit in the oem cutouts. I want to wire my rigid reverse lights to be (on/off/on with reverse gear). I found a thread a few months ago talking about it but I cant for the life of me find it again. I know if I could just type in the right key word it would pop up but I'm waving the white flag. If anyone knows what I'm talking about could you please direct me to the link?
     
  2. Aug 1, 2018 at 10:29 PM
    #42
    StuckBuck

    StuckBuck [OP] Well-Known Member

    Joined:
    Jul 26, 2018
    Member:
    #260661
    Messages:
    56
    Gender:
    Male
    Oregon
    Vehicle:
    2018 Cement TRD OR DCLB
    Haha nah that's not me man. I'm one of those guys that will probably die young of a heart attack because I'm constantly doing something. If I run out of projects something's wrong lol
     
    tcjacado and Catfish21[QUOTED] like this.
  3. Aug 2, 2018 at 6:43 PM
    #43
    StuckBuck

    StuckBuck [OP] Well-Known Member

    Joined:
    Jul 26, 2018
    Member:
    #260661
    Messages:
    56
    Gender:
    Male
    Oregon
    Vehicle:
    2018 Cement TRD OR DCLB
    First group of boxes showed up tonight. I guess I'm used to seeing the squadron xls because the squadron pros are way smaller than I thought they were. That little baggie is full of interior bulbs. Really crappy packaging for the interior bulbs in my opinion but whatever as long as they work. Those rigid ignites are awesome they are so tiny! Cant wait for my bracketry and wiring to show up so I can put them on!20180802_183607.jpg
     
    Catfish21 and tcjacado like this.
  4. Aug 5, 2018 at 12:27 AM
    #44
    StuckBuck

    StuckBuck [OP] Well-Known Member

    Joined:
    Jul 26, 2018
    Member:
    #260661
    Messages:
    56
    Gender:
    Male
    Oregon
    Vehicle:
    2018 Cement TRD OR DCLB
    Tonight I finally was able to get some installing done. Special thanks to @CaliRaisedLed for making awesome products and getting them here fast! Started with the relay bracket, then the hidden bumper light bar, and then finally the ditch light brackets and @Baja Designs squadron pros. Everything went pretty smooth but there was a few issues. First off the wiring harness that came with the squadron pros was way to short to reach both sides of the truck and plug into both lights. Maybe I ordered a kit meant for a Rzr/side by side or something but i dont know for sure. Also in cali raised's install video they show the conector in the switch portion of the harness being small enough to fit through the hole in the firewall. Maybe this is new on the 2018s but the only unused hole in the firewall was far to small to fit the connector through. Nothing too difficult to over come though I just ended up doing a little hacking and slashing and was able to combine the baja designs harness with an extra cali raised harness to fix the length problem. On the cali raised conector issue I just cut the harness and spliced it back together under the dash, no big deal.

    20180804_150850.jpg 20180804_151303.jpg
    Cali Raised relay bracket installed!

    20180804_152119.jpg 20180804_154316.jpg 20180804_155526.jpg
    I highly recommend leaving the passenger side light bar bracket off until you get the light bar positioned inside the bumper. I ended up having to take it back off to get the bar in place. Also leave everything loose until the bar is snugged down to the brackets, you will thank yourself dearly.

    20180804_160356.jpg 20180804_162710.jpg
    If I have to adjust the light bar up any higher I am going to have a clearance issue. It's not touching right now but it's really close. From my initial testing I think i have the bar adjusted properly but if i have to move it much at all then I will have to address the hoodlatch/support clearance.

    20180804_163856.jpg
    Finished product! And man that dealer plate is ugly! From this point on I kind of got on a roll and didnt take as many pictures but heres what I got:

    20180804_182614.jpg
    Ditch lights looking good! Had to spin the baja designs brackets around from the way they show in their pictures in order to clear the windshield when the hood was opened much past the propped position.

    20180804_200606.jpg
    Thats the only open hole in the firewall and it was way to small for the cali raised connector.

    20180804_225930.jpg 20180804_231129.jpg 20180804_231950.jpg

    Finished product! Dang they are bright! The cali raised bar in the spot pattern shoots crazy far and the baja designs squad pros in the combo pattern really illuminate everything up close. I cant be more happy with the finished product! I still have some work to do, the way I'm tied in to the battery is temporary as well as my switch situation. I'm still waiting for a few parts. I also still need to install the rigid ignites for the reverse lights. It got dark and I forgot to take pictures of the finished wiring. It turned out pretty clean besides the temp stuff. I'll try to remember to snap a pic of that tomorrow. Thanks for following along with me so far guys I'll try to get another build update soon!
     
    CaliRaisedLed and tcjacado like this.
  5. Aug 5, 2018 at 1:12 PM
    #45
    CaliRaisedLed

    CaliRaisedLed Well-Known Member Vendor

    Joined:
    Apr 23, 2015
    Member:
    #153803
    Messages:
    8,281
    Gender:
    Male
    First Name:
    Jake
    Texas (DFW)
    Thanks for choosing us! It looks great
     
  6. Aug 11, 2018 at 3:33 PM
    #46
    StuckBuck

    StuckBuck [OP] Well-Known Member

    Joined:
    Jul 26, 2018
    Member:
    #260661
    Messages:
    56
    Gender:
    Male
    Oregon
    Vehicle:
    2018 Cement TRD OR DCLB
    Quick little update while I'm stopping for lunch. Been super busy the past couple days so I havent been taking any pics but I got my windows tinted and the other day I received all my suspension components. This afternoon I've been trying to get the rears done. Pretty simple so far. I've got both rear springs out and the driver side back in so far. Havent started in shocks yet but after lunch I'll try to get everything finished up. First impressions of the bp51 kit is awesome. Build qualitys fantastic and everything is very heavy duty. We will see how far I can get today.
    20180811_134733.jpg 20180811_140450.jpg 20180811_140713.jpg 20180811_143838.jpg

    Sorry not very entertaining pictures yet and ps: for the record I'm not the guy that painted the axle green on the jeep in the background lol just had to clear my name of that before I get any hate.
     
    tcjacado likes this.
  7. Aug 11, 2018 at 11:34 PM
    #47
    StuckBuck

    StuckBuck [OP] Well-Known Member

    Joined:
    Jul 26, 2018
    Member:
    #260661
    Messages:
    56
    Gender:
    Male
    Oregon
    Vehicle:
    2018 Cement TRD OR DCLB
    Got the rear finished up. Turned out great. But man the rear shocks were a huge pain to get in and everything to line up it took forever. Decided to call it quits for the night but if I can get myself out of bed tomorrow morning I'll try to get the fronts done.

    I do have a question to anyone running the Dakar packs. Theres a little ebrake cable bracket that bolts on to the side of the spring. Sitting flat it is plenty long but at full droop the ebrake cable is way to short to use that bracket. Not sure what guys usually do but I decided to cut the bracket off cuz I dont wanna rip my cable outa the brake assembly. I'll have to come up with something though since it rubs on the leaf pretty bad. Also I'm definitely gunna need some longer brake lines. As of right now the brake lines are limiting my droop. From my experience brake lines dont make for good limiting straps lol.
    20180811_163625.jpg 20180811_183629.jpg 20180811_190049.jpg 20180811_190948.jpg
     
  8. Aug 20, 2018 at 7:18 PM
    #48
    tcjacado

    tcjacado Well-Known Member

    Joined:
    Aug 29, 2016
    Member:
    #195947
    Messages:
    41,570
    Pics didn't show up.
     
  9. Aug 20, 2018 at 7:20 PM
    #49
    StuckBuck

    StuckBuck [OP] Well-Known Member

    Joined:
    Jul 26, 2018
    Member:
    #260661
    Messages:
    56
    Gender:
    Male
    Oregon
    Vehicle:
    2018 Cement TRD OR DCLB
    I was wondering if that would happen I just cut and paste and didnt attach like normal. Thanks I'll see what i can do.
     
    tcjacado[QUOTED] likes this.
  10. Aug 20, 2018 at 7:43 PM
    #50
    StuckBuck

    StuckBuck [OP] Well-Known Member

    Joined:
    Jul 26, 2018
    Member:
    #260661
    Messages:
    56
    Gender:
    Male
    Oregon
    Vehicle:
    2018 Cement TRD OR DCLB
    Time for a long overdue update. I'm finally done with the bp51 kit. Took me a little longer than expected but nothing was too terribly difficult. I struggled a little more with the uca bolts than I expected and the rear shocks were kind of a bear but other than that everything went well. I left the preload at 20mm due to time constraints and the fact that I dont have a spring compressor so I figured I'd try it like this for now. Seems like a good height everything looks good but i took some decent whoops at around 35 on my test drive and I could feel something topping out. I'm assuming shocks but granted these were really deep whoops any faster and I might of got air lol. Since its 1:30am I didnt take any outside pics but I will tomorrow. I still need brake lines and I would like to come up with a betterway to mount the resis. Ome'sbracket works but I dont really like the look of it and I would like to be able to throw the dust cover back in the fender well without covering the resi. It will work for now.

    Driver side mostly complete:

    20180817_204228.jpg

    Starting on the passenger:

    20180817_204240.jpg

    Passenger finished:
    20180818_000525.jpg

    Driver finished and reservoir mounted:

    20180818_004338.jpg

    After the lift with stock wheels and tires:

    20180818_131000.jpg

    20180818_131013.jpg


    20180818_131043.jpg
    And then...

    20180818_134050.jpg 20180818_134336.jpg 20180818_134539.jpg 20180818_135028.jpg 20180818_135349.jpg 20180818_141050.jpg 20180818_141137.jpg

    Finished product before and after:

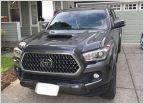
    20180728_155803.jpg 20180728_155730.jpg 20180818_143713.jpg 20180818_143753.jpg

    I couldnt be more happy with the results so far I think it turned out awesome!

    @JaCado let me know if the pics didnt work this time
     
  11. Aug 20, 2018 at 7:52 PM
    #51
    tcjacado

    tcjacado Well-Known Member

    Joined:
    Aug 29, 2016
    Member:
    #195947
    Messages:
    41,570
    They worked fine this time ..... now she looks like a truck:thumbsup:
     
    MattCowsmasher likes this.
  12. Aug 20, 2018 at 7:54 PM
    #52
    StuckBuck

    StuckBuck [OP] Well-Known Member

    Joined:
    Jul 26, 2018
    Member:
    #260661
    Messages:
    56
    Gender:
    Male
    Oregon
    Vehicle:
    2018 Cement TRD OR DCLB
    Previous post was actually a few days ago...

    Tonight I got an alignment. Camber is still 1.2 degrees passenger and 0.7 degrees driver. I feel like the passenger is still a little much but I'm not an alignment guy so I dont know what is acceptable numbers wise.

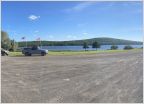
    After the alignment I took it up to the woods and did a little pre season elk scouting so while I was up there I had to snap a few pics:

    LRM_EXPORT_20180820_183902.jpg LRM_EXPORT_20180820_184517.jpg LRM_EXPORT_20180820_185136.jpg LRM_EXPORT_20180820_185428.jpg
     
    Ducman4x4, PappyKat and tcjacado like this.
  13. Aug 20, 2018 at 7:55 PM
    #53
    StuckBuck

    StuckBuck [OP] Well-Known Member

    Joined:
    Jul 26, 2018
    Member:
    #260661
    Messages:
    56
    Gender:
    Male
    Oregon
    Vehicle:
    2018 Cement TRD OR DCLB
    She looks more like a truck in the pics i posted as you commented Haha!
     
    tcjacado[QUOTED] likes this.
  14. Aug 23, 2018 at 11:28 AM
    #54
    jss1975snow

    jss1975snow Well-Known Member

    Joined:
    May 1, 2018
    Member:
    #252202
    Messages:
    48
    Gender:
    Male
    First Name:
    Jamey
    Delaware
    Vehicle:
    2018 Tacoma TRD OFFROAD
    What Size Tires you running? I like the look, thanks.
     
  15. Aug 23, 2018 at 5:45 PM
    #55
    StuckBuck

    StuckBuck [OP] Well-Known Member

    Joined:
    Jul 26, 2018
    Member:
    #260661
    Messages:
    56
    Gender:
    Male
    Oregon
    Vehicle:
    2018 Cement TRD OR DCLB
    285/75/16 bfg km3s on method nv305s with 0 offset
     
    jss1975snow[QUOTED] likes this.
  16. Sep 29, 2018 at 6:46 PM
    #56
    taco_feevuh

    taco_feevuh SUUUUUUUUUUUUP?!

    Joined:
    Sep 29, 2018
    Member:
    #267830
    Messages:
    252
    Gender:
    Male
    Merritt Island, FL
    Vehicle:
    2018 cement Tacoma TRD OR 4x4 DCSB
    Rci sliders, Trd pro grill, Fox 2.5 fronts, Fox 2.0 rears w/resi, SCS Ray 10’s, Cooper stt pros
    Your truck is lookin prime. How much lift you running on the ome? Any rubbing? This is exactly what I’m tryna do with my SB
     
  17. Sep 30, 2018 at 12:37 PM
    #57
    StuckBuck

    StuckBuck [OP] Well-Known Member

    Joined:
    Jul 26, 2018
    Member:
    #260661
    Messages:
    56
    Gender:
    Male
    Oregon
    Vehicle:
    2018 Cement TRD OR DCLB
    I'm not exactly sure how much lift I gained. I'm running the coilovers at 20mm preload. Seems to sit fairly level. I'd say close to 2.5 in the back and maybe a little more in the front. I'll take some measurements and give you a real number.
     
  18. Oct 2, 2018 at 8:04 PM
    #58
    -40

    -40 Well-Known Member

    Joined:
    Jul 26, 2015
    Member:
    #160383
    Messages:
    1,057
    Gender:
    Male
    North Dakota
    Vehicle:
    01 DC Camburg LT & 17 OR OME BP-51
    1 st Gen TRD Supercharger. URD 7th Inj. Camburg 4x4 LT Kit. Tundra Brakes. 3rd Gen just get’n started, OME BP51 Dakar HD, Camburg UCA & various armor.
    First world problems:thumbsup: nice build
     
  19. Nov 12, 2018 at 4:22 PM
    #59
    ffemt2987

    ffemt2987 Shut up Hippie!

    Joined:
    May 22, 2010
    Member:
    #37601
    Messages:
    1,279
    Gender:
    Male
    First Name:
    Austin
    Golden
    Vehicle:
    Cement 3rd gen that was supposed to stay stock
    Rack, sliders, softopper, tjm bumper, eibach temp suspension
    So first impressions of the ride on and off road ? Thanks! Looks sick
     
  20. Apr 21, 2019 at 7:35 PM
    #60
    Gnarman

    Gnarman Well-Known Member

    Joined:
    Jan 24, 2016
    Member:
    #175919
    Messages:
    749
    Gender:
    Male
    Southwest
    Vehicle:
    2016 dbcb trd off road quicksand lb
    ARB Shell, BP51, 255/85/16 ST MAXX, SCS Ray 10 Matte Bronze, Caliraised led 32 inch/side shooter/amber pods, floor mats, start x remote start, auxbeam 8 gang switch panel, diode dynamics hid lows, Australian Shepherd
    How is the setup? I just got the same kit. What's your mileage like?
     

Products Discussed in

To Top