

-
Welcome to Tacoma World!
You are currently viewing as a guest! To get full-access, you need to register for a FREE account.
As a registered member, you’ll be able to:- Participate in all Tacoma discussion topics
- Communicate privately with other Tacoma owners from around the world
- Post your own photos in our Members Gallery
- Access all special features of the site
 One way camper tint
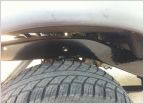 Paint Issues, clear coat failure?
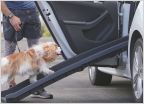 Dog ramp
 Anyone install rear air bags?
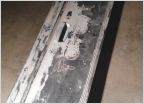 What can I use?
 Outside passenger door handle will not open door
Front Diff Pinion Seal Replacement Tutorial?
Discussion in '1st Gen. Tacomas (1995-2004)' started by bwise, Jan 27, 2025.


