

-
Welcome to Tacoma World!
You are currently viewing as a guest! To get full-access, you need to register for a FREE account.
As a registered member, you’ll be able to:- Participate in all Tacoma discussion topics
- Communicate privately with other Tacoma owners from around the world
- Post your own photos in our Members Gallery
- Access all special features of the site
 Pro Rigid fog lights w/bezels (SOLD) + stock speakers
 FS: Lug nuts, HS spacers, Meso Panel, Compressor mount etc.
 [ SOLD ]
 *Sold* NIB Bilstein 5100s Front and Rear
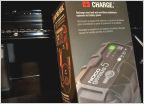 NOCO GENIUS5, 5-Amp Fully-Automatic Smart Charger
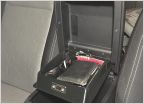 FS: Custom hidden storage tray for center console bin $74
Full "C" tail light conversions
Discussion in '3rd Gen Tacoma Parts Marketplace (2016-2023)' started by Puppypunter, Mar 28, 2024.


