

-
Welcome to Tacoma World!
You are currently viewing as a guest! To get full-access, you need to register for a FREE account.
As a registered member, you’ll be able to:- Participate in all Tacoma discussion topics
- Communicate privately with other Tacoma owners from around the world
- Post your own photos in our Members Gallery
- Access all special features of the site
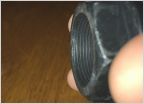 Replacing Bearing/Hub - need a sander for cleaning surfaces?
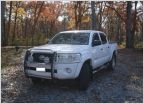 Decisions... Grille Gurad? Bull Bar? Light Bar? Help!
 Brake module for towing
 What scanner do you have?
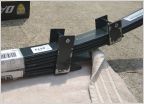 Installed Updated OME Dakars (New Part Number) and Bushings
 Roof rack from stealership $246. GOOD PRICE?
Garsha91's Chevy 63s experimentation
Discussion in '2nd Gen. Tacomas (2005-2015)' started by GARSHA91, Mar 4, 2016.
Page 1 of 2
Page 1 of 2


