1. Welcome to Tacoma World!

    You are currently viewing as a guest! To get full-access, you need to register for a FREE account.

    As a registered member, you’ll be able to:
    • Participate in all Tacoma discussion topics
    • Communicate privately with other Tacoma owners from around the world
    • Post your own photos in our Members Gallery
    • Access all special features of the site

Got a used Leer 180

Discussion in '3rd Gen. Tacomas (2016-2023)' started by Cement Taco 2, Feb 2, 2025.

  1. Feb 3, 2025 at 11:28 AM
    #21
    Veet-88

    Veet-88 Well-Known Member

    Joined:
    May 21, 2015
    Member:
    #155792
    Messages:
    1,676
    Gender:
    Male
    First Name:
    Ryan
    Vehicle:
    18 Tacoma DCLB sport
    I swapped to dobinsons 112's with by present camp set up and they nearly havnt settled at all compared to the ome 111's and I have had some hefty loads on them. It's been nearly a year and I have no real complaints
     
    Cement Taco 2[OP] likes this.
  2. Feb 3, 2025 at 1:16 PM
    #22
    Cement Taco 2

    Cement Taco 2 [OP] Member

    Joined:
    Feb 2, 2025
    Member:
    #465288
    Messages:
    18
    Gender:
    Male
    Vehicle:
    ‘21 DCLB OR
    Leer 180
    Ever action always has a reaction.

    My last shell was on an ‘84 pk up n had full carpet kit too w boxes n all. That truck never sagged and shell never leaked. Damn i punished that truck too!

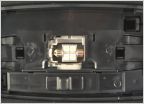
    On current shell, previous owner put clear caulk around windows n 3rd brake light. Probably a sign. It looks meh now so will likely remove and maybe replace. See some mixed reviews, but paint thinner may be best to remove the old hard silicone from painted surfaces on shell? Is there a better caulk besides pure silicone?

    Thx for all the input!
     
  3. Feb 3, 2025 at 3:45 PM
    #23
    Mike Z

    Mike Z Well-Known Member

    Joined:
    Jul 27, 2023
    Member:
    #429942
    Messages:
    111
    Gender:
    Male
    One thing you could try is electric duct seal. It comes in a wrapped block and is putty like. it could be used on the recess where the light goes all the way around. I wouldn't put so much near the edge that it oozes out on a light colored cap. I think it cleans up with mineral spirits if it did get on the paint. Probably would not create a bulge in the middle between the screws like the rope caulk I used did.

    https://www.grainger.com/product/25...VI1xHAR3uqiW-EAQYAyABEgIrhPD_BwE&gclsrc=aw.ds
     
    Cement Taco 2[OP] likes this.
  4. Feb 3, 2025 at 10:56 PM
    #24
    PooTaco

    PooTaco Well-Known Member

    Joined:
    Nov 17, 2023
    Member:
    #437667
    Messages:
    264
    Gender:
    Male
    Utah
    Vehicle:
    2020 Tacoma Access SX 4x4
    Had my shell for a year now and haven't noticed any sag at all.
     
    Cement Taco 2[OP] likes this.
  5. Feb 3, 2025 at 11:54 PM
    #25
    Cement Taco 2

    Cement Taco 2 [OP] Member

    Joined:
    Feb 2, 2025
    Member:
    #465288
    Messages:
    18
    Gender:
    Male
    Vehicle:
    ‘21 DCLB OR
    Leer 180
    Mike Z Yeah i’m curious what kind of seal is behind 3rd BL. Replacement arrival says wed. Nother adventure. Sounds like u ran that caulking rope further inside light housing? Vs. around edge. I got silicone caulk n thin rubber stripping so will consider those first if housing has no gasket.
     
  6. Feb 4, 2025 at 5:06 AM
    #26
    Mike Z

    Mike Z Well-Known Member

    Joined:
    Jul 27, 2023
    Member:
    #429942
    Messages:
    111
    Gender:
    Male
    There was a fairly dense black thin foam gasket. Part of the problem is the center area between the screws does not compress the gasket enough to seal. Some of the shells have a sloppy hole where the wire comes through not giving a good surface for the gasket to seal in that area. If you sealed the light with silicone you would have to destroy it if you ever needed to remove it.
     
    Cement Taco 2[OP] likes this.
  7. Feb 4, 2025 at 3:39 PM
    #27
    Cement Taco 2

    Cement Taco 2 [OP] Member

    Joined:
    Feb 2, 2025
    Member:
    #465288
    Messages:
    18
    Gender:
    Male
    Vehicle:
    ‘21 DCLB OR
    Leer 180
    I found 2 primary leaks today. One is in bottom exact center of DS windoor. Bottom door tray/ledge (where windoor closes and seats on seal) seems to have nowhere to drain other that directly off if filled or inside if seal isnt perfect. More recon needed. Windoor seal seems good and i cleaned edge of windoor where contact is made. PS seems ok so far. There is 1/8 inch gap in windoor seal though about 4 inches from leak location.
    PS has bigger seal gap in similar location. 2 is related to 3rd brake light which I’ll try n fix when i change it out. I ordered some butyl tape to give me another sealing option for here.

    IMG_7841.png
     
  8. Feb 5, 2025 at 10:28 PM
    #28
    Cement Taco 2

    Cement Taco 2 [OP] Member

    Joined:
    Feb 2, 2025
    Member:
    #465288
    Messages:
    18
    Gender:
    Male
    Vehicle:
    ‘21 DCLB OR
    Leer 180
    Still waiting for replacement brake light. I’ll recon little more first, but I’m nearly committed to removing leaking windoor and resealing w butyl tape or rope. Maybe finish outer edge w clear non-silicone rv type sealant/caulk. Confirm thats all good before anything else. Inner rubber seals appear still healthy. Says built in 2020.
     
  9. Feb 13, 2025 at 9:11 PM
    #29
    Cement Taco 2

    Cement Taco 2 [OP] Member

    Joined:
    Feb 2, 2025
    Member:
    #465288
    Messages:
    18
    Gender:
    Male
    Vehicle:
    ‘21 DCLB OR
    Leer 180
    Yesterday finally received third brake light and got done. After old removal used heat gun to soften old silicone a little and most pealed off all intact n quick. Used alcohol first and it did ok on remnants, but then some lacquer thinner and think that did the trick n back to alcohol for final clean. New light had foam gasket, but decided to add bead of sikaflex 221 against gasket n interior of light. Design is kinda poor cuz it only has a screw on far ends, but really needs one in the middle. Went in smooth and finished wiring. Light wire ends come wired w new terminals to push n lock into old plug. Turned out I put one terminal in wrong position n already pushed into plug. Damn! Hard to explain, but after several other trys n fails I ended up using 2x2 inch of AL from diet coke can wound around small screw driver to form perfect size rigid tube to push into plug around barbs, n terminal slid right back out. Sorry if thats hard to understand but a small but important victory.

    To test theory on source of windoor leak i blue taped top side of entire windoor.

    Tested today in heavy rain on freeway.

    Brake light and front bed gaps no leaks!
    Tailgate corners leaked a lot n need work.
    Still see daylight. Inside windoor was dry except two tiny leaks on both bottom ends, but not in middle like before so its not the door seal, but the outer frame seal coming in from top. I gotta either remove, reseal n replace windoor or clean n recaulk for now n maybe do full reseal in summer.

    Slowly checking boxes off.
     
    Steves104x4 likes this.
  10. Mar 11, 2025 at 9:23 PM
    #30
    Cement Taco 2

    Cement Taco 2 [OP] Member

    Joined:
    Feb 2, 2025
    Member:
    #465288
    Messages:
    18
    Gender:
    Male
    Vehicle:
    ‘21 DCLB OR
    Leer 180
    Yesterday decided WTH and remove and replace DS windoor seal. Blue tape marked windoor location to help alignment when putting back. Removal was easy. Prep took the most time because of all the silicone on shell, some of which was very dry and hard. Plastic pry tool and paint thinner did most of the work, but didnt get it perfect. Finished w alcohol. Existing seal was surprising. See pic below. I anticipated a seal that didnt feed into a channel n opted to try the one I preplanned for. I removed old seal and cleaned lip. New seal I nearly centered it on windoor lip and over channel where oem seal feeds in. When I put it back I ended up installing a little higher because when aligned to original location, I peeked around, and spot on top seemed too close to opening (or slight issue with cut hole) so shifted up so more seal looked in contact with shell. Had help pushing from outside where I was replacing screws. Weirdly one small section of inner frame didn’t want to perfectly align back up, but got it all in and all screws went in original holes and snugged up good. Finished screws with ratchet cuz I wanted to make sure I compressed new outer seal.
    New outer seal is rubber and 3/8 x 1/8.
    I estimate oem seal was 3/8 x 1/16 max + tee for track.
    Still need rain to test, but I washed it and no windoor leaks! Pretty happy its done.

    I estimate leaks were primarily due to (1) thickness of seal/failure (2) possible misalignment of windoor or slight issue when factory cut windoor hole in shell.

    Slight leaks remain in upper front bed corners n tailgate. I added some more stripping to tailgate, but need more in those upper corners. Shit pisses me off those holes r so big.

    IMG_8052.png
    IMG_8053.png
    IMG_8054.png
     

Products Discussed in

To Top