

-
Welcome to Tacoma World!
You are currently viewing as a guest! To get full-access, you need to register for a FREE account.
As a registered member, you’ll be able to:- Participate in all Tacoma discussion topics
- Communicate privately with other Tacoma owners from around the world
- Post your own photos in our Members Gallery
- Access all special features of the site
 SWIPED CAT CONVERTERS
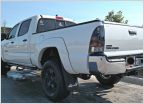 Older style tail lights to replace 2015s
 Need an ABS bleeder
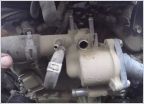 Best Water Pump To Use? Replacement Time
 Bilstein 5100 and Tires question
 Most essential interior Mod?
Help with Cross Threaded Seatbelt Bolts
Discussion in '2nd Gen. Tacomas (2005-2015)' started by hamtaco4x4, Aug 22, 2020.
Page 1 of 2
Page 1 of 2
Products Discussed in


