1. Welcome to Tacoma World!

    You are currently viewing as a guest! To get full-access, you need to register for a FREE account.

    As a registered member, you’ll be able to:
    • Participate in all Tacoma discussion topics
    • Communicate privately with other Tacoma owners from around the world
    • Post your own photos in our Members Gallery
    • Access all special features of the site

Home Improvement Today?

Discussion in 'Garage / Workshop' started by Hotdog, Jul 28, 2008.

  1. Jan 9, 2012 at 9:36 AM
    #281
    OZ-T

    OZ-T I hate my neighbour

    Joined:
    Dec 15, 2009
    Member:
    #27584
    Messages:
    50,587
    Gender:
    Male
    First Name:
    Peter North
    British Columbia
    Vehicle:
    Mag Grey 09 Trd Sport DCLB 4x4
    OME 885x , OME shocks and Dakars , Wheelers SuperBumps front and rear , 275/70/17 Hankook ATm , OEM bed mat , Weathertech digifit floor liners , Weathertech in-channel vents , headache rack , Leer 100RCC commercial canopy , TRD bedside decals removed , Devil Horns by Andres , HomerTaco Satoshi
    Lol , I think everybody learns that one at some point , but you never make that mistake again .
     
  2. Jan 10, 2012 at 9:32 AM
    #282
    kris77

    kris77 Born in the Backwoods

    Joined:
    May 8, 2008
    Member:
    #6480
    Messages:
    1,192
    Gender:
    Male
    West Virginia
    Vehicle:
    08 DC TRD Sport Speedway Blue
    In channel Vent Visors, AVS Bug Shield, Hankook Dynapro RF10 265/70/17
    Here are some pics of what i was talking about in the previous post.

    I had to move the outlet up about 5 inches. notch out the drywall as you can see in the next 2 pics. Then are 2 pics of the finished product.

    Gotta find some way to make that drywall notch look good. I'm thinking caulk, but the wife says white wouldn't look good. Ideas?

    IMG00562-20120110-0629.jpg
    IMG00558-20120110-0626.jpg
    IMG00559-20120110-0627.jpg
    IMG00556-20120110-0626.jpg
    IMG00561-20120110-0627.jpg
     
  3. Jan 11, 2012 at 12:29 PM
    #283
    JaSkynyrd

    JaSkynyrd Ron F. Swanson

    Joined:
    May 26, 2011
    Member:
    #57269
    Messages:
    488
    Gender:
    Male
    Chattanooga, TN
    Vehicle:
    2001 XtraCab 4x4 V6 SR5
    I would tape off the granite and caulk it white and then paint it, you could do it clear and no paint but I don't think that would look very good. Heck you could even mud it and paint that.
     
  4. Jan 11, 2012 at 10:18 PM
    #284
    wileyC

    wileyC Well-Known Member

    Joined:
    Oct 22, 2011
    Member:
    #65685
    Messages:
    3,198
    Gender:
    Male
    Centerville, OH
    Vehicle:
    2012 PreRunner Double Cab TRD Sport
    i had to relocate a duplex outlet on my bathroom remodel too.. luckily i had enough slack from where the NM cable was stapled to the stud to get everything connected in the new location :D

    looks good - good choice of granite and cabinet! i'd just caulk all the way around where the backsplash meets the wall - i'd use white caulk, ..probably wouldn't worry about trying to match the wall color, should look fine if you tool the bead nicely ;)
     
  5. Jan 11, 2012 at 10:27 PM
    #285
    Hoyal

    Hoyal Whiskey bent and hell bound.

    Joined:
    May 14, 2009
    Member:
    #17221
    Messages:
    18,112
    Gender:
    Male
    First Name:
    Devin
    N 39.2249 W -106.16974
    Vehicle:
    2013 Tundra
    Big tires, big lift, Lots of stuff's.
    Just bought a remodeled house can't wait for summer to put on a roof top patio.
     
  6. Jan 15, 2012 at 6:29 AM
    #286
    macgyver

    macgyver Well-Known Member

    Joined:
    Aug 14, 2009
    Member:
    #21173
    Messages:
    3,577
    Gender:
    Male
    First Name:
    Brad
    Canton, GA
    Vehicle:
    '13 Tundra double cab SR5 4x4
    Worked on the bathroom yesterday some more. I also worked on it last weekend.

    Last weekend, I got all the CBU in the tub surround mudded and taped and the CBU down on the floor. I also got all of the electrical wired up (can lights in, switches & receptacles wired)

    Yesterday I got 2 coats of redgard up. I think I need to add more because I only used 1 gallon and the recommended coverage stated for a waterproofing membrane of 1 gallon is less than the square footage I covered.

    I also got two coats of drywall mud up. I used 45 min set mud so I could get two coats done. Tomorrow I'm gonna sand and put the finish coat of mud up on the drywall.

    2012-01-07112634_2fae3ad4636558c7d9de2c732beaa762a9a9392c.jpg
    2012-01-07114026_edbcdf8360cb35d74c04f98eab747bd2ee79f72d.jpg
    2012-01-07114037_a1e8743678fa5bee7a68fa34296dcf837e60814d.jpg
    2012-01-14130230_8379fd25bdcdd35fff00cda201fdf40568338016.jpg
    2012-01-14130240_6b33fc82f9c4acc27abd2bfebe32e74c02eef220.jpg
    2012-01-14130246_2fccdde4156e2ad622e64cb98bd7720df4825d5b.jpg
    2012-01-14130256_df06f68a618b13f02285b8111ee60c239168f9fb.jpg
    2012-01-14130327_020396dfac7f294e7b2f3fc8f333172c66551546.jpg
    2012-01-14130337_7d94895cea7bf429e9b2189d56da30ff478252b7.jpg
     
  7. Jan 15, 2012 at 7:38 AM
    #287
    MattN03

    MattN03 Well-Known Member

    Joined:
    Jan 14, 2009
    Member:
    #12571
    Messages:
    736
    Gender:
    Male
    First Name:
    Matt
    Bluegrass State
    Vehicle:
    SOLD: 07 DC 4x4 TRD Off-Road
    20% window tint, beep mod, hardwired V1, TSB springs, AVS Bugshield-21803, USA Spec PA15, OEM Tacoma scuff plates, Weathertech mats, Truxedo LoPro, TRD skid, GY Duratrac's 265/75/16 C Range, locker mod (switch method)
    Looks like you're making great progress!
     
  8. Jan 16, 2012 at 4:47 PM
    #288
    Evil Monkey

    Evil Monkey There's an evil monkey in my truck

    Joined:
    Aug 8, 2007
    Member:
    #2352
    Messages:
    8,262
    Gender:
    Male
    First Name:
    Robert
    Escondido, CA
    Vehicle:
    07 4x4 DC SR5 TRD Off-road
    Weathertech front & rear mats, rear suspension TSB, Toytec AAL for TSB, Hi-Lift Jack, Bilstein 5100 & Toytec Adjustable coilovers, Built Right UCAs, KMC XD 795 Hoss Wheels, Definity Dakota MTs 285/75R16, Leer XR, Thule Tracker II & Thule MOAB basket
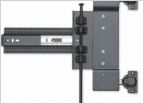
    Finished up a spice cabinet. My wife has a lot of spices and some of the bottles are quite large (Costco). The cabinet was pretty full and it made it difficult to find the smaller stuff. Plus, some of the smaller bottles were stored in a separate cabinet since there was no room. So I cut out the shelf and added some pull-out shelves. I have 4 4" pullouts on the outsides for the larger stuff and 2 2-1/2" pullouts on the inside for the smaller stuff. Now she can fit everything in the one cabinet. I cut out the middle pillar that separated the two doors and attached it to one cabinet door so she has full access to the cabinet.

    When I first did it, I made them with the thought of using one undermount slide. Unfortunately it was a bit wobbly and the drawers tended to tilt forward at the top and sway back and forth when they were pulled out, making them clunky to put back in. So I took them out and shaved 1/4" from the top and bottom with a power hand planer that I purchased from Sears Then, I added another slide to the top of the spice rack.

    The drawer to the left has wood putty where I blew it out using the planer (lesson learned):). When it's fully dry, I'll sand it flat and repaint it.

    spicecab-4.jpg

    spicecab-3.jpg

    spicecab-1.jpg

    spicecab-2.jpg
     
  9. Jan 16, 2012 at 5:54 PM
    #289
    theredofshaw

    theredofshaw Well-Known Member

    Joined:
    Aug 10, 2010
    Member:
    #41484
    Messages:
    7,038
    Gender:
    Male
    First Name:
    John
    Somewhere on the East coast
    Vehicle:
    not a taco (guess that means I can be a MOD now)
    (totaled) 2011 Tacoma DC
    this will definitely be one of the things that I will tackle once we purchase our home...we have one similar to the one in the infomercials right now and its already full lol
     
  10. Jan 17, 2012 at 6:34 AM
    #290
    macgyver

    macgyver Well-Known Member

    Joined:
    Aug 14, 2009
    Member:
    #21173
    Messages:
    3,577
    Gender:
    Male
    First Name:
    Brad
    Canton, GA
    Vehicle:
    '13 Tundra double cab SR5 4x4
    I like those spice racks above! Very nice! I plan on ripping out my pantry soon and building a built-in pantry with similar pullout shelves for everything.

    Update:

    Sanding drywall in a sealed off bathroom sucks... I can sand for about 10 minutes, then take a break and let the dust settle, then come back and sand for 10 minutes...then repeat. I have tears of gypsum haha. I also have to clean the pre-filter on my respirator periodically.

    I'm thinking of making some sort of dust ducting system to duct the dust out the window nearby bedroom window so I can sand longer than 10 minutes at a time.

    Also, I had some tape bubble in a few spots. DAMNIT! so yesterday I had to cut out those sections so I can re-tape and re-mud them...GRRR.
     
  11. Jan 17, 2012 at 9:27 AM
    #291
    JaSkynyrd

    JaSkynyrd Ron F. Swanson

    Joined:
    May 26, 2011
    Member:
    #57269
    Messages:
    488
    Gender:
    Male
    Chattanooga, TN
    Vehicle:
    2001 XtraCab 4x4 V6 SR5
    I hate the bubbling for you, I had the same problem and it was hard to get them to look right after retaping and mudding. In fact, I couldn't! On one joint I knew it was going to bubble so I just pulled the whole thing off and redid it.

    I don't know if you have any more drywalling to do but I found watering down the mud to a consistency of room temperature sour cream and applying twice as much mud as you need and then squeezing out the excess over 3 or 4 runs of your trowel made for perfect corners with no bubbling.

    I am looking forward to seeing your finished bathroom, I bet you'll finish yours before I finish mine.
     
  12. Jan 17, 2012 at 10:17 AM
    #292
    kris77

    kris77 Born in the Backwoods

    Joined:
    May 8, 2008
    Member:
    #6480
    Messages:
    1,192
    Gender:
    Male
    West Virginia
    Vehicle:
    08 DC TRD Sport Speedway Blue
    In channel Vent Visors, AVS Bug Shield, Hankook Dynapro RF10 265/70/17
    Got a shop vac? I have the wife hold the vac under the spot i'm sanding. Catches about 90% of the dust.
     
  13. Jan 30, 2012 at 11:28 PM
    #293
    .28

    .28 TacoRunnerCamry

    Joined:
    Nov 19, 2011
    Member:
    #67305
    Messages:
    452
    Gender:
    Male
    First Name:
    miguel
    Texas
    Vehicle:
    2016 TRD Offroad DC 4x4
    Last little project I did...

    Before..
    [​IMG]
    [​IMG]

    [​IMG]

    [​IMG]

    [​IMG]

    [​IMG]

    Rest of bush coming down this week...

    What it looked like last summer..
    2011-06-10_16-33-46_831-1_3014e59694cfb7b333993ac2070187be6811cd75.jpg
    Have fence on both sides of house now.. Will post pics later...
     
  14. Feb 13, 2012 at 4:48 PM
    #294
    macgyver

    macgyver Well-Known Member

    Joined:
    Aug 14, 2009
    Member:
    #21173
    Messages:
    3,577
    Gender:
    Male
    First Name:
    Brad
    Canton, GA
    Vehicle:
    '13 Tundra double cab SR5 4x4
    I got the tile laid this weekend finally and my girlfriend primed and painted the walls and ceiling.

    We're finally in the home stretch haha, I can see the light at the end of the tunnel.

    All we have left is:
    Grout, install trim & paint the trim, caulk, touch up painting, install toilet and other finish plumbing, install the vanities, lights, and mirrors, transition threshold, install receptacle plates and switch covers, and put the accessories back up (shower curtain, towel bars, etc).

    Back wall tile is up
    2012-02-11160934_7fc2d11e9122daafb4c83b1586f1ecb3343ed16e.jpg
    Wall color is a grey color
    2012-02-11160946_a34ac0a5fa627fc9588b6f07706aa60ef77ee387.jpg
    2012-02-11160952_b5b61b18a3935848b6415d09f4881cb45cf210a0.jpg
    Bullnose tile to edge it
    2012-02-11165137-1_f5ae616144696eb8c630d6db0de8a03cebe3ab6e.jpg
    Shower tile is up
    2012-02-12143838_03d2bc13edba4f7b1e1a975d5e49b7ac04352d28.jpg
    Floor tile
    2012-02-12143843_afbcfc9e1da6f44e3f450164145459697a95a7b6.jpg
    A shot of both the wall and floor tile
    2012-02-12143849_22eaa757212352a087d3180a9c241567761a48c2.jpg
    Tiling the shampoo niche. Unfortunately my measurements were slightly off and the niche didn't fall exactly in the field tile like I wanted. Oh well, such is life.
    2012-02-12161755_baca8e43176b20025ba59d0a18e4f2580aff4da4.jpg
    Another floor tile shot
    2012-02-12161805_07e39816454cbe6a56704abc17c4eeb116b61e17.jpg
    Yep I know one is crooked, I fixed it after the pic
    2012-02-12171134_1825b2c69eefc50594193884657b0720cb66a2f0.jpg
     
  15. Feb 13, 2012 at 4:53 PM
    #295
    OZ-T

    OZ-T I hate my neighbour

    Joined:
    Dec 15, 2009
    Member:
    #27584
    Messages:
    50,587
    Gender:
    Male
    First Name:
    Peter North
    British Columbia
    Vehicle:
    Mag Grey 09 Trd Sport DCLB 4x4
    OME 885x , OME shocks and Dakars , Wheelers SuperBumps front and rear , 275/70/17 Hankook ATm , OEM bed mat , Weathertech digifit floor liners , Weathertech in-channel vents , headache rack , Leer 100RCC commercial canopy , TRD bedside decals removed , Devil Horns by Andres , HomerTaco Satoshi
    Getting close Brad

    :thumbsup:
     
  16. Feb 13, 2012 at 5:04 PM
    #296
    macgyver

    macgyver Well-Known Member

    Joined:
    Aug 14, 2009
    Member:
    #21173
    Messages:
    3,577
    Gender:
    Male
    First Name:
    Brad
    Canton, GA
    Vehicle:
    '13 Tundra double cab SR5 4x4

    Almost there for sure! As soon as I'm done with this though, I'm ripping up 80% of the carpet in my house and putting down new floors.
     
  17. Feb 13, 2012 at 5:45 PM
    #297
    genxer36

    genxer36 Lord of Tomfoolery

    Joined:
    Nov 13, 2007
    Member:
    #3442
    Messages:
    10,535
    Gender:
    Male
    First Name:
    Sean
    Bethlehem,GA
    Tow package, XM Satellite radio, K & N Air filter, & Channel Vent Visors
    Moved the wife's shit out! (Soon to be EX) Big improvemnt not having all her clutter.
     
  18. Feb 13, 2012 at 11:11 PM
    #298
    wileyC

    wileyC Well-Known Member

    Joined:
    Oct 22, 2011
    Member:
    #65685
    Messages:
    3,198
    Gender:
    Male
    Centerville, OH
    Vehicle:
    2012 PreRunner Double Cab TRD Sport
    shower tile looks good! what kind of caulk are you going to use in the corners?
     
  19. Feb 14, 2012 at 5:44 AM
    #299
    JaSkynyrd

    JaSkynyrd Ron F. Swanson

    Joined:
    May 26, 2011
    Member:
    #57269
    Messages:
    488
    Gender:
    Male
    Chattanooga, TN
    Vehicle:
    2001 XtraCab 4x4 V6 SR5
    Looking good, I am very interested to see what the shower tile looks like grouted. Is it going to be light or dark colored grout?
     
  20. Feb 14, 2012 at 6:36 AM
    #300
    macgyver

    macgyver Well-Known Member

    Joined:
    Aug 14, 2009
    Member:
    #21173
    Messages:
    3,577
    Gender:
    Male
    First Name:
    Brad
    Canton, GA
    Vehicle:
    '13 Tundra double cab SR5 4x4
    100% silicone color matched. I have to go pick some up from a tile store though. HD and Lowe's only carry color matched in siliconized acrylic which doesn't hold up as well in a shower.

    The grout is an offwhite color about 2 shades from white. Similar to the tile color. I'm using the same color for the walls and floor. I'm grouting it on Saturday.
     

Products Discussed in

To Top