1. Welcome to Tacoma World!

    You are currently viewing as a guest! To get full-access, you need to register for a FREE account.

    As a registered member, you’ll be able to:
    • Participate in all Tacoma discussion topics
    • Communicate privately with other Tacoma owners from around the world
    • Post your own photos in our Members Gallery
    • Access all special features of the site

hoverlover’s “there are many like it, but this one is mine” extra long title bs thread and build too

Discussion in '2nd Gen. Builds (2005-2015)' started by hoverlover, Apr 22, 2018.

  1. Apr 22, 2018 at 9:22 PM
    #1
    hoverlover

    hoverlover [OP] Never pet a burning dog.

    Joined:
    Apr 4, 2016
    Member:
    #183342
    Messages:
    10,844
    Gender:
    Male
    C-137, Laniakea, Virgo, Milky Way, Earth, USA, TX
    Vehicle:
    Things. Stuff. Lots of bad decisions.
    Mostly Zip-Ties
    Sold as of 12/4/2020
    Happy trails...

    Hey and welcome to my little corner of TW. I originally started this thread to share all of the work I've been putting into my taco and keep track of useful information but it's mostly bs.

    Most of the stuff on my truck has been done a hundred times before a hundred different ways and 99 of the 100 people out there are doing it better than me. But, like the title says, this one is mine.

    If you’ve got questions or comments just throw them out there, I’m happy to chat.

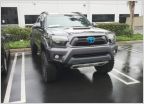
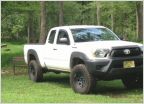
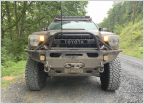
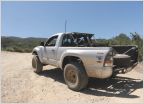
    So, here she is, my '13 Taco

    D98243EE-8800-466B-B0E9-45B5A7427DA9.jpg

    The day I brought her home (3/26/2016)

    IMG_20160323_173053356_HDR.jpg
    (The dealer put it in that spot.)

    My goal is was to keep it simple. I ended up spending way too much time on this website and because I love turning wrenches, one thing just kept leading to another... and another... and another lol.

    Anyway, my current goal is to keep it as simple as possible, keep it comfortable and reliable for long haul road trips, and build it into a capable rig that will go farther and harder than I am willing to push it. So far so good, the limiting factor should always be me.

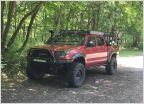
    More pics! Everybody loves pictures right?

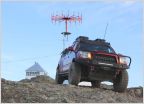
    Moab 2019

    6DA713F7-6088-4D51-8BC2-606152B3D69C.jpg

    Winter 2019
    [​IMG]

    All Cleaned up

    97133E8A-54BF-43F0-BC17-8E9AF04656E1.jpg

    Hidden Falls 2019

    2859C0C5-B1A6-4C05-AB79-88144A671AA0.jpg

    Jambo 2019

    E8B9132B-C818-4CDA-B107-CBFBE1AAA816.jpg

    3DDA6BD6-6123-4FC5-BD4E-AC24CCCDC370.jpg

    4862090B-C2BC-4F41-ACE2-E0FB49C355F8.jpg

    9DE269C3-086A-4EA7-BE56-0FF02793B9FB.jpg

    70054A8F-D090-4321-BB33-7F706825F977.jpg

    A92D6069-0D69-4B27-9DAA-CF0DB2C56F5D.jpg

    IMG-3807.jpg

    IMG-3690.jpg

    IMG-2800.jpg

    IMG-3647.jpg

    IMG-3649.jpg

    IMG-3663.jpg

    608A28EF-15D7-4DED-B253-D68D1BACA580.jpg

    A5E63E4E-4334-473F-BA3E-DF0796B9D460.jpg

    Beware the mod bug if you're here looking for ideas! The following (and incomplete) list of modifications all started when I told my wife "I just want to lift it a little bit. It's a 4 wheel drive truck, it should sit higher than a minivan."

    You've been warned!

    --------------

    This section is new and is currently under construction:
    Trip pics -
    Truck Related Video -
    Helicopter Related
    ------------

    Current/Completed mods -

    Suspension -
    Armor -
    Lighting -
    Exterior -
    Interior/Electrical -
    Performance -
    Drivetrain -

    Rims and Tires -

    Other -
    Comms -

    To-do list - (Parts currently pending delivery, installation, or fabrication.
    • Install second auxiliary switch panel
    • Mega wiring overhaul v3.5
    • Install equalizer
    • Weld on Cam Gussets
    Upcoming projects -
    • Regear diffs
    • Front Locker
    • TC LCA's
    • Bed lights
    • Dust light(s)
    • Color match the hood
    • Spindle gussets

    Future plans - (in no specific order)
    • Archive Garage Hammer Hangers w/cross tube
    • ProCharger
    Distant plans -
    Looking to buy -

    For sale, pm me for info -

    • OME Transfer Case, 110k miles, functions 100%, used not abused. $200
    • Front ADD tube, comes with actuator, ready to bolt up. $100

    Also for sale, non-Tacoma stuff -
    Check out my cousin's band!
    https://youtu.be/89sS7LJyrBs
     
    Last edited: Feb 5, 2021
  2. Apr 22, 2018 at 9:23 PM
    #2
    hoverlover

    hoverlover [OP] Never pet a burning dog.

    Joined:
    Apr 4, 2016
    Member:
    #183342
    Messages:
    10,844
    Gender:
    Male
    C-137, Laniakea, Virgo, Milky Way, Earth, USA, TX
    Vehicle:
    Things. Stuff. Lots of bad decisions.
    Mostly Zip-Ties
    On March 26, 2015, I traded in my stock 2011 TRD Sport Tacoma for the 2013 TRD Off Road Tacoma because it had a great price, really low miles, and it came with a manual transmission.

    One of the few pictures I have of my 2011

    A2378715-7568-4903-91F5-61FA8A745E37.jpg

    I said I’d never buy another black pickup, but the 2013 had everything I was looking for and it was a 6 speed! I'm still considering wrapping the whole thing Toyota hyper white or satin white or something. Anyway, prices argued, deals made, lines signed, keys swapped, boom, sweet new truck.

    I knew from the beginning I wanted to lift it. So I figured if I'm going to build it, I need to build this truck right. After a lot of google-fu I stumbled on TW and started reading anything and everything about lifting a truck. I decided on an OME lift with OME shocks, 887 coils, Dakars, and Camburg balljoint UCA’s and after getting lost in the 255 thread for a couple weeks, decided to give the pizza cutters a try. Well, the tires came in but the leaf springs were on back order, so I rode around like this for a while

    E78E1A58-7679-4C58-B9D2-1DB1D0842407.jpg

    Surprisingly, the tires only rubbed pretty much all the time. Didn't stop me from taking it to Big Bend and doing a bunch of trails though lol. That was a lot of noise lol

    F6A07B51-12D8-4D58-BA64-FECBD5471094.jpg

    8EAB2993-FCEE-455A-80E9-6F6807C7354C.jpg

    I illegally crossed the Rio Grande into Mexico to skip rocks into the US.

    C40633FB-E06E-40C2-8406-B87E67F48E3D.jpg

    While waiting for parts, I also did the black headlight mod, blacked out the chrome grill, put on a scooped hood, stripped the emblems, did the fogs anytime mod, and the locker anytime mod.

    Interesting packaging job.
    A5B90366-2741-4BA0-9FBE-10932CE560FE.jpg

    But it worked! Hood came in nice and straight without a bend, dent, or scratch. The hood was made in America or of almost 100% recycled material. I thought that was pretty cool.

    57941D24-1F01-4E2B-974A-C883D4EA67E3.jpg

    I somehow "overloaded" a 10-ply dually tire on a half-ton truck without damaging the truck. According to BFG, at least, who vehemently denied that they could produce a faulty tire.

    6ED4F579-94E6-4C61-90BC-CB9FEA56B309.jpg

    Finally, the Dakar leafs came in. Luckily they weren't seized by a porch pirate because UPS just left them on my freaking doorstep! I spent a Saturday adding three or so inches to the truck. In my victory celebration that evening :)drunk:) I went ahead and ordered a pair of Pelfreybilt bumpers, some lights, a fuse block, switches and a few other things.

    E094DD95-B987-443D-B4F7-F48D91905C90.jpg

    7BEB0C99-08EE-4362-A5CE-36734F07CDB0.jpg

    I didn't like the OME lift from the get-go. But it was my own stupid fault. I shouldn't have used the 887 coils. If you're reading this and considering the OME's with 887 coils, just don't do it. I got the super stiff ride and the "over speed bump goes bang" noise and it just sucked all around. My wife hated riding in the truck, and, towards the end, so did I. After more intense reading, I knew I wanted some Kings. Within a few weeks of that decision, I found a set on the Texas Classified Sticky for half the price of new ones! They were used pretty hard, bent shafts, broken eyelets, the works. I sent them over to Downsouth Motorsports to be rebuilt. After about 10 days, the brown truck cometh!

    Pre rebuild.

    IMG_2457.jpg

    I was shopping for a set of King's for the rear and at the time, DSM had their 12" King smooth body shocks on sale for the same price as the 8" direct replacement shocks. So, I did what any rational person would do: said what the hell and ordered them along with some Total Chaos uniball UCA's, BAMF shock towers, an All-Poo U-Bolt flip kit, +4" SS brake lines, and Wheeler's bump stops. I also ordered a Baja Designs S8 light bar, Baja Designs Squadron-R dual beams, Rigid Industries back-up lights, some switches from OTRATTW, a Blue Sea fuse block and circuit breaker for another incoming project or two.

    The fronts were easy. Remove, replace, have beer. Since they came off of another Tacoma, I didn't bother with the adjustment ring and got lucky, truck sits nearly level with just a touch of rake.

    Post rebuild.

    IMG_2561 (2).jpg

    The rears were a bit of an adventure and would have to wait. About a week after I got the coilovers in, a big truck brought me a big pallet with a big box on it!

    82B42139-CD33-46BB-8FA1-8219D11FCCE8.jpg

    9C7426EA-D82C-48CD-B2D9-CDF2AC2B5808.jpg

    I started prepping the bumpers to be rattle canned when I found a local shop near me that said they’d do TWO coats of powder on BOTH bumpers for $200. So I dropped them off at Converse Technical Coatings here in San Antonio. The powder has lasted, what, 5 years? Where does the tie go? I'll end up pulling the bumper in the near future and repainting it with a rattle can. I think I'll only strip the areas where the powder is chipping off.

    The front bumper was easy-peasy. Got it on in about an hour and a half or so by myself. I pre-wired all the lights while the bumpers were getting coated so they were plug and play as soon as the bumpers were bolted up.

    The full hoops made picking it up and mounting it pretty easy to do alone. The rear was impossible to hold, balance, and start bolts at the same time, so I waited for the wif to get home and enlisted her expert services as bolt-starter.

    9046F07C-8793-43EB-88E4-C5EAD63CBCBA.jpg

    I was actually pretty excited to trim the bedsides. A lot of people are nervous or have anxiety about it. If you're one of them, measure like 50 times and use a brand new cutting wheel on a 4" angle grinder and you're golden. I took my time measuring everything out and used a laser to draw a perfectly straight line around the bulge in the fenders. I probably measured it out about 50 times myself, or at least it felt like it, before I put the cutting wheel to it.

    Pretty satisfied with my cuts, they’re about as straight as I could ask for.

    7071347E-2FEA-4533-BFF5-907988EC34D9.jpg

    3F2D5D39-EDBA-4F91-9F4B-199BC497B44E.jpg

    A43CA4D8-008B-4ADE-94E0-36EB69404141.jpg

    Once I got the bumpers installed, I filled up all the empty light holes

    1FD4F096-0633-4E2F-BDBB-017DAF16B988.jpg

    3-Position switches for the light bar and the back up lights.

    85076A7E-6E2F-4366-9C0D-0A6E283EBCA6.jpg

    A09BCA6C-3B0D-41ED-BBE4-64B1079A208B.jpg

    B5A49427-8EFD-4AFE-96D4-4B9E8E6D3755.jpg

    4693D1A6-E727-43CD-8516-04F8011A8C6C.jpg

    If you don't already know about this, there is a nifty hole in the firewall on the drivers side next to the brake fluid reservoir. Just pull out the factory grommet and poke a hole in your carpet and the wires will come in above the brake pedal. I used a soldering iron to make a hole in the carpet added a grommet and some clear silicone sealant around the hole - it has never leaked.

    CB06416D-143E-4ACE-9ECB-82B6C86794A7.jpg

    My next project was going to take some doing, but I was pretty excited to knock it out..

    Toki, my garage foreman, inspecting the welds.

    A197DF75-9B96-4064-B663-CA628072529A.jpg

    I reached out to the TW community for someone who would be able to help me out with welding these shock towers to the frame and was introduced to @Texoma. When we got started on the project, I had already done a lot of reading about how the whole deal was supposed to go down, but there was a lot I had simply never done before. But, Chris was a boss! I can’t speak highly enough of him and his work at the Triple C Chop Shop in Lago Vista. He had obviously done his homework and knew exactly what to do. His confidence gave me confidence.

    We pulled the bed off (which made the truck look like a gecko without a tail)...

    AD2BE73C-5D20-458C-BC86-0CF132265E00.jpg

    ...shaved off the factory mounts on the frame and the axle,

    E221C7D9-F72D-4492-B249-9BA76E6B8A3B.jpg

    figured out the appropriate angle for the shocks, the towers, and the lower mounts for the axle, and Chris burned em in.

    4543E920-5495-449F-8FC5-67519E7A7406.jpg

    4F2ADCEE-E935-406B-91A7-B0EFE72EC51D.jpg
    That might be half of what we ended up cutting and grinding off.

    He offered to let me do some welding, but I chickened out. Looking back, I do wish I had at least put in one stitch, but Chris’s welds are great, good penetration on all of them and much better than mine would have been. If it weren’t on something as critical as a shock mount, I think I’d have been much more willing to accept the offer and get make a mess of things.

    AAD2131C-3F6F-42BA-8B23-203ECDE81D0D.jpg

    I really didn’t want to paint over that beautiful weld but rust is a thing.

    B527A5F7-CD22-41D1-A299-AEF6BD1CA841.jpg

    Out with the old, in with the new

    AA74B9E7-6567-4B3E-84E5-72DF661FC386.jpg

    B02A3B63-E82A-4E58-AF24-62A68EE3BB92.jpg

    We mounted both shocks forward of the axle and at 11*. 10* is considered ideal but 11* worked better for us.

    8E74A0FE-BDB6-482B-ACB0-DBBFB13376D5.jpg

    Here you can see how much higher up the lower shock mount sits on the axle compared to the factory mounts.

    Before (not the best picture, but you get the idea...) -

    31CC0B0D-26EF-4A4C-BBE1-5BE10A531DA0.jpg

    After -

    A28F8FE5-0792-4430-8015-1A813E47450E.jpg
    (I did remember to put that missing bolt back in.)

    I've been really happy with the suspension. I have come to realize that the front shocks might be set a bit high but it hasn't hurt anything and rides well. The King's just soak up whatever you throw at them on and off road. I've done 60 down a rutted (and empty) beach and the truck was stable.

    So I've got the lift on, now I need some armor.

    7D38A1E2-B79A-4852-952E-69B9A0ABBD98.jpg

    Abracabooya!

    352D9B56-FEB2-473F-A3EE-A0E8564B924E.jpg

    7097E716-629A-40C4-9521-7D03ADEB5FFC.jpg

    CCFDDED7-D940-4091-8082-7607F7653278.jpg

    Al-you-mini-um skids from Pelfreybilt! They looked so nice I couldn't put paint on them. Every time I have to remove them or install them, I really appreciate the aluminum. I can hold them in one place with one arm and start bolts with the other pretty easily.

    I also threw on some BAMF LCA skids, these things are BEEF!

    228DD7DB-C682-49A5-B3D2-123F1078C072.jpg

    4E08EE76-E705-4984-89C9-B508120D0A1B.jpg

    I've also ordered some rock sliders from Pelfreybilt and they arrived DAYS before that whole debacle. I was lucky the bank had my back when they went bankrupt and I got the deposit back for their dual swing-out rear.

    I also snagged three blemished SCS SR8's - had to wait a bit for the fourth

    BEC676A4-5641-4102-80C3-8FF194B4F312.jpg

    Now we're all caught up with what work I've already done. Everything after this post will be as it happens.

    Thanks again for checking in, hope you find something useful or at least enjoy anything that follows

    :cheers:
     
    Last edited: Mar 19, 2020
  3. Apr 22, 2018 at 9:23 PM
    #3
    hoverlover

    hoverlover [OP] Never pet a burning dog.

    Joined:
    Apr 4, 2016
    Member:
    #183342
    Messages:
    10,844
    Gender:
    Male
    C-137, Laniakea, Virgo, Milky Way, Earth, USA, TX
    Vehicle:
    Things. Stuff. Lots of bad decisions.
    Mostly Zip-Ties
    A little about me

    I'm a Marine Corps veteran and served as an Aircraft Recovery Specialist (7011). I always did really well on the range so I picked up the B-MOS of Combat Arms Instructor (093X). I got out honorably in 2010 and, after spending so much time in and around helicopters, knew that's what I wanted to do. I started flight school at Embry Riddle in AZ in 2011.

    I am a recovering Jeep enthusiast and still have a full long-travel XJ that I just can't bring myself to sell is officially for sale! My first Jeep I picked up in high school. It was a '79 CJ7 with a 304 V8. Keeping that thing running and working on my dad's hot rods prety much daily is where I learned most of what I know about working on cars. Spending every dollar keeping the CJ7 running was annoying so I sold it. After throwing way too much money at the diesel truck I bought afterwards, I found an '05 Rubicon. It was very capable and I learned a lot about trails and crawling in it.

    My Jeeps
    FECC600C-0026-47C7-AD3D-0F06F84FE240.jpg

    D5746F95-F0E6-476F-BA13-763C4D9BCECB.jpg

    7F2958ED-1A5F-4535-9E8A-5E2E0E60D998.jpg

    Currently I am a commercial helicopter pilot and certified flight instructor in Texas. It's a pretty cool job but it's not for everyone. There's a lot that goes on behind the scenes and it is an immense amount of work. But I get to fly all kinds of jobs and every flight is different.

    My wife and I enjoy all the usual outdoor activities and try to get out and enjoy them as often as we can. In December of 2017, we camped in the high mountains of Colorado. It was a hell of a night with temps around 11*F, blowing snow, and wind gusts between 40-50 mph but we survived!

    B26D40A3-3D95-4C8D-ABE3-DE5AC3352E7C.jpg

    0383E999-6C47-4F65-BD10-E23334C7751A.jpg

    We found this paddle board 30-something miles down the beach. We thought it was pretty crazy that it had floated from Sandals, Jamaica to Texas and had to take a picture with it.

    ACDDEA66-F81D-4462-A995-3B3518A5E9A9.jpg

    You see and do some pretty cool stuff flying helicopters.

    My city
    5EF3EB0A-CCCF-4FB7-AFC4-102FF8D697A9.jpg

    Thought this was interesting.
    F13FE4C6-B591-46C5-B17C-208F86CE7C64.jpg

    A pic I took of two of our R44's from another job
    63A97969-88E5-4062-A876-CF141A3F04C5.jpg

    This is just a really nice machine.
    EA855E76-B4D6-4B2B-A8DB-66E7A7950EE1.jpg

    97F01A63-C2ED-4FF8-B3C9-D052033FBA4A.jpg

    Isolated thunderstorm
    96025DBF-0595-4C44-B527-8F5F433C7086.jpg

    Proof it snowed in south Texas!
    33F7AC0F-A698-42F7-A64D-FD675722E74C.jpg
     
    Last edited: Mar 24, 2020
  4. Apr 23, 2018 at 10:39 PM
    #4
    hoverlover

    hoverlover [OP] Never pet a burning dog.

    Joined:
    Apr 4, 2016
    Member:
    #183342
    Messages:
    10,844
    Gender:
    Male
    C-137, Laniakea, Virgo, Milky Way, Earth, USA, TX
    Vehicle:
    Things. Stuff. Lots of bad decisions.
    Mostly Zip-Ties
    USEFUL LINKS

    Wiring Diagrams - https://www.tacomaworld.com/threads/2013-tacoma-electrical-wire-diagrams.278185/

    Torque Specs and IPB - https://www.tacomaworld.com/threads/the-torque-spec-guide.318116/

    Owners Manuals - https://www.toyota.com/owners/resources/owners-manuals/tacoma/2013

    Maintenance Schedule - https://www.driverside.com/service-schedule/toyota-tacoma-2013-140265-343466-0?style_id=927083

    Performance and Tech info -
    Diesel Notes, Articles, Opinions, and other Ir/Relevant Information -
    Marlin Crawler Useful Links -
    FJ Case Info
    Body clips, replacement parts, etc.

    VF2A Components:

    https://www.purefjcruiser.com/docs/2007 Toyota FJ Cruiser Repair Manual/VF2A Transfer/TransferAssembly/02000510.pdf

    VF2A Removal/disassembly:

    https://www.purefjcruiser.com/docs/2007 Toyota FJ Cruiser Repair Manual/VF2A Transfer/Transfer Assembly/020003.pdf

    VF2A Inspection:

    http://www.purefjcruiser.com/docs/2007 Toyota FJ Cruiser Repair Manual/VF2A Transfer/Transfer Assembly/020004.pdf

    Cheap/Free Taco Mods

    https://www.tacomaworld.com/threads/cheap-free-mods.4838/


    Enjoy!

    https://www.youtube.com/watch?v=sZLnUNwGSM0
     
    Last edited: Feb 4, 2020
  5. Apr 23, 2018 at 10:39 PM
    #5
    hoverlover

    hoverlover [OP] Never pet a burning dog.

    Joined:
    Apr 4, 2016
    Member:
    #183342
    Messages:
    10,844
    Gender:
    Male
    C-137, Laniakea, Virgo, Milky Way, Earth, USA, TX
    Vehicle:
    Things. Stuff. Lots of bad decisions.
    Mostly Zip-Ties
    PROJECT NOTES

    ADD DELETE


    CLUTCH AND FLYWHEEL R/R
    FJ CASE & TACO BOX INSTALL


    FJ CASE SWAP INFO
    Swapping inputs on the FJ Cruiser T case

    By Wyatt @ RST

    [​IMG]
    Many of you Tacoma wheelers out there still want to shift your Tacoma on your own. Cool. But you also want to shift the t case on your own as well. Toyota, in all their infinite wisdom thought hey, why don't we put a manual transmission in this thing and let the folks shift it on their own but give it an electronic transfer case.


    Well, as many of you have found out that six speed transmission is not all it's cracked up to be and the transfer case is even worse. The actuator gets dirty or wet and stops working and then you try to fix it and that just leads to a jammed shift rod inside the case and now your stuck in either 4wd or worse yet, your stuck in 2wd and your in the middle of no where staring at an obstacle that requires 4lo. Thanks Toyota!


    But we do have a solution for you. The FJ Cruiser T case from the automatic transmission FJ. It's a manual shifting transfer case so no electronics to worry about and it's strong as hell. I've never seen one fail.


    For the swap of the FJ Cruiser transfer case into your Tacoma follow this link. FJ Cruiser t case into Tacoma


    In this post we are just showing you what you'll need to do to your new FJ case to put it behind your six speed transmission. If you need to see about the swap itself follow the link above.


    No I know some of you will say, hey, the FJ Cruiser came with a six speed transmission too. I'll just use that one. We'll, it's not that easy. You see, the six speed FJ Cruiser is a full time 4wd system. The T case in that FJ does not have 2wd. Plus it's longer than your T case because it has a locking center differential in it. Not a good choice.


    Your going to want the t case from the auto transmission FJ Cruiser and swap out the planetary gear sets.


    Or like some people doing the 2wd to 4wd conversion, you can get the input shaft from Toyota along with the front cover and seals and just swap those into your FJ Case as well.


    So lets see what you'll need to do.


    [​IMG]
    First lets look at the two inputs because that is where all the work will be done. The one on the left with the larger splines is the input from a six speed Tacoma. Notice how much larger the input is and also the difference in the front covers. The one on the right is from the automatic Tacoma and it has the coupler pulled off of the splines already.


    When you swap these planetary gearsets from one t case to the other you'll need to also swap the covers as well.


    So lets pull this puppy out. First you'll need to open the case.

    One of the most important things to do is make sure your in 2wd in this case. If your in 4wd or 4lo and you pull this case apart there are three little keys that will fall out from the synchro gear and you'll wish you'd never seen them. If you see one or all three of these keys fall out when you pull your case apart you'll need to put them back in. We'll cover that later. Just make sure you have that case in 2wd when you pull it apart.

    [​IMG]
    So first you'll need to pull the front output flange off. It has a 30mm nut that you'll want to use a heavy impact on to get it off. Take it off and you can go to the next step.

    [​IMG]
    After you have the front flange off, spin the case around and take off the twelve 12mm bolts that are holding the two halves of the case together. You'll need something like a scraper to split the case.

    [​IMG]
    Pull it apart and it should look like this. One half has the shift rods, shift forks and chain in it the other side has the oil pick up, (this one has been pulled out already) oil pump and planetary gear set in it.


    [​IMG]
    You'll need a 10mm socket to get the three bolts holding the oil pick up off, then take out the three 10mm bolts holding the oil pump in.


    [​IMG]
    Once the oil pump and pick up are out you can go to the snap ring holding the gear set in. We use two medium screw drivers to pry up one end of the clip and then just work our way around. The planetary gearset wont come out yet though.

    [​IMG]
    At this point you'll need to flip the case half over and take the cover off by removing the five 12mm bolts holding it on. Then just gently pry the cover off exposing the snap ring holding the gearset in. I have a set of snap ring pliers that help to open these snap rings.

    [​IMG]
    [​IMG]
    Once the snap ring is open we use a small screw driver to take it off. Be carefull when doing this. You'll need to hold the gearset as you do this other wise it could just fall out when you pull the snap ring out.

    [​IMG]

    [​IMG]

    Now that the planetary is out you can now do the same thing to the other case so you can swap the gearsets out.

    But there is also one other important step you'll need to take or your new fj case wont shift properly.


    On the back of the gearsets there is a ring that must be swapped out. If you look at the ring on the right of the picture, that is the gearset from the six speed Tacoma. That ring has an indentation before it gets to the inner gear teeth. The ring on the left is the gearset from the automatic trans FJ Cruiser and it's ring if flush with the inner gear teeth. That ring is the ring you'll want to swap. Put the flush ring from the FJ Cruiser t case onto the gearset from the six speed Tacoma gearset. Then you can assemble the case back together again.

    [​IMG]

    [​IMG]
    Once you've put the case all back together again it should look like this. This a an FJ Cruiser t case from an automatic FJ Cruiser with the six speed Tacoma input shaft and cover in it ready to go into a 2008 Tacoma double cab with the six speed transmission.

    [​IMG]
    Video of the completed case below. This was the worlds first true part time 4wd FJ Cruiser t case for the Toyota Tacoma.

    05 + Tacoma IFS T case swap wiring instructions

    August 25, 2017

    |

    Wyatt Scott


    So you have swapped out your electronic T case in your 2005 Tacoma for the FJ Cruiser T case but you need to get your front Differential to work again.


    [​IMG]


    Here are the instructions to get that front ADD to work.


    First we’ll swap some wires around to get your sensor lights to work. There are two variations depending on Model year of your Tacoma. Basically you will need to cut the 4wd indicator light wire, 4lo indicator light wire, 4wd sensor wire and 4lo sensor wire then connect them to the appropriate wires.


    Here are the two plugs at the 4wd computer found behind the glove box you'll need to find the wires you'll need to cut and use.


    [​IMG]


    05-08 Tacoma wiring

    Connect 4wd sensor wire (red w/ blue stripe - B 22) to the 4wd light wire (solid red - A 19)

    Connect 4lo sensor wire (yellow w/ black stripe - B 17) to the 4lo light wire (brown w/ white stripe - A 11)


    08-11 Tacoma wiring

    Connect 4wd sensor wire (red w/ blue stripe - B 22) to the 4wd light wire (grey w/ black stripe - A 19)

    Connect 4lo sensor wire (yellow w/ black stripe - B 17) to the 4lo light wire (brown w/ white stripe - A 11)


    The final step is to confirm that you have the sensors installed and connected properly at the transfer case.

    The 4wd sensor will go into the passenger side of the transfer case and the plug should have two wires (red w/ blue stripe and white w/ black stripe).

    The 4lo sensor will go into the drivers side of the transfer case, be careful though as it will go into the opening closest to the front of the truck, and the plug should have two wires (yellow w/ black stripe and white w/ black stripe).


    Now you can turn on the ignition and test to make sure the dash lights work correctly when you shift the transfer case.

    LEAVE BOTH CONNECTORS UNPLUGGED FROM THE 4WD ECU!


    THIS NEXT SECTION IS FOR ALL OF THOSE THAT HAVE MADE THIS SWAP INTO AN IFS TRUCK.


    Ok so now that you've got your dash lights working properly you need to be able to engage the ADD for the front differential. Here we will outline the simplest way to achieve this however I'm sure there are quite a few different options as far as switches go.


    This write up will describe how to wire it using a Carling DPDT Momentary switch (Double Pole Double Throw Momentary switch).


    RockSolidToys Has the Carling switch you’ll need for this swap. Just email us at wyatt@rocksolidtoys.com or call 714-460-3491 Monday Through Friday 9:00am to 5:pm PST.


    All the wires you will need to tap into are located in the same two plugs you disconnected from the 4wd ECU in the previous post.


    If you purchase the switch from RockSolidToys we will send a diagram that illustrates whats what for the switch connections, and will label each connection with a number. This write up will use those numbers to correspond with each wire it connects to.


    Here is the illustration of the switch.


    [​IMG]
    Diagram of the two plugs removed from the 4wd ECU

    [​IMG]
    You will need to take the solid red wire and the black w/ white stripe wire and branch each of them into a Y, each wire will need to terminate in two separate spots on the switch.


    All Tacomas 05-11

    # on plug diagram - wire color - location in factory plug

    1 -red - B 3
    2 - purple (IGN +) - A 5
    3 - black w/ white stripe - B 4
    4 - black w/ white stripe - B 4
    5 - white w/ black stripe (GRND -) - A 6
    6 - red - B 3


    The next step will be an indicator light to tell you when the ADD is "locked" or "unlocked". You can either use the indicator light that's built into the switch or wire up your own light for this.

    To use the light that is built into the switch these are the terminations you'll need to make.

    7 - light green w/ black - B 26
    8 - purple (IGN +) - A 5

    If you choose to use your own indicator light you will need to power the light with an IGN hot wire, then run the ground wire to the light green w/ black stripe wire.


    Now turn on the ignition and test it out. You should be able to rock the switch one way, hold it for a few seconds until the indicator light comes on then release. The ADD is now "locked" for 4wd. Then rock the switch back the other direction and hold for a few seconds and the indicator light should go off.

    The ADD is now "unlocked" for 2wd.


    LEAVE BOTH CONNECTORS UNPLUGGED FROM THE 4WD ECU!


    So there you go. You are now set to wheel without worry of having your t case stuck in 2wd leaving you stranded in the middle of no where.


    ADD SWITCH MOD
    [​IMG]

    and away we go
     
    Last edited: Feb 3, 2020
  6. Apr 29, 2018 at 6:46 AM
    #6
    DJ KRAZY K

    DJ KRAZY K Well-Known Member

    Joined:
    Apr 12, 2012
    Member:
    #76817
    Messages:
    337
    Gender:
    Male
    NM
    Vehicle:
    '15 TRD OFF ROAD 4X4 V6 Manual
    OME 886+Dakars, ARE Shell, ARB Front Bumper+Winch

    Found it and this is definitely the best part of your build thread... the truck... meh... :notsure: nah the truck is cool too! lol
     
  7. Apr 29, 2018 at 9:14 AM
    #7
    hoverlover

    hoverlover [OP] Never pet a burning dog.

    Joined:
    Apr 4, 2016
    Member:
    #183342
    Messages:
    10,844
    Gender:
    Male
    C-137, Laniakea, Virgo, Milky Way, Earth, USA, TX
    Vehicle:
    Things. Stuff. Lots of bad decisions.
    Mostly Zip-Ties
    Ha!


    ... You're probably right though :anonymous:
     
  8. May 2, 2018 at 3:02 PM
    #8
    pixelsailor

    pixelsailor TTC #33

    Joined:
    Aug 26, 2016
    Member:
    #195614
    Messages:
    2,361
    First Name:
    Ben
    San Antonio
    Vehicle:
    Devourer of wallets
    things
  9. May 2, 2018 at 3:34 PM
    #9
    BassAckwards

    BassAckwards Well-Known Member

    Joined:
    May 3, 2016
    Member:
    #186002
    Messages:
    27,630
    Vehicle:
    AWD Turbo 2TR-FE
  10. May 5, 2018 at 5:01 AM
    #10
    Texoma

    Texoma IG: Triple C Chop Shop

    Joined:
    Feb 1, 2011
    Member:
    #50374
    Messages:
    18,750
    Gender:
    Male
    First Name:
    Chris(Topher)
    Lago Vista, TX
    Vehicle:
    10 Taco 4x4
    A bunch a cool stickers, a bada ass MetalMiller Tx Longhorns grill emblem painted Hemi Orange, JBA long tube headers with o2 sims, Diff breather mod, Red LED interior lights, Fancy head unit that plays ipod n movies, Also DIY install factory stuff like, factory cruise control, factory intermittent wipers, OME nitro struts with 886x springs and toy tec top plate, JBA high caster UCA's for better alignmnet and dey beefier too, Old Man Emu Dakar leaf springs in da rear with the gear, U bolt flipper, Ivan Stewart TRD rims with 33" K Bro 2's, some bad ass weather tech floor liners so I don't muck up my interior, an ATO shackle flipper for mo travel in da rear wit the gear, also super shiny Fox 2.0 shocks back there too, all sorts of steal armor for bouncing off of the rocks like demello sliders, AP front skid, trans skid, n transfer skid, demello gas tank skid, and a tough as nails ARB bumper with warn 8k winch, I'm sure there's more
    He'll yeah Alex, I'm glad I found this thread. Truck is looking good.
     
  11. May 5, 2018 at 9:46 AM
    #11
    hoverlover

    hoverlover [OP] Never pet a burning dog.

    Joined:
    Apr 4, 2016
    Member:
    #183342
    Messages:
    10,844
    Gender:
    Male
    C-137, Laniakea, Virgo, Milky Way, Earth, USA, TX
    Vehicle:
    Things. Stuff. Lots of bad decisions.
    Mostly Zip-Ties
    Thanks, Chris!

    It’s definitely coming along :D
     
    ChadsPride, MattCowsmasher and MarX like this.
  12. May 5, 2018 at 10:23 AM
    #12
    MarX

    MarX Hotdogs, spam and skittles.

    Joined:
    Jun 14, 2013
    Member:
    #106295
    Messages:
    25,395
    Gender:
    Male
    First Name:
    Mark
    NE Kansas
    Vehicle:
    2013 DCLB Tacoma TRD sorta Sport 4X4, 2009 Tundra SR5 workhorse
    RETRAX bed cover, Tailgate lock, TRD exhaust. 887's, LR UCA'S, Bilstein 5100's and Deavers AAL.
    Nice truck, glad to hear someone else who's ride was kinda bumpish and squeaky from their 887's. Mine turned the same way after like 8 months and winter ha ha.
     
  13. May 5, 2018 at 10:53 AM
    #13
    hoverlover

    hoverlover [OP] Never pet a burning dog.

    Joined:
    Apr 4, 2016
    Member:
    #183342
    Messages:
    10,844
    Gender:
    Male
    C-137, Laniakea, Virgo, Milky Way, Earth, USA, TX
    Vehicle:
    Things. Stuff. Lots of bad decisions.
    Mostly Zip-Ties
    Kind of a let down, I had read so much from so many people it seemed to work for. It was just too damn stiff and had no down-travel at all. Even with the bumpers.
     
    Last edited: May 8, 2018
  14. May 5, 2018 at 1:40 PM
    #14
    MarX

    MarX Hotdogs, spam and skittles.

    Joined:
    Jun 14, 2013
    Member:
    #106295
    Messages:
    25,395
    Gender:
    Male
    First Name:
    Mark
    NE Kansas
    Vehicle:
    2013 DCLB Tacoma TRD sorta Sport 4X4, 2009 Tundra SR5 workhorse
    RETRAX bed cover, Tailgate lock, TRD exhaust. 887's, LR UCA'S, Bilstein 5100's and Deavers AAL.
    My ride isn't horrible, not a far cry from stock. Just the squeaks, those are killing me lol.
     
  15. May 5, 2018 at 10:16 PM
    #15
    hoverlover

    hoverlover [OP] Never pet a burning dog.

    Joined:
    Apr 4, 2016
    Member:
    #183342
    Messages:
    10,844
    Gender:
    Male
    C-137, Laniakea, Virgo, Milky Way, Earth, USA, TX
    Vehicle:
    Things. Stuff. Lots of bad decisions.
    Mostly Zip-Ties
    So here's where I am right now.

    66A03F95-5B2B-445A-8190-7AE51BD94D25.jpg

    I've replaced the factory speakers with JL audio speakers and components.

    1B10BD00-282F-4E7D-A317-E0E830CABFB0.jpg

    270A605A-8F7F-4AD7-8269-224E72299CE6.jpg

    Now I'm trying to figure out how to make this subwoofer fit behind my back seats.

    Here's what I'm looking at right now.

    F2464458-C788-46FF-9715-A1D77B8E8EEF.jpg 87E9F89E-E3E4-48DE-8224-3167B13B35F7.jpg 27EB4946-FA8D-4E35-83F9-AA2DC9C7EDB9.jpg D8F7FD96-4B36-4863-8CD6-256877088D1B.jpg

    The distance between my back seat brackets is 19 3/4 and the with of the box is 21 3/8. The brackets have a piece of folded steel I could trim but that would compromise the structural integrity of the seat brackets. In an accident they wouldn't have the same strength.

    I don't think I'm stupid enough to cut my seat brackets.

    I'd love to replicate this setup,

    https://www.tacomaworld.com/threads/loaded-sub-enclosure-question.403363/#post-11249755

    which was done with a sub box slightly larger than mine. But in a slightly older second gen. Not sure if there's a difference in seat brackets or what. Still working that one out...

    Edit: added pics
     
    Last edited: May 8, 2018
  16. May 8, 2018 at 8:38 PM
    #16
    hoverlover

    hoverlover [OP] Never pet a burning dog.

    Joined:
    Apr 4, 2016
    Member:
    #183342
    Messages:
    10,844
    Gender:
    Male
    C-137, Laniakea, Virgo, Milky Way, Earth, USA, TX
    Vehicle:
    Things. Stuff. Lots of bad decisions.
    Mostly Zip-Ties
    Hell yeah!

    I finally got myself a camper!

    Big thanks to @rjbiii for finding the winner and everyone else in the San Antonio thread for keeping their peepers peeled for me! Super happy about this and I cannot wait to expand on this new platform. Helipad on the roof? Why not?

    94E27F6E-6F28-4639-9688-B0D0B4CFAC4D.jpg 1F01EDCD-EF75-4BE7-9788-F6D270AE59E0.jpg
     
    Last edited: Jul 2, 2018
  17. May 9, 2018 at 2:49 AM
    #17
    MattCowsmasher

    MattCowsmasher ( -_・)ᡕᠵ᠊ᡃ່࡚ࠢ࠘⸝່ࠡࠣ᠊߯᠆ࠣ࠘ᡁࠣ࠘᠊᠊ࠢ࠘

    Joined:
    Apr 7, 2017
    Member:
    #215629
    Messages:
    48,680
    Gender:
    Male
    Temple, Tx
    Vehicle:
    2015 sporty dcsb 4wd
    Lifted, armored, lumenz w/ switches, positraked, long legged, big tars, debadged with a hood skewp
    Subbed nice clean truck an build.:proposetoast:
     
    ChadsPride and hoverlover[OP] like this.
  18. May 9, 2018 at 4:28 AM
    #18
    BassAckwards

    BassAckwards Well-Known Member

    Joined:
    May 3, 2016
    Member:
    #186002
    Messages:
    27,630
    Vehicle:
    AWD Turbo 2TR-FE
    Glad i was able to help! It looks great, fit is spot on!:fistbump:
     
  19. May 9, 2018 at 4:44 AM
    #19
    pixelsailor

    pixelsailor TTC #33

    Joined:
    Aug 26, 2016
    Member:
    #195614
    Messages:
    2,361
    First Name:
    Ben
    San Antonio
    Vehicle:
    Devourer of wallets
    things
    Looks great :thumbsup:
     
  20. May 9, 2018 at 5:24 AM
    #20
    hoverlover

    hoverlover [OP] Never pet a burning dog.

    Joined:
    Apr 4, 2016
    Member:
    #183342
    Messages:
    10,844
    Gender:
    Male
    C-137, Laniakea, Virgo, Milky Way, Earth, USA, TX
    Vehicle:
    Things. Stuff. Lots of bad decisions.
    Mostly Zip-Ties
    Thank you, guys

    :hattip:
     

Products Discussed in

To Top