

-
Welcome to Tacoma World!
You are currently viewing as a guest! To get full-access, you need to register for a FREE account.
As a registered member, you’ll be able to:- Participate in all Tacoma discussion topics
- Communicate privately with other Tacoma owners from around the world
- Post your own photos in our Members Gallery
- Access all special features of the site
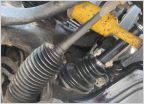 Rubber boot around tie rod leaking grease?
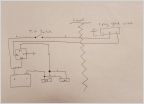 Double switched engine bay lights
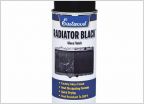 What is the best paint to use on the radiator
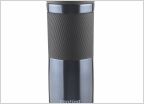 Coffee tumblers that fit?
 Anyone knowledgeable on “balance shafts”?
How do I handle this stripped UCA castle nut?
Discussion in '2nd Gen. Tacomas (2005-2015)' started by Madcat207, May 23, 2025.
Page 1 of 4
Page 1 of 4
Products Discussed in


