

-
Welcome to Tacoma World!
You are currently viewing as a guest! To get full-access, you need to register for a FREE account.
As a registered member, you’ll be able to:- Participate in all Tacoma discussion topics
- Communicate privately with other Tacoma owners from around the world
- Post your own photos in our Members Gallery
- Access all special features of the site
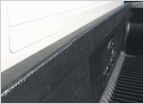 Doublecab with Under Rail Liner and Leer Cap - Front Rail Issue/Need to trim?
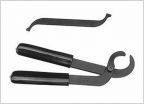 3rz Valve Clearance Tool
 My turn at a new radiator
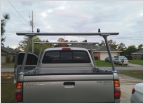 Installed Tracrac TracOne Universal Rack
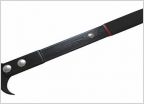 Help with front axle seal
 Need advice on broken door handles
How Many Miles On Brakes?
Discussion in '1st Gen. Tacomas (1995-2004)' started by Ridgerunner, Apr 29, 2012.
Page 2 of 2
Page 2 of 2


