1. Welcome to Tacoma World!

    You are currently viewing as a guest! To get full-access, you need to register for a FREE account.

    As a registered member, you’ll be able to:
    • Participate in all Tacoma discussion topics
    • Communicate privately with other Tacoma owners from around the world
    • Post your own photos in our Members Gallery
    • Access all special features of the site

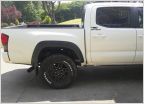
How much sound deadening and proofing material do I need?

Discussion in '3rd Gen. Tacomas (2016-2023)' started by QuicksandYoda, Apr 9, 2020.

  1. May 5, 2020 at 12:12 PM
    #141
    SearArtist

    SearArtist GX poor

    Joined:
    Jan 5, 2016
    Member:
    #174151
    Messages:
    18,968
    Gender:
    Male
    First Name:
    Matt
    NC
    Vehicle:
    GX470 & GX460
    Things
  2. May 5, 2020 at 3:01 PM
    #142
    CAG Gonzo

    CAG Gonzo Ascendant Spaghetti

    Joined:
    Oct 25, 2018
    Member:
    #270558
    Messages:
    1,688
    Gender:
    Male
    Vehicle:
    2018 OR DCLB BarRed
  3. May 10, 2020 at 2:54 AM
    #143
    Rainoffire

    Rainoffire Well-Known Member

    Joined:
    May 31, 2018
    Member:
    #255034
    Messages:
    3,104
    Gender:
    Male
    Vehicle:
    2017 QS DCLB TRD Sport
    You can take out the headliner.
    Everything has to be stripped, the steering wheel in the lowest pushed in setting and removal of the rear view mirror to help with the limited space.
    Angle it where the front is towards the front passenger side, and the rear is to the driver's rear door.
    The hardest part was trying to manuever it over the transmission section.
     
    JKU3000 likes this.
  4. May 13, 2020 at 1:56 PM
    #144
    KVTaco

    KVTaco Well-Known Member

    Joined:
    Oct 24, 2018
    Member:
    #270503
    Messages:
    371
    Two boxes of the 80mil (so 72sq ft) is more than enough if you're going to do everything but the headliner. I was able to do:
    • Entire floor with a double thickness in a few spots
    • Back wall of the cab
    • All 4 doors which includes doing the backsides of the plastic door too and a few double spots
    • The top of the wheel wells in the engine compartment
    • The honeycomb spots on the inner hood
    And I still have some left.

    It does make a difference although I don't have a quantifiable # to give you with regards to decibels.
     
    Rainoffire likes this.
  5. May 13, 2020 at 2:47 PM
    #145
    CAG Gonzo

    CAG Gonzo Ascendant Spaghetti

    Joined:
    Oct 25, 2018
    Member:
    #270558
    Messages:
    1,688
    Gender:
    Male
    Vehicle:
    2018 OR DCLB BarRed
    I could be wrong, but I thought the 80 mil was not rated for placement in the engine bay and could lead to a sticky mess.
     
    Rainoffire and shane100700 like this.
  6. May 13, 2020 at 4:02 PM
    #146
    KVTaco

    KVTaco Well-Known Member

    Joined:
    Oct 24, 2018
    Member:
    #270503
    Messages:
    371
    Ill keep an eye on it.
     
  7. Jun 19, 2020 at 7:16 PM
    #147
    Kyle831

    Kyle831 Well-Known Member

    Joined:
    Dec 12, 2019
    Member:
    #313172
    Messages:
    100
    Gender:
    Male
    First Name:
    Kyle
    Central California
    Vehicle:
    2016 Tacoma TRD Off-road Silver Sky Metallic
    I’m getting ready to tackle this, did anyone break any tabs/clips or anything that I should have on hand before attempting?
     
  8. Jun 19, 2020 at 7:29 PM
    #148
    HeyWannaTaco

    HeyWannaTaco Well-Known Member

    Joined:
    Feb 20, 2020
    Member:
    #319814
    Messages:
    527
    Gender:
    Male
    First Name:
    Dan
    Ontario
    Vehicle:
    2019 Red DCLB SR5
    OVTuned, OKX Skids, AVS In-Channel, N-fab Predators
    If it's headliner, not done yet, but on the list.

    If you're doing doors, There are clips on the doors , small white ones (3x) holding the vertical trim pieces. These little clips stay stuck in the door when you take the trim off, and if you try to re-install the vertical parts they will push the clips through their recess/holes and you will lose them. Pop the clips out after you remove the trim and install them in the door trim piece prior to re-installing.
     
    Kyle831[QUOTED] likes this.
  9. Jun 19, 2020 at 11:41 PM
    #149
    Rainoffire

    Rainoffire Well-Known Member

    Joined:
    May 31, 2018
    Member:
    #255034
    Messages:
    3,104
    Gender:
    Male
    Vehicle:
    2017 QS DCLB TRD Sport
    How far are you planning to sound deaden?

    Remove the negative terminal from the battery.
    If you want to make cutting holes easy, use one of those leather punchout tools. Perfect holes and a professional look.

    Doors: Sail piece has three clips the do not initially come out together with the trim piece. BEFORE reinstalling, be sure to take those 3 white clips and install it on the sail trim itself.

    Careful not to bend the door lock and release wire levers. Just pop them out when you pull out the door card.

    Best to use OEM Audio +'s speaker install video for the doors.


    Rear Wall: Cargo trims just pop off. Some trucks have a hanging jute padding or a MLV hybrid.

    Floor: Got to remove all the seats. Careful with the front seats when removing and reinstalling, the rails can easily damage your paint/car. Two or more people is best. Carpet comes out as one piece, might need to fold in the center to get out of the truck.

    There is a cotton/fabric jute padding that can only be removed by one, cutting it at key areas around the transmission tunnel or hardmode two, removing all the things in top of the transmission tunnel.

    Personally, I just worked around it, much harder though.

    Headliner: Got to remove all the seats. Remove overhead console, and dome lights. Remove rear grabhandles, hangers and front vanity mirrors. Remove A and B pillars. There is a wire taped to the headliner on the driver's side A pillar.

    The headliner should drop a little, it is being held up by LOTS of wires hotglued to the headliner. Slowly release the wires from the glue. Careful the headline can crease and leave a permanent crease line.

    Getting the headliner out is very tricky. Got push in the steering wheel into the lowest setting possible to maximze space. Then angle it on its side, front at passengers door and rear towards the driver's rear door.

    Getting it in and out is a major pain, so I instead worked around it.
     
    Hawapino and Kyle831[QUOTED] like this.
  10. Jun 20, 2020 at 4:14 AM
    #150
    KVTaco

    KVTaco Well-Known Member

    Joined:
    Oct 24, 2018
    Member:
    #270503
    Messages:
    371
    This!
     
    Kyle831 likes this.
  11. Jun 20, 2020 at 6:49 AM
    #151
    Kyle831

    Kyle831 Well-Known Member

    Joined:
    Dec 12, 2019
    Member:
    #313172
    Messages:
    100
    Gender:
    Male
    First Name:
    Kyle
    Central California
    Vehicle:
    2016 Tacoma TRD Off-road Silver Sky Metallic
    Thank you so much for this! I’m going to try and do the whole truck so this helps so much! I wouldn’t even attempt it if it wasn’t for the help from this forum
     
  12. Jun 20, 2020 at 7:28 AM
    #152
    HeyWannaTaco

    HeyWannaTaco Well-Known Member

    Joined:
    Feb 20, 2020
    Member:
    #319814
    Messages:
    527
    Gender:
    Male
    First Name:
    Dan
    Ontario
    Vehicle:
    2019 Red DCLB SR5
    OVTuned, OKX Skids, AVS In-Channel, N-fab Predators
    Check out youtube - Jesse Rizzo does a pretty detailed video (two vids actually) on doing the floors and doors. Very helpful, it brought my confidence level way up before and during my install.
     

Products Discussed in

To Top