1. Welcome to Tacoma World!

    You are currently viewing as a guest! To get full-access, you need to register for a FREE account.

    As a registered member, you’ll be able to:
    • Participate in all Tacoma discussion topics
    • Communicate privately with other Tacoma owners from around the world
    • Post your own photos in our Members Gallery
    • Access all special features of the site

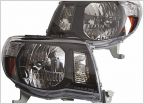
How To: Black Head Light mod

Discussion in 'Lighting' started by Viet2100, Dec 14, 2009.

  1. Jan 12, 2013 at 7:17 PM
    #381
    Rhody76

    Rhody76 Well-Known Member

    Joined:
    Dec 15, 2010
    Member:
    #47755
    Messages:
    133
    Gender:
    Male
    First Name:
    Chris
    Rhode Island
    Vehicle:
    2011 SR5 DCLB 4x4
    Rear leaf TSB, Bilstein 5100s set at 1.75",1" blocks, UWS low profile toolbox in black, husky liners, tint, LED interior and reverse lights, yellow fogs
    I'm getting ready to do this and Ive been reading some other threads on the subject that talk about sanding the chrome off the before painting.

    Is this necessary?
     
  2. Jan 12, 2013 at 7:21 PM
    #382
    ImpulseRed008

    ImpulseRed008 Gone But Not Forgotten

    Joined:
    Sep 9, 2008
    Member:
    #9104
    Messages:
    46,841
    Gender:
    Female
    First Name:
    Susan
    SC
    Vehicle:
    08 PreRunner SR5 V6 w/tow pkg
    OEM SS tube steps, Access LE tonneau cover, pop n'lock, AVS in-channel vent visors, stubby antenna, Wet Okole seat covers, bed mat, rear diff breather mod, 4 extra d rings in bed, K&N air filter.
    Maybe not sand all the chrome off, but most definitely need to scuff it up real well. Otherwise the paint will have nothing to stick to.
     
  3. Jan 12, 2013 at 10:06 PM
    #383
    bjmoose

    bjmoose Bullwinkle J. Moose

    Joined:
    Aug 31, 2010
    Member:
    #42529
    Messages:
    6,009
    Gender:
    Male
    First Name:
    Steve
    San Jose CA
    Vehicle:
    '11 Std Cab 4x4 5sp
    OME suspension, ARB Air Lockers, CBI/Relentless/Pelfrey armor, HAM radio
    I did it. I can't guarantee it's necessary. But I can tell you it's much easier to sand the chrome off the plastic than to sand equivalent chrome off of metal - which is a serious pain in the patootie.
     
  4. Jan 12, 2013 at 11:36 PM
    #384
    Rich91710

    Rich91710 Well-Known Member

    Joined:
    Feb 23, 2012
    Member:
    #73470
    Messages:
    16,331
    Gender:
    Male
    First Name:
    Rich
    Los Angeles
    Vehicle:
    08 Base
    Satoshi with FJ badge, factory cruise, factory intermittent wipers, Redline Tuning hood-lift struts, Hellwig Swaybar, Rosen DVD-Nav
    I didn't bother, but I used RustOleum's version of Krylon Fusion.
     
  5. Jan 13, 2013 at 4:47 AM
    #385
    CookieMonster

    CookieMonster Well-Known Member

    Joined:
    Jan 16, 2012
    Member:
    #70765
    Messages:
    287
    Gender:
    Male
    First Name:
    Wil
    Norfolk, VA
    Vehicle:
    '12 DCSB TRD Sport
    I didn't bother with it, just used the paint designed for plastic and was good to go.
     
  6. Jan 13, 2013 at 9:33 AM
    #386
    87twentytwor

    87twentytwor Well-Known Member

    Joined:
    Nov 19, 2012
    Member:
    #91423
    Messages:
    242
    Gender:
    Male
    First Name:
    Jake
    Hawaii
    Vehicle:
    Sport
    none
    Is it mandatory to stick in oven?
     
  7. Jan 13, 2013 at 11:19 AM
    #387
    bjmoose

    bjmoose Bullwinkle J. Moose

    Joined:
    Aug 31, 2010
    Member:
    #42529
    Messages:
    6,009
    Gender:
    Male
    First Name:
    Steve
    San Jose CA
    Vehicle:
    '11 Std Cab 4x4 5sp
    OME suspension, ARB Air Lockers, CBI/Relentless/Pelfrey armor, HAM radio
    Only if you don't want to break them when you try and separate them :rolleyes:

    Seriously - the'yre glued together and the only way to soften the glue is with the heat of the oven. You wouldn't get good results with a heat gun - you'd get parts too hot and other parts not hot enough.
     
  8. Jan 13, 2013 at 11:23 AM
    #388
    Rich91710

    Rich91710 Well-Known Member

    Joined:
    Feb 23, 2012
    Member:
    #73470
    Messages:
    16,331
    Gender:
    Male
    First Name:
    Rich
    Los Angeles
    Vehicle:
    08 Base
    Satoshi with FJ badge, factory cruise, factory intermittent wipers, Redline Tuning hood-lift struts, Hellwig Swaybar, Rosen DVD-Nav
    Good luck getting it apart without breaking it without heating the glue.

    I didn't use the oven to reassemble or cook the paint, but I literally waited a week before closing them up, and months before installing the lamps and installing, so the paint had plenty of time to off-gas.
    I got creative with clamps and shims and over the course of a week, the lens pulled in flush.
     
  9. Jan 13, 2013 at 1:40 PM
    #389
    YFZ450MOE

    YFZ450MOE When you blow off steam you get an eyepatch

    Joined:
    Feb 16, 2011
    Member:
    #51261
    Messages:
    1,282
    Gender:
    Male
    First Name:
    Moe
    Auburn, WA / Roseburg, OR
    Vehicle:
    09 white DCSB TRD (it's getting there)
    Icon Extended Travel 2.5" Coil Overs All-Pro U-Bolt Flip Kit Bilstien Rear Shocks Fabtech Add-a-Leaf Icon Upper Control Arms All-Pro Rear Bumper w/ Wrap Arounds & Hitch with custom LED plate light BHLM and Morimoto III D2S retrofit Satoshi Grill 2 Hella Black Magics behind Grill Bestop Supertop BAMF sliders

    Do not use window weld. It's not the same as the butyl type stuff. It's more like plastic and doesn't seal very good. And it's harder to pull apart if you ever need to.
     
  10. Jan 13, 2013 at 2:23 PM
    #390
    Pugga

    Pugga Pasti-Dip Free 1983 - 2015... It was a good run

    Joined:
    Jun 18, 2010
    Member:
    #39131
    Messages:
    38,664
    Gender:
    Male
    First Name:
    Mike
    Massachusetts
    Vehicle:
    '19 Ford F-250 6.7 SCrew
    F-250 Land Yacht Mod
    Advanced Auto or Autozone should have it. I'd use the roll.

    3M Window Weld is perfect to use to seal up the headlights... They come apart with the same effort if you ever need to do it again. I don't know if you're talking about the tube stuff but the window weld roll is good stuff.
     
  11. Jan 13, 2013 at 4:10 PM
    #391
    Rhody76

    Rhody76 Well-Known Member

    Joined:
    Dec 15, 2010
    Member:
    #47755
    Messages:
    133
    Gender:
    Male
    First Name:
    Chris
    Rhode Island
    Vehicle:
    2011 SR5 DCLB 4x4
    Rear leaf TSB, Bilstein 5100s set at 1.75",1" blocks, UWS low profile toolbox in black, husky liners, tint, LED interior and reverse lights, yellow fogs
    For those that have used the Krylon fusion paint, did you use the flat black or gloss?

    Any recommendations and experiences with one or the other would be appreciated.
     
  12. Jan 13, 2013 at 4:14 PM
    #392
    Rich91710

    Rich91710 Well-Known Member

    Joined:
    Feb 23, 2012
    Member:
    #73470
    Messages:
    16,331
    Gender:
    Male
    First Name:
    Rich
    Los Angeles
    Vehicle:
    08 Base
    Satoshi with FJ badge, factory cruise, factory intermittent wipers, Redline Tuning hood-lift struts, Hellwig Swaybar, Rosen DVD-Nav
    RustOleum "All Surfaces" (self-priming) in Satin Black.

    [​IMG]
     
  13. Jan 13, 2013 at 4:44 PM
    #393
    Pugga

    Pugga Pasti-Dip Free 1983 - 2015... It was a good run

    Joined:
    Jun 18, 2010
    Member:
    #39131
    Messages:
    38,664
    Gender:
    Male
    First Name:
    Mike
    Massachusetts
    Vehicle:
    '19 Ford F-250 6.7 SCrew
    F-250 Land Yacht Mod
    I painted mine white but I used Krylon Fusion. Pretty sure it was satin.
     
  14. Jan 13, 2013 at 4:48 PM
    #394
    ajohnson

    ajohnson Glamour Shot

    Joined:
    Apr 19, 2009
    Member:
    #16145
    Messages:
    8,496
    Gender:
    Male
    First Name:
    Andy
    Charlotte, NC
    Vehicle:
    07 DCLB TRD Sport Prerunner 4x4
    Things and stuff and such
    I used adhesion promoter with Krylon Fusion sation black.

    [​IMG]
     
  15. Jan 13, 2013 at 6:51 PM
    #395
    Rhody76

    Rhody76 Well-Known Member

    Joined:
    Dec 15, 2010
    Member:
    #47755
    Messages:
    133
    Gender:
    Male
    First Name:
    Chris
    Rhode Island
    Vehicle:
    2011 SR5 DCLB 4x4
    Rear leaf TSB, Bilstein 5100s set at 1.75",1" blocks, UWS low profile toolbox in black, husky liners, tint, LED interior and reverse lights, yellow fogs
    Is adhesion promoter a primer that you apply first?
     
  16. Jan 13, 2013 at 10:24 PM
    #396
    Darth_Yota

    Darth_Yota I intend to live forever, or die trying.

    Joined:
    Apr 4, 2011
    Member:
    #54348
    Messages:
    4,074
    First Name:
    Cam-moron
    Somewhere USA
    Vehicle:
    Dented, broken-down ‘08 hoopty
    Ain’t good’nuff for insta
    Yeah it helps with adhesion of topcoats to whatever surface you're painting.
     
  17. Jan 14, 2013 at 2:50 AM
    #397
    ajohnson

    ajohnson Glamour Shot

    Joined:
    Apr 19, 2009
    Member:
    #16145
    Messages:
    8,496
    Gender:
    Male
    First Name:
    Andy
    Charlotte, NC
    Vehicle:
    07 DCLB TRD Sport Prerunner 4x4
    Things and stuff and such
    Yes it creates a good base for the paint to stick to. Krylon fusion still looks great on my badges after 3.5 years, I dont think i have used a better paint.
     
  18. Jan 14, 2013 at 4:42 AM
    #398
    SpruceTaco

    SpruceTaco トヨタ

    Joined:
    May 18, 2012
    Member:
    #79082
    Messages:
    12,284
    Gender:
    Male
    First Name:
    Mike
    Clearwater, FL
    Vehicle:
    2012 Spruce Mica TRD Sport
    Tinted windows 5%, sill protectors, TRD stubby antenna, weathertech in channel rain guards, wheathertech floor mats, BHLM, Truxedo low pro qt, DTRL deleted, anytime backup camera, bed storage locks, fog lights on anytime, tailgate theft deterrent, painted engine cover, relocated horns, l.e.d bed lights, l.e.d engine bay lights, l.e.d lights above cup holders, in glove box, rear cup holder, in console storage & cubby next to steering wheel, Grillcraft grill, 17x8.5 SCS Ray10's, 35x12.50 Nitto Ridge Grapplers, Borla cat back exhaust, map & dome l.e.d's, TEQ badge on grill, Redline tuning hood struts, Maxtrac spindles, SPC Light Racing UCA's, Bilstein 5100's front set at 0 with OME 885's & extended length Bilstein 5100's in the rear, All Pro expedition leaf springs & 2" blocks, extended brake lines front & rear, 1.5" 4crawler drive shaft spacer, Beefed Taco carrier bearing drop, 1.25" spidertrax wheel spacers on rear, Kenwood DNX570 touchscreen with navigation, 30" led light bar in lower bumper opening, 1/4" top plate spacer drivers side, Bullet Proof Fabricating skid plate, Cali Raised ditch lights & Rago f Fabrication brackets, Amp Research power steps, smoked l.e.d 3rd brake light, Wet Okole seat covers, under cab LED'S tied to dome circuit
    Krylon fusion in satin black, not too shiny not too flat.

    [​IMG]
     
  19. Jan 14, 2013 at 5:09 AM
    #399
    Pugga

    Pugga Pasti-Dip Free 1983 - 2015... It was a good run

    Joined:
    Jun 18, 2010
    Member:
    #39131
    Messages:
    38,664
    Gender:
    Male
    First Name:
    Mike
    Massachusetts
    Vehicle:
    '19 Ford F-250 6.7 SCrew
    F-250 Land Yacht Mod
    You're a poet and don't know it :laugh:
     
  20. Jan 20, 2013 at 5:51 AM
    #400
    Badgtho

    Badgtho Well-Known Member

    Joined:
    Dec 16, 2012
    Member:
    #93193
    Messages:
    326
    Gender:
    Male
    First Name:
    Ben
    CT
    Vehicle:
    '13 TRD sport 6spd
    TRD exhaust, TRD beadlock wheels, moto xtender
    67FF375B-C4CF-49AE-81EC-62E2CE0CFEC7-513_d8e0a415dad2f321f56283c7686ed7c08656c38b.jpg

    42305001-AEEA-44A2-93A3-337FD1BEFBD0-513_78c017e473adca430adacff0e26873fd65db26c6.jpg

    Just did this mod. Really not bad. I had a buddy lend a second set of hands.

    200 degrees for 8 min was what I used.

    Adhesion promoter and rust oleum satin black.
     

Products Discussed in

To Top