1. Welcome to Tacoma World!

    You are currently viewing as a guest! To get full-access, you need to register for a FREE account.

    As a registered member, you’ll be able to:
    • Participate in all Tacoma discussion topics
    • Communicate privately with other Tacoma owners from around the world
    • Post your own photos in our Members Gallery
    • Access all special features of the site

How to: DIY Wedge Camper

Discussion in 'Tonneau Covers, Caps and Shells' started by Ripcord, Apr 15, 2019.

  1. Aug 17, 2024 at 8:22 PM
    #3541
    guaco.supreme

    guaco.supreme Fk around and find out

    Joined:
    Jan 26, 2024
    Member:
    #442486
    Messages:
    537
    Gender:
    Male
    MN
    I know guys that use construction adhesive to glue box trailer side panels on and they don't seem to have issues with them coming apart. Probably a far stronger and stiffer bond than just rivets TBH. Be sure to lay them flat and put something heavy on them while its curing so it doesn't cure bowed.
     
  2. Aug 27, 2024 at 7:14 AM
    #3542
    guaco.supreme

    guaco.supreme Fk around and find out

    Joined:
    Jan 26, 2024
    Member:
    #442486
    Messages:
    537
    Gender:
    Male
    MN
    Got the topper portion finished last night. I will start the tent build probably Oct or Nov and build that over the winter.

    I wanted the tent to be removable, but didn't want the cap towering over the roof when the tent is off, so I made the cap roof height and the RTT will have a taller base. I almost messed up the frame by running too hot and too long of welds and had some warping, but I was able to get it pretty close to flat again with a floor jack and persuasion. Thats also why I have a vertical brace in the middle of the doors, probably don't need it but it's there for peace of mind.

    I opted for .125 alum sheet panels instead of Alupanel. I didn't like how much flex I saw in the Alupanel in photos even after adding braces, and that flex is only going to get worse over time with use. I drew the panels up in Fusion360, sent em off to a local fab shop and the cut and formed them. Little more $ than the alupanel, but much better fit.

    Doors and roof are double sealed, one seal on the frame and one seal on the panel. Rear door has a slight leave between door and tailgate, but should be easy to fix.

    Hurricane hinges for doors. These work great but kind of difficult to close off the ends. I ended up designing end caps and 3d printed them, hopefully they hold up. Latches clamp against a piece of replaceable natural alum so I don't scratch up the frame.

    20240826_181429.jpg

    20240826_223518.jpg

    20240826_223535.jpg
     
  3. Aug 30, 2024 at 12:38 PM
    #3543
    nanserb

    nanserb Well-Known Member

    Joined:
    Jan 25, 2016
    Member:
    #176034
    Messages:
    231
    Gender:
    Male
    First Name:
    Elliott
    Vehicle:
    2019 ZR2 Colorado
    Nice work!

    Lets see the 3D printed end pieces for the hurricane hinges! I need to redo the hinges on mine as the fabric is failing after a few years of sun and rain.

    Also do you have a link to the hinge you used?
     
    Last edited: Aug 30, 2024
  4. Sep 11, 2024 at 10:54 AM
    #3544
    mkhck

    mkhck New Member

    Joined:
    Jul 8, 2022
    Member:
    #400944
    Messages:
    1
    My buddy is selling his built camper for a 6.5' bed f-250. It's more of a work truck these days so he's going a different route. Located in Maryland. Willing to deliver or meet

    20240908_110151.jpg
     
  5. Sep 18, 2024 at 9:12 PM
    #3545
    ZColorado

    ZColorado Well-Known Member

    Joined:
    Nov 6, 2020
    Member:
    #345998
    Messages:
    1,083
    Gender:
    Male
    Near Boulder Colorado
    Vehicle:
    13 DCSB OR 6MT
    35's,Kings, NWF, 488, Harrop, SPC, Archive, Method, RCI, C4
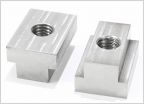
    I am going to be starting my build this weekend. We are going a little fancy and starting with some DIY powdercoating. These will solve the lack of 3 hole corners, and the too short single hole corners.
    IMG_4410.jpg
     
    G_W_Chonkr and Tronfunkblow like this.
  6. Sep 19, 2024 at 5:41 PM
    #3546
    G_W_Chonkr

    G_W_Chonkr Well-Known Member

    Joined:
    Mar 11, 2021
    Member:
    #359012
    Messages:
    86
    Gender:
    Male
    First Name:
    Enzo
    Clackamas, OR
    Vehicle:
    2020 Tacoma TRD OR
    Just a reccommedation/reminder that when you assemble these against the extrusion, make sure you add sealant. I'm sure that I would have had some water intrusion if I didn't. I even used some of the tent material as a water barrier between the pieces. Stoked to see more man!
     
    ZColorado[QUOTED] likes this.
  7. Sep 19, 2024 at 9:01 PM
    #3547
    ZColorado

    ZColorado Well-Known Member

    Joined:
    Nov 6, 2020
    Member:
    #345998
    Messages:
    1,083
    Gender:
    Male
    Near Boulder Colorado
    Vehicle:
    13 DCSB OR 6MT
    35's,Kings, NWF, 488, Harrop, SPC, Archive, Method, RCI, C4
    That is in the plan. Probably one of the things I will do once I get nearly done and I know I dont need to add more t-nuts. However I have a lot of the tilt in ones now, so I should have probably just sealed it up.


    Tonights progress was very good.

    Got the main wedge frame built and the floor sealed against the extrusion. I did not opt for any of the wiper type extrusion seal as called out in the BOM, I will be relying on the sealant.
    **NOTE** The corners will be re-sealed near the end of the build.


    These custom corners look so good. We did use a CNC mill to cut these though.
    IMG_4419.jpg


    **DO NOT USE SILICONE, Silicone is nearly impossible to repair. It must be completely mechanically removed down to bare metal/surface before anything else will stick. I used a non-silicone sealant on this build, look for a product that is paintable.
    IMG_4421.jpg


    These custom corners are fitting really really nice, just the right amount of squish in the sealant. Note the slight wave in the corner of the floor panel, I'd bet the router was moving too fast to make that a nice cut.
    IMG_4426.jpg

    Tonights stopping point. Very pleased with the progress after a couple hours. getting the right amount of t-nuts in the channels BEFORE you seal it up is key.
    IMG_4424.jpg

    Tomorrow we should get some real progress... It may even end up mounted to the truck... Without any welding.
     
    Last edited: Sep 19, 2024
  8. Sep 20, 2024 at 8:04 PM
    #3548
    ZColorado

    ZColorado Well-Known Member

    Joined:
    Nov 6, 2020
    Member:
    #345998
    Messages:
    1,083
    Gender:
    Male
    Near Boulder Colorado
    Vehicle:
    13 DCSB OR 6MT
    35's,Kings, NWF, 488, Harrop, SPC, Archive, Method, RCI, C4
    V2.5 makes the frame section go together quick. It took me about an hour to and hour and a half before I could put it on my truck. Ripcord has not yet released V2.5, I am one of the guinea pigs for the Beta version.

    Again, super thrilled with the progress for some garage time after work.

    Tomorrow we build the wedge and start the doors.

    IMG_4441.jpg


    IMG_4444.jpg
     
    lamjam and guaco.supreme like this.
  9. Sep 20, 2024 at 8:34 PM
    #3549
    guaco.supreme

    guaco.supreme Fk around and find out

    Joined:
    Jan 26, 2024
    Member:
    #442486
    Messages:
    537
    Gender:
    Male
    MN
    I really like the idea of using extruded alum, but damn it's expensive. Just the alum for the tent half of mine after shipping will cost about the same as I have into my completed cap, and I even used expensive hurricane hinges and .125 alum sheets for my doors and roof. Nice thing tho, is from the looks of your photos there isn't much extruded alum needed for the space frame portion.
     
    ZColorado[QUOTED] likes this.
  10. Sep 20, 2024 at 8:54 PM
    #3550
    guaco.supreme

    guaco.supreme Fk around and find out

    Joined:
    Jan 26, 2024
    Member:
    #442486
    Messages:
    537
    Gender:
    Male
    MN
    Sorry, I somehow missed your reply.

    I used these hinges from Vintage Trailer Tech.
    https://teardroptrailerparts.com/product/offset-flat-hurricane-hinge/

    I have end caps at both ends of the hinges. The fronts I wanted to prevent the hinge from marring the front panel.
    The other ends of the hinges I wanted to cap off so A) water doesn't easily work its way into the hinge, and B) it prevents the hinges from sliding forwards or backwards.
    Both are printed in solid PETG. So far no issues. They held up to 100+ deg temps in Utah for a few days. I suspect I'll have issues with them when it gets stupid cold here in MN.

    They just bolt on with the last bolt (or rivet) for the hinge. They do make it difficult to get the protective cover on though (hence why I ran the bolt through it on the rear door). I might see about getting them machined out of alum with a thicker piece that the bolt goes through. I dont have any Fusion360 screenshots of the front cap, and Fusion is currently down so I can't even log in to get them, but I have the rear caps.

    20240714_185820.jpg

    20240715_165427.jpg

    20240920_223814.jpg

    20240920_223807.jpg

    20240920_223826.jpg

    20240920_223838.jpg
     
  11. Sep 21, 2024 at 6:39 AM
    #3551
    ZColorado

    ZColorado Well-Known Member

    Joined:
    Nov 6, 2020
    Member:
    #345998
    Messages:
    1,083
    Gender:
    Male
    Near Boulder Colorado
    Vehicle:
    13 DCSB OR 6MT
    35's,Kings, NWF, 488, Harrop, SPC, Archive, Method, RCI, C4
    My spreadsheet shows the extruded frame was about $240, not including the machined brackets which will likely be expensive. It will definitely not be the bargain route. It is definitely the easy path to take though. This thing flew together far quicker then I expected. The machined bracket sourcing still has to be solved. I have a feeling that this particular design may end up changing a bit to make that easier. The person who made the brackets for me has some ideas, I have some ideas on that design too. So I would not be surprised if the brackets go through some iterations.

    One of the things often ignored in projects like this is what the builders time costs. I know I enjoy projects like this just for the sake of the project, but at the end of it all I would rather be out on the trail, or out camping. I have a welder and I could have easily built the V2 frame. However I also have a full time job and other stuff going on. A frame would have likely taken me multiple weekends, this went together in a friday night. But thats why this is a DIY project. You get to decide how you want to build it.
     
    lamjam and Calamity_taco like this.
  12. Sep 21, 2024 at 8:14 PM
    #3552
    HockeyTRD

    HockeyTRD Well-Known Member

    Joined:
    Dec 20, 2022
    Member:
    #413659
    Messages:
    58
    Vehicle:
    2022 Tacoma TRD OR DCSB
    Going to be working on the space frame jig soon. Have some questions about the hight. I am using ripcords plans. If you did a jig on a 3rd gen, can you pm me?
     
  13. Sep 22, 2024 at 6:17 AM
    #3553
    ZColorado

    ZColorado Well-Known Member

    Joined:
    Nov 6, 2020
    Member:
    #345998
    Messages:
    1,083
    Gender:
    Male
    Near Boulder Colorado
    Vehicle:
    13 DCSB OR 6MT
    35's,Kings, NWF, 488, Harrop, SPC, Archive, Method, RCI, C4
    Progress is moving along very well. I expect to finish the assembly today. Which will bring this build from parts to assembled in two days and two evenings. V2.5 specs hurricane hinges and aluminium doors so cost is a little higher again, but finding a waterjet or laser place that can cut, bend, and powdercoat is easy in most metropolitan areas. Denver has 4-5 places. I am not thrilled with the quality of the powder coat on my doors though.


    This photo is a decent example of the differences between 80/20s ultralight extrusions and Tnuts extrusions. If you are super weight conscious then ordering extrusions from 80/20 might be best. The only things I ordered from 80/20 where the long 100" sections since tnuts made you go through some hoops to get them. Interestingly they showed up on the regular UPS truck where Tnuts would only ship freight.

    IMG_4447.jpg


    Send cut Send cut, bent, and powdercoated the latch brackets and hold down brackets for me. I opted for thicker material then is Spec'd in the BOM (.187 not .120) and I am very pleased with how these turned out. Seems like SCS added an extra bracket of each type in the build process, and you get candy in the order.

    IMG_4464.jpg


    This was our technique to install the bulb seal on the underside of the rails. We did not try this until we had the hold down brackets installed because they would keep the camper from sliding off the bed rails. I did not opt for the window flashing called out in the BOM and just put bulb seal against the bed after removing the plastic trim. There are a number of holes that dust can come up from under the truck. I know some folks have made metal caps for the rails. That would be interesting to investigate. Some simple powdercoated aluminium rail caps might tie it all together well? maybe multiple sections to stay within SCS' length restrictions?

    IMG_4465.jpg


    This is where we ended the day. The only thing left is the doors, hurricane hinges, gas struts and of course the tent fabric.

    IMG_4467.jpg
     
    Last edited: Sep 22, 2024
  14. Sep 22, 2024 at 6:42 PM
    #3554
    ZColorado

    ZColorado Well-Known Member

    Joined:
    Nov 6, 2020
    Member:
    #345998
    Messages:
    1,083
    Gender:
    Male
    Near Boulder Colorado
    Vehicle:
    13 DCSB OR 6MT
    35's,Kings, NWF, 488, Harrop, SPC, Archive, Method, RCI, C4
    Todays update:
    Installing hurricane hinges, doors, struts, and door seals. These steps are the first real fabrication for assembly we have needed to do. The rest was just bolting together existing designs. The BOM calls out rivets for this, which would have likely been faster, but I opted for some 10-32 x 3/8 screws and KEPS nuts on the back.

    The main task of the day: match drilling.

    Pro tips: Have some good drill bits, measure twice, and use pilot drills. Good left and right hand tin snips will help too. Use a file to clean up the cuts.


    My buddy match drilled all the hurricane hinges into the wedge frame, there are already holes in te hurricane hinge. These will all get covered by a piece of trim
    (This photo is a few steps ahead, but shows the top and bottom of the hurricane hinge)
    IMG_4484.jpg

    Then you need to attach the hurricane hinge to the doors. You need to clearance the flange. These dont seem to come without that flange.
    IMG_4470.jpg

    IMG_4480.jpg

    I found it a lot easier to snip strips and bend them back and forth to break them. Then clean the edge up with a bastard file.

    IMG_4482.jpg


    The doors were a lot of Mark, center punch, pilot drill, drill and then install bolts. The hurricane hinge is very flexible so I needed to install a bolt after each hole to support the next hole. Spacing was critical because the bolt head would hit the hinge if too close, but too far away and you wont grab the flange for the hinge. We found 1/2" away from the hinge would work.

    IMG_4490.jpg

    Gas struts were next. We placed the bracket a bit too low, but it works perfectly for what I want. I can have the door flat and I can walk under it. Tools and detritus collected quickly.


    IMG_4493.jpg


    And one more tip. Buy some extra bolts. getting some from the local hardware store is expensive, and HD and Lowes dont carry them>
    IMG_4471.jpg

    Tuesday I will get more progress and will attach Keder rail, and finish the rear door. Then it's just tent material time.

    IMG_4499.jpg
     
    franzgod likes this.
  15. Sep 23, 2024 at 7:25 AM
    #3555
    guaco.supreme

    guaco.supreme Fk around and find out

    Joined:
    Jan 26, 2024
    Member:
    #442486
    Messages:
    537
    Gender:
    Male
    MN
    @ZColorado got photos of how you're running the seals?

    Any plans to cap off the hurricane hinges? If not closed off they will get water intrusion by airflow pushing water in from the ends. I have this issue with my camper trailer. It's not a lot, but its enough. Water collects in the hinge, then when you open it drips/pours inside.
     
  16. Sep 23, 2024 at 8:45 AM
    #3556
    ZColorado

    ZColorado Well-Known Member

    Joined:
    Nov 6, 2020
    Member:
    #345998
    Messages:
    1,083
    Gender:
    Male
    Near Boulder Colorado
    Vehicle:
    13 DCSB OR 6MT
    35's,Kings, NWF, 488, Harrop, SPC, Archive, Method, RCI, C4
    One of the major changes in v2.5 is the aluminum doors which have bent edges. The side doors bend towards the bed on the leading and tailing edges. This solves a lot of the water intrusion. The bed rail is rather wide to give that double bulb seal a lot of surface area too.

    so far we are using the double bulb seal on the bed rails, t-slot seals on the wedge halves and the door seams. There are some spots we are using single bulb seals, bottom of the doors, and the milled corners.
    I’ve not found a solution for the hurricane hinge.

    I don’t expect this to be perfectly dry on the bottom half. I do hope to be able to store gear down there that won’t get soaked. Colorado does not get a lot of rain so I am trying, but I expect to iterate after I experience some rain.


    IMG_4495.jpg
     
    guaco.supreme[QUOTED] likes this.
  17. Sep 23, 2024 at 8:52 AM
    #3557
    ZColorado

    ZColorado Well-Known Member

    Joined:
    Nov 6, 2020
    Member:
    #345998
    Messages:
    1,083
    Gender:
    Male
    Near Boulder Colorado
    Vehicle:
    13 DCSB OR 6MT
    35's,Kings, NWF, 488, Harrop, SPC, Archive, Method, RCI, C4
    Here is a shot of the leading edge. A little wind deflector on the hurricane hinge would probably do a good job of keeping out the driving rain.

    the powder coat quality on the doors is terrible. I will likely need to have them stripped or remade.
    IMG_4497.jpg
     
    Last edited: Sep 23, 2024
    guaco.supreme likes this.
  18. Sep 23, 2024 at 9:31 AM
    #3558
    guaco.supreme

    guaco.supreme Fk around and find out

    Joined:
    Jan 26, 2024
    Member:
    #442486
    Messages:
    537
    Gender:
    Male
    MN
    A bend along the bottom on the door to match the angle of the space frame will help create a solid seal against the bottom bulb. Look at my photos a few posts up, you can see what I did along the bottom on the doors. So far I have zero leaks or intrusion around the doors (I did have some on my front panel where I missed a gap in sealant :facepalm:)

    I designed some 3d prints for capping off the hinges (see post above). So far they are working great, but haven't had cold weather yet. Was curious your plans to see if you had a better idea than mine lol
     
  19. Sep 23, 2024 at 12:00 PM
    #3559
    ZColorado

    ZColorado Well-Known Member

    Joined:
    Nov 6, 2020
    Member:
    #345998
    Messages:
    1,083
    Gender:
    Male
    Near Boulder Colorado
    Vehicle:
    13 DCSB OR 6MT
    35's,Kings, NWF, 488, Harrop, SPC, Archive, Method, RCI, C4
    your doors are super clean. I like that bend. Looks kinda like a super pacific top.

    The v2.5 design has the side doors bend in around the topper giving it a tiny hug. The bulb seal at the bottom seems like it should seal very well.
     
  20. Sep 24, 2024 at 10:25 PM
    #3560
    ZColorado

    ZColorado Well-Known Member

    Joined:
    Nov 6, 2020
    Member:
    #345998
    Messages:
    1,083
    Gender:
    Male
    Near Boulder Colorado
    Vehicle:
    13 DCSB OR 6MT
    35's,Kings, NWF, 488, Harrop, SPC, Archive, Method, RCI, C4
    Finished the rear door and got the Keder rail in.
    I also got the truck back home. It fits in a 7' tall garage as long as you dont have a steep lead in. I can't back in like I usually do, I now have to drive nose in to allow it to flatten out before the rear tires are in the driveway.

    I'll try and post some photos soon.

    IMG_4515.jpg
     
    Last edited: Sep 25, 2024
    G_W_Chonkr and Tronfunkblow like this.

Products Discussed in

To Top