1. Welcome to Tacoma World!

    You are currently viewing as a guest! To get full-access, you need to register for a FREE account.

    As a registered member, you’ll be able to:
    • Participate in all Tacoma discussion topics
    • Communicate privately with other Tacoma owners from around the world
    • Post your own photos in our Members Gallery
    • Access all special features of the site

How to: DIY Wedge Camper

Discussion in 'Tonneau Covers, Caps and Shells' started by Ripcord, Apr 15, 2019.

  1. Dec 4, 2020 at 10:52 AM
    #941
    Jarman02

    Jarman02 Well-Known Member

    Joined:
    Sep 17, 2018
    Member:
    #266568
    Messages:
    147
    Gender:
    Male
    Oregon
    Vehicle:
    2002 Tacoma Xtra Cab
    I was gonna say what @plurpimpin said. Don’t run your movable panels all the way to the edge of the space frame else you won’t clear the keder rail.
     
  2. Dec 4, 2020 at 11:24 AM
    #942
    2ski4life7

    2ski4life7 Well-Known Member

    Joined:
    Apr 30, 2012
    Member:
    #77911
    Messages:
    2,196
    Gender:
    Male
    Seattle WA
    Vehicle:
    17 DCLB 4x4 TRD Off Road Previously '12 DCLB 4x4 SR5
    I plan to run a diesel heater in my truck. Do you guys think I still need the condensation mat?
     
    jp_flynavy likes this.
  3. Dec 4, 2020 at 11:30 AM
    #943
    plurpimpin

    plurpimpin Well-Known Member

    Joined:
    Jul 31, 2011
    Member:
    #60895
    Messages:
    2,971
    Gender:
    Male
    PDX
    Vehicle:
    2010 TRD Off Road 4x4
    Get some 0.025" wire for your mig welder. It makes welding 16 and 18ga tube WAY easier! I started out practicing with 0.035" wire and on the thin walled tube it made me feel like I forgot how to weld - I was constantly burning through and had very little control. I switched to the thinner wire and 16ga with 0.025" wire welds as easily as 1/8" with 0.035" wire.

    It's a little detail that most people overlook and it makes a huge difference.

    Yes, I had condensation under an area of my pad where the mat had slipped out on a relatively warm night. Condensation is going to be a much bigger issue in temperatures where you'd want the heater. I don't think there's any good way to get by without the anti-condensation mat. You're already spending a few grand in materials just spring the extra $100 to avoid a moldy mat.

    I have a diesel heater I'm working on setting up as well. I'm going to go the portable pelican case mounted approach since I only need it for ski season.
     
    Rando_lurker likes this.
  4. Dec 4, 2020 at 11:49 AM
    #944
    JMcFly

    JMcFly Well-Known Member

    Joined:
    Aug 11, 2020
    Member:
    #337348
    Messages:
    1,338
    Central FL
    Vehicle:
    2012 Tacoma SR5 4x4
    I'm making a mess with a flux core welder. But I have a mig at the makerspace I could utilize then.
     
  5. Dec 4, 2020 at 7:46 PM
    #945
    nanserb

    nanserb Well-Known Member

    Joined:
    Jan 25, 2016
    Member:
    #176034
    Messages:
    231
    Gender:
    Male
    First Name:
    Elliott
    Vehicle:
    2019 ZR2 Colorado
    Does yours have gas input? It's worth it to buy a bottle.
     
  6. Dec 4, 2020 at 7:50 PM
    #946
    JMcFly

    JMcFly Well-Known Member

    Joined:
    Aug 11, 2020
    Member:
    #337348
    Messages:
    1,338
    Central FL
    Vehicle:
    2012 Tacoma SR5 4x4
    My flux, no. But I’ve got a 220 MIG with gas at the makerspace.

    I’m still on the fence about doing the movable platform. Worse comes to worse I redo my build later down the road if I really want the panels.
     
  7. Dec 5, 2020 at 7:16 AM
    #947
    Jarman02

    Jarman02 Well-Known Member

    Joined:
    Sep 17, 2018
    Member:
    #266568
    Messages:
    147
    Gender:
    Male
    Oregon
    Vehicle:
    2002 Tacoma Xtra Cab
    It’s Ottertex canvas with PVC backing. I would stay away unless you have a sewing machine with room for bulk material as it’s stiffness makes it exceedingly difficult to manage lol
     
  8. Dec 5, 2020 at 7:39 AM
    #948
    nanserb

    nanserb Well-Known Member

    Joined:
    Jan 25, 2016
    Member:
    #176034
    Messages:
    231
    Gender:
    Male
    First Name:
    Elliott
    Vehicle:
    2019 ZR2 Colorado
    Is about 0.5" clearance on each side enough room?

    Also, has anyone tried feeding the kedar cord inside of the extrusion rail? Just curious.
     
  9. Dec 5, 2020 at 9:40 AM
    #949
    plurpimpin

    plurpimpin Well-Known Member

    Joined:
    Jul 31, 2011
    Member:
    #60895
    Messages:
    2,971
    Gender:
    Male
    PDX
    Vehicle:
    2010 TRD Off Road 4x4
  10. Dec 5, 2020 at 5:11 PM
    #950
    Dubiousveracity

    Dubiousveracity Well-Known Member

    Joined:
    Aug 2, 2018
    Member:
    #261489
    Messages:
    358
    Vehicle:
    2018 TRDOR DCSB MT
    none
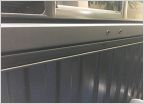
    Got the space frame plans, got my steel on its way. Anyway how are folks dealing with this on the 3rd gens?

    The tops of the sides and front of the bed aren't even. When I remove the plastic it will be even more uneven.

    So far my ideas are

    remove the upper part of the front of the bed, make a piece out of angle that's level with the bed side.

    Build the space frame around the lip.

    Anything else I should be looking at?

    20201205_160504.jpg
     
    2ski4life7 likes this.
  11. Dec 6, 2020 at 10:21 AM
    #951
    howied

    howied Well-Known Member

    Joined:
    Apr 25, 2020
    Member:
    #325807
    Messages:
    92
    Gender:
    Male
    Okay party people, I’ve got a jig I can now sell. Setup for a Gen 1 long bed, but should be adjustable. Let me know if interested. Seattle area. Definitely helpful having it.
     
  12. Dec 6, 2020 at 10:25 AM
    #952
    vitodaniel

    vitodaniel Well-Known Member

    Joined:
    Nov 27, 2018
    Member:
    #273969
    Messages:
    82
    Gender:
    Male
    First Name:
    Vito
    Southern NH
    Vehicle:
    2016 Toyota Tacoma TRD Sport
    I am thinking just running double bulb seal and that's it. it should be water tight ? or you could possibly run 1/8" foam strips with adhesive just on the sides to level it up, and then run double bulb seal all around
     
  13. Dec 6, 2020 at 3:00 PM
    #953
    jp_flynavy

    jp_flynavy IG: @TrailLimoOverland

    Joined:
    Dec 30, 2016
    Member:
    #206065
    Messages:
    1,013
    Vehicle:
    2015 Tacoma DCLB
    It looks tough. I went with a much thinner material and found that it’s has its drawbacks too.
     
  14. Dec 7, 2020 at 10:02 AM
    #954
    Jarman02

    Jarman02 Well-Known Member

    Joined:
    Sep 17, 2018
    Member:
    #266568
    Messages:
    147
    Gender:
    Male
    Oregon
    Vehicle:
    2002 Tacoma Xtra Cab
    It does feel durable. I like it because there is zero light penetration, effectively black out curtain status lol. It was just a total pain when it came to heming and sewing the zippers on the windows. Being thicker, it should be better in windy situations. Guess we will see!
     
    jp_flynavy[QUOTED] likes this.
  15. Dec 7, 2020 at 4:44 PM
    #955
    jp_flynavy

    jp_flynavy IG: @TrailLimoOverland

    Joined:
    Dec 30, 2016
    Member:
    #206065
    Messages:
    1,013
    Vehicle:
    2015 Tacoma DCLB
    On the contrary, I’m using a rather translucent material. Still wanted and wind proof, just I’ll be getting up with the sun lol. It was easy to sew, but sometimes felt too light and would bunch up too easily. Definitely tricky with the zipper.

    In any case, can’t wait to see more of yours!
     
  16. Dec 8, 2020 at 8:28 AM
    #956
    Wasatch

    Wasatch Well-Known Member

    Joined:
    Aug 6, 2010
    Member:
    #41303
    Messages:
    392
    Anyone experiencing warpage on their spaceframe? Any tips on making sure the tubes are laying flat on the jig? Mine is on a jig very similar to @Ripcord 's

    I have the bottom section tacked up and when I mock it up to my truck, the tube ends are raised ever so slightly on the bedrail (1/8-1/4 inch or so)... this to be expected?
     
  17. Dec 8, 2020 at 8:46 AM
    #957
    Wasatch

    Wasatch Well-Known Member

    Joined:
    Aug 6, 2010
    Member:
    #41303
    Messages:
    392
    Have any photos of the flat bar welded up? I'm debating between flat bar or angle iron... Thanks!
     
  18. Dec 8, 2020 at 8:47 AM
    #958
    CayucosTacoma

    CayucosTacoma Just think outside the Yota

    Joined:
    Mar 9, 2012
    Member:
    #74580
    Messages:
    5,597
    Gender:
    Male
    First Name:
    Chris
    San Luis Obispo/San Jose
    Vehicle:
    2004 Double Cab 4x4
    Specs in the Build Thread
    This is just after tacking up the tubes or welding?
     
  19. Dec 8, 2020 at 8:50 AM
    #959
    Wasatch

    Wasatch Well-Known Member

    Joined:
    Aug 6, 2010
    Member:
    #41303
    Messages:
    392
    Just after tacking up the square tubing... Not fully welded.

    I plan to tack the entire frame up, then test fit to see if any 'manipulation' is needed to ensure it fits flush on the bedrails... really wish I had a massive welding table! hah
     
  20. Dec 8, 2020 at 8:55 AM
    #960
    plurpimpin

    plurpimpin Well-Known Member

    Joined:
    Jul 31, 2011
    Member:
    #60895
    Messages:
    2,971
    Gender:
    Male
    PDX
    Vehicle:
    2010 TRD Off Road 4x4
    Weird you're seeing warpage from just tack welds. Fully welding you need to move around alot to keep the heat in the part low. Don't weld a whole joint at one. Weld one side of the square tube and move somewhere different while you let it cool. Tube work like this is really easy to warp if you rush and put too much heat into it at once.

    My rhythm was basically do a weld on one corner and move to the next and basically kept working around the frame in circles so by the time I did 3 other welds the first one had some time to cool. On the rear of the frame (where there is no bottom tube) I let the parts cool completely between welds. The first time I did the rear the heat pulled each side in almost an inch so I had to grind out the welds and redo it. Also learned that on the rear it helps to add a support across the bottom while you weld it. I just clamped on a few pieces of angle iron to help hold it in place.
     
    Last edited: Dec 8, 2020

Products Discussed in

To Top