

-
Welcome to Tacoma World!
You are currently viewing as a guest! To get full-access, you need to register for a FREE account.
As a registered member, you’ll be able to:- Participate in all Tacoma discussion topics
- Communicate privately with other Tacoma owners from around the world
- Post your own photos in our Members Gallery
- Access all special features of the site
Quick Links: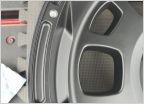 Stripped M8x1.0 bolts on TRD wheels - ideas??
 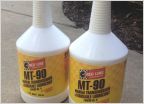 How-To: 6-Speed Manual Transmission Oil Change
 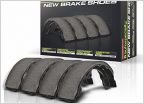 Rear drum brake upgrade - Larger wheel cylinders?
  Lugnuts going from stock steelies to alloy
  Find me this metal pop sound on my truck (and moms 07 4runner)! 6 speed, transfer case, and axle drain plug washers
How to remove Junction Box to install OEM trailer wiring harness?
Discussion in '2nd Gen. Tacomas (2005-2015)' started by arnhcho, Jan 8, 2023.


