1. Welcome to Tacoma World!

    You are currently viewing as a guest! To get full-access, you need to register for a FREE account.

    As a registered member, you’ll be able to:
    • Participate in all Tacoma discussion topics
    • Communicate privately with other Tacoma owners from around the world
    • Post your own photos in our Members Gallery
    • Access all special features of the site

How To: Replacing Carrier Bearing

Discussion in '1st Gen. Tacomas (1995-2004)' started by TacomaJPP, Jan 27, 2013.

  1. Jan 27, 2013 at 11:20 AM
    #1
    TacomaJPP

    TacomaJPP [OP] To secure peace, is to prepare for war

    Joined:
    Dec 5, 2010
    Member:
    #47218
    Messages:
    556
    Gender:
    Male
    East TN
    Vehicle:
    03 4WD TRD XTD Cab
    Snugtop Camper Brushguard
    How to change carrier bearing on 2003 Toyota Tacoma Extended Cab 4wd.

    Safety blurb: Be sure to chock your tires. Don’t do anything stupid. If you do something stupid and kill yourself or your truck, don’t blame me. You’re responsible for your own actions and if you are desperate enough to read a “how to” on the internet, then you assume all responsibility for the outcome. Let’s get started.

    Tools Required:
    -14mm wrench (x2)
    -17mm wrench (I didn't, you may need it)
    -Torque wrench (capable of 51, 54, and 134 ft-lbs)
    -24mm socket
    -Impact wrench
    -Jack Stand
    -14mm socket and ratchet (3/8" drive)
    -Bench vise
    -PB Blaster or other loosening lubricant
    -Dead blow hammer
    -Flathead screwdriver (for staking nut)
    -Jaw puller

    Parts Required:

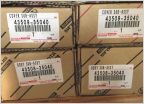
    Toyota Carrier Bearing Part Number: 37230-35130

    Purchased from www.partznet.com - Price $147

    PartPic_zps3b6fadd1_b4cd1dd3daa77c47969389959f7038b300e20e02.jpg

    Factory Service Manual Documents:

    See attached located at the bottom of this post.

    Symptoms: I experienced some vibrations in the mid 60 mph range. I also noticed a very slight “popping” sound at high gear / low rpm situations. Moreover, the video below shows how much play was in my worn carrier bearing. I estimate it to be about ½” of total play. After I installed the new one, I had less than 1/8” of play.

    http://www.youtube.com/watch?v=vtBHKHGa8Fo


    To begin, we will only have to remove the front half of the propeller shaft. The back half (the part that goes from the carrier bearing to the rear differential will not have to be removed).

    Pic1_zps80e8a862_bf86f39a27b66508ab521f5e574ee2f87e32126f.jpg


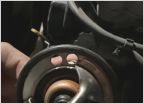
    Step 1 – Mark the alignment of the transmission output shaft flange to the U-joint carrier assembly. See pic below.

    Pic2_zps72fc30b2_646ee6c5fac8fc5bd3dba948fd69397ac0f2bbc0.jpg


    Step 2 – Loosen the 4, 14mm bolts on the transmission output shaft flange. The nut uses a 14mm wrench. I did not have to back the head of the bolt because they seemed to be froze. However, if you do, it uses a 17mm wrench. Break-torque is 54 ft-lbs. A ratchet was too difficult to use in loosening these bolts. I suggest using a wrench only. If you can’t get to some of the bolts, you may have to roll your truck a foot or two. I removed all of the bolts except one. I left it in (but loose) so that it wouldn’t fall on my head.


    Step 3 – Mark the alignment of the flange to the rear propeller shaft front U-joint carrier.


    Step 4 - Loosen the 4, 14mm bolts on the rear propeller shaft front U-joint carrier. Both the nut and bolt head use a 14mm wrench. Again, I suggest using wrenches and not a ratchet/socket. These were so tight that I had to use a ¾” wrench as an additional breaker bar by doubling it up on the14mm wrench. Break torque is 54 ft-lbs.

    Pic3_zps248f3b98_8978b2221bb09d76aa22887c19ab6511abd77f05.jpg


    Step 5 – Insert floor jack under the rear half of the propeller shaft. You don’t have to support it at this point, just put it underneath it.


    Step 6 – Loosen the two carrier bearing bolts.

    Pic4_zpscaaed200_cb4d7b7f51a5600d12b4210f1408acd6eeecc73a.jpg


    Step 7 – The driveshaft should come out now. You may have to use some PB Blaster and a dead blow hammer to get the U-Joint carriers to break free from the flanges. Be sure to support the rear half of the propeller shaft with your jack stand.


    Step 8 – Take your drive shaft with carrier bearing to your work bench. Place the drive shaft in your bench vise. Please note, be very careful in how much you tighten the vise onto the shaft. You do not want to warp it. I also wrapped my driveshaft in some scotch bright pads (for friction) and some rubber (for protection).


    Step 9 – The flange must be removed in order to get the carrier bearing off. To remove the flange, you must un-stake the nut. Take a small screwdriver and hammer under the staked-over metal. Pry the metal up slightly being careful not to over-pry it. I re-used this nut. Break-torque is 134 ft-lbs. I used an impact wrench to remove it.

    Pic5_zps63bf5cfd_d0acbf10b77a1a2b8f2d6b23144033265859ac5b.jpg


    Step 10 – Remove carrier bearing by using a jaw puller. I didn’t have one. Neither did Advance, O’Reilly, or AutoZone in my town. Fortunately, one of my friends did. I removed it at his house and forgot to take my camera. However, it is quite simple. Pictured below is the type of jaw puller I used. I ended up hooking to the assembly and pulled it off. The rubber tore from the actual carrier bearing, leaving the bearing on the shaft. No worries. Use the jaw puller to hook to the bearing and pull it off too. This took about 2 minutes. Note, the jaw puller should have jaws about 6” long.

    [​IMG]

    Here’s a good video of a guy doing this:

    http://www.youtube.com/watch?v=96Tx-vklCYw


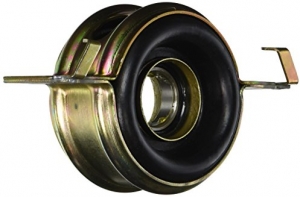
    Step 11 – Now that the old carrier bearing has been removed, slide new one on. Be sure to put it on in the correct orientation. The correct orientation is pictured below:

    Pic6_zps4e7d1e6a_446d4393f94daf77629b57b272b3c68dbd2cbb4d.jpg


    Step 12 – Be sure that you replace the washers and nut back on in the correct order of removal. Place the nut back on the shaft and tighten to 134 ft-lbs. This seats the bearing properly.


    Step 13 – Loosen the nut and then re-torque to 51 ft-lbs. After it is torqued properly, stake the nut by using a screw driver and ballpeen to tap the nut back over the cut-out in the shaft.


    Step 14 – Take the drive shaft assembly back under the truck and re-install in order of removal making sure to take note of all of the flange orientations and re-aligning your marks. I recommend loosely tightening everything up until all of your bolts are in. You may have to push truck forward/backward a little to get everything to line up. Torques for the 8, 14mm bolts are 54 ft-lbs.


    Step 15 – You must align your carrier bearing. I did so by noting where it was before because of the dirt line. Once it is centered, tighten it up.


    Step 16 – Double check every bolt to make sure it is tight.


    Tags: Carrier bearing center support bearing vibe vibration shutter shake propeller shaft driveshaft drive how to howto removal remove replace replacement
     

    Attached Files:

    • reas.pdf
      File size:
      29.4 KB
      Views:
      4,535
    • disa.pdf
      File size:
      23.7 KB
      Views:
      2,541
    • remo.pdf
      File size:
      41.5 KB
      Views:
      2,391
    CrankTank, Tmar04, toyoBen and 29 others like this.
  2. Jan 27, 2013 at 4:51 PM
    #2
    davidpick

    davidpick NWXPDTN

    Joined:
    Jan 21, 2010
    Member:
    #29760
    Messages:
    2,380
    Gender:
    Male
    First Name:
    David
    Leavenworth, WA
    Vehicle:
    1988 Pickup 22R 5sp 2wd
    Weber 32/36, RV Cam, LCE exhaust headers, Desmogged
    good work, and excellent writeup! i just replaced my carrier bearing a few days ago... this would have been tremendously helpful haha :)
     
  3. Jan 27, 2013 at 5:24 PM
    #3
    fouillard13

    fouillard13 Well-Known Member

    Joined:
    Jan 15, 2009
    Member:
    #12619
    Messages:
    1,170
    Gender:
    Male
    First Name:
    Riley
    Canadia
    Vehicle:
    1998 tacoma 4x4
    I get a vibration around 60 mph. Its almost a pulsing vibration. I have had my tires re balanced. I am wondering if this is my problem. it is only bad around 60 mph. How much did the carrier bearing cost?
     
    Nick'sblue4x4 likes this.
  4. Jan 27, 2013 at 5:30 PM
    #4
    TacomaJPP

    TacomaJPP [OP] To secure peace, is to prepare for war

    Joined:
    Dec 5, 2010
    Member:
    #47218
    Messages:
    556
    Gender:
    Male
    East TN
    Vehicle:
    03 4WD TRD XTD Cab
    Snugtop Camper Brushguard
    $147
     
  5. Jan 27, 2013 at 5:31 PM
    #5
    TacomaJPP

    TacomaJPP [OP] To secure peace, is to prepare for war

    Joined:
    Dec 5, 2010
    Member:
    #47218
    Messages:
    556
    Gender:
    Male
    East TN
    Vehicle:
    03 4WD TRD XTD Cab
    Snugtop Camper Brushguard
    Thanks.

    I just replaced mine yesterday. How many miles did you have on yours?
     
  6. Jan 27, 2013 at 5:32 PM
    #6
    fouillard13

    fouillard13 Well-Known Member

    Joined:
    Jan 15, 2009
    Member:
    #12619
    Messages:
    1,170
    Gender:
    Male
    First Name:
    Riley
    Canadia
    Vehicle:
    1998 tacoma 4x4
    mine has 220k miles on it i believe. so i think its time
     
  7. Jan 27, 2013 at 5:48 PM
    #7
    TacomaJPP

    TacomaJPP [OP] To secure peace, is to prepare for war

    Joined:
    Dec 5, 2010
    Member:
    #47218
    Messages:
    556
    Gender:
    Male
    East TN
    Vehicle:
    03 4WD TRD XTD Cab
    Snugtop Camper Brushguard
    I've heard that cheaper ones are available, but I only put Toyota parts on my truck. Considering the Toyota one lasted 200,000, I think it's a wise investment.
     
  8. Jan 27, 2013 at 11:18 PM
    #8
    Anthony250

    Anthony250 Ex Fabricator

    Joined:
    Sep 29, 2010
    Member:
    #44016
    Messages:
    3,774
    Gender:
    Male
    First Name:
    Anthony
    Rialto CA
    Vehicle:
    99 Tacoma LT Prerunner
    LSK Race Kit, King Shocks, Methods, Glassworks, Baja Designs, Built by myself.
    I did put a cheaper brand CB on mine and it didnt last at all. The stock rubber in the original parts last much longer.
     
  9. Feb 8, 2013 at 10:44 PM
    #9
    geoff06

    geoff06 261k and counting

    Joined:
    Feb 7, 2011
    Member:
    #50697
    Messages:
    271
    Gender:
    Male
    WI
    Vehicle:
    '01 PreRunner Xcab lifted
    3" lift, Bilstein 5100/OME coilovers, rear AAL, Swiss camper shell, Rough Country 9000 rear shocks, 265/75/16 AT's on stock steel rims painted black, All-Pro 1.5"F/1.25"R wheel spacers, airbox elbow mod, Flowmaster Super 44, Davico post-cat, I took off my DIY angle iron bed/light bar!, bed wheel well shovel-mount, blacked out grill emblem, Poineer DEH-P3900 head unit, Alpine Type R front component speakers, Pioneer Coaxial rears, Dynamat in door panels, scratchbuilt aluminum holders for my ipod nano and phone, and for some reason, I painted the headlight fillers black...
    Great writeup! This will be very helpful when I reaplace mine in the next week or so
     
  10. Feb 9, 2013 at 10:36 PM
    #10
    tan4x4

    tan4x4 Well-Known Member

    Joined:
    Nov 30, 2011
    Member:
    #67982
    Messages:
    3,807
    Gender:
    Male
    First Name:
    Rick
    Folsom, CA
    Vehicle:
    99 Tacoma EC 4x4 2.7L Auto
    Bilsteins, OME 881's, 3-leaf AAL, Detroit TruTrac, Tundra brake swap, Michelin LTX AT2, Tranny skidplate, TC skidplate, CBI rear bumper, TG sliders, UltraGauge, PowerTank, Reverse Camera
    Great write-up and photos.

    The only correction I would make is to change every reference to 'CARRIER bearing' to 'CENTER bearing'. Carrier bearings are in the differential. :eek:
     
    Jlab, HansWorldTravels and jackn7 like this.
  11. Feb 10, 2013 at 2:23 PM
    #11
    Sittingbull2

    Sittingbull2 Old N.R.A. Hippy

    Joined:
    Sep 24, 2012
    Member:
    #87633
    Messages:
    124
    Gender:
    Male
    First Name:
    Mitch
    Southeast texas
    Vehicle:
    2000 Xtra Cab SR5 White
    3" Body lift, ARB Front Bumper w/9000 lb. Warn Winch, Chevy Alum. Rims w/ Kelly 285's M/S
    I used a Timken brand bearing on mine. They are only $73.25 verses what others are. Timken has been making bearings for years. Great quality also.
    Just my .02 cents
     
  12. Feb 10, 2013 at 5:53 PM
    #12
    TacomaJPP

    TacomaJPP [OP] To secure peace, is to prepare for war

    Joined:
    Dec 5, 2010
    Member:
    #47218
    Messages:
    556
    Gender:
    Male
    East TN
    Vehicle:
    03 4WD TRD XTD Cab
    Snugtop Camper Brushguard
    So how did you make the whole assembly work?
     
  13. Feb 11, 2013 at 8:03 PM
    #13
    Sittingbull2

    Sittingbull2 Old N.R.A. Hippy

    Joined:
    Sep 24, 2012
    Member:
    #87633
    Messages:
    124
    Gender:
    Male
    First Name:
    Mitch
    Southeast texas
    Vehicle:
    2000 Xtra Cab SR5 White
    3" Body lift, ARB Front Bumper w/9000 lb. Warn Winch, Chevy Alum. Rims w/ Kelly 285's M/S
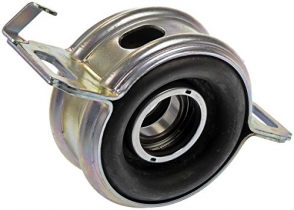
    It came all together It has the metal band with the tabs W/holes in it and rubber. Pop it out of the box and put it on. Of course you have to take off your other.
     
    Coolidge likes this.
  14. Feb 11, 2013 at 8:22 PM
    #14
    tacomakid96

    tacomakid96 Lions Not Sheep

    Joined:
    Jan 27, 2010
    Member:
    #30175
    Messages:
    4,067
    Gender:
    Male
    First Name:
    Phil
    Out n' about
    Vehicle:
    1996 Tacoma / 2000 4.7 Tundra TRD
    Nice writeup! Very helpfull
     
  15. Feb 19, 2013 at 8:56 AM
    #15
    NAVY_TRIPP

    NAVY_TRIPP Well-Known Member

    Joined:
    Oct 15, 2009
    Member:
    #24348
    Messages:
    45
    Gender:
    Male
    First Name:
    Luke
    Colorado
    Vehicle:
    '01 Tacoma DC
    6" Fabtech, Sway-A-Way 2.0's, 4.88's, Deck Plate, headers, 1'' shackles, AP extended lines, Warn M8000, ARE Tonneau
    Did you see/feel/hear a noticible difference after replacing? Great write-up by the way!
     
  16. Feb 19, 2013 at 5:43 PM
    #16
    TacomaJPP

    TacomaJPP [OP] To secure peace, is to prepare for war

    Joined:
    Dec 5, 2010
    Member:
    #47218
    Messages:
    556
    Gender:
    Male
    East TN
    Vehicle:
    03 4WD TRD XTD Cab
    Snugtop Camper Brushguard
    I did notice some difference in driveline vibration at "my" annoying 65 - 70 mph shake.
     
    Which Way Out likes this.
  17. Mar 10, 2013 at 6:05 PM
    #17
    jesus

    jesus Well-Known Member

    Joined:
    Oct 31, 2009
    Member:
    #25236
    Messages:
    944
    Gender:
    Male
    First Name:
    jesus
    bakersfield
    Vehicle:
    02
    K&N ram intake & doug exs.
    good job..."sub " I need to do this...lol
     
  18. Mar 21, 2013 at 9:24 PM
    #18
    boshak

    boshak Well-Known Member

    Joined:
    May 23, 2010
    Member:
    #37663
    Messages:
    750
    Gender:
    Male
    First Name:
    AG
    CA
    Vehicle:
    2003 Manual 4x4 5VZ-FE
    I have a 1/2" drive torque wrench. Is there an alternative to a crow foot adapter to torque the 8 bolts? Can't seem to find a 14mm in 1/2" drive.
     
    HansWorldTravels likes this.
  19. Mar 21, 2013 at 9:26 PM
    #19
    boshak

    boshak Well-Known Member

    Joined:
    May 23, 2010
    Member:
    #37663
    Messages:
    750
    Gender:
    Male
    First Name:
    AG
    CA
    Vehicle:
    2003 Manual 4x4 5VZ-FE
    Great write-up by the way... Thanks OP!
     
  20. Mar 22, 2013 at 6:12 PM
    #20
    TacomaJPP

    TacomaJPP [OP] To secure peace, is to prepare for war

    Joined:
    Dec 5, 2010
    Member:
    #47218
    Messages:
    556
    Gender:
    Male
    East TN
    Vehicle:
    03 4WD TRD XTD Cab
    Snugtop Camper Brushguard

Products Discussed in

To Top