1. Welcome to Tacoma World!

    You are currently viewing as a guest! To get full-access, you need to register for a FREE account.

    As a registered member, you’ll be able to:
    • Participate in all Tacoma discussion topics
    • Communicate privately with other Tacoma owners from around the world
    • Post your own photos in our Members Gallery
    • Access all special features of the site

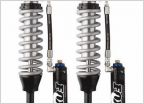
Icon Coilover Adjustment Info

Discussion in 'Suspension' started by UrbanWarrior, Dec 16, 2014.

  1. Dec 16, 2014 at 3:27 PM
    #1
    UrbanWarrior

    UrbanWarrior [OP] Well-Known Member

    Joined:
    Aug 24, 2012
    Member:
    #85414
    Messages:
    186
    Hey guys,

    So I've spent the last couple hours looking for information on adjusting my Icon Coilovers. I have found how to do it, but not much information about the best height to adjust them to. So I figured I would start this thread to see if someone can help me out.

    Also if you can post pictures and specs on your Icon lift and tire set up? (CO setting, Lift height, Tire size, Rear lift type).

    I figured this can help me and other members if they choose to go with the set up in the future.

    My current set up:
    -Icon Stage I (set at what they came from factory, I did adjust the drivers side to accommodate for the taco lean).
    -Coilovers are extended travel
    -Camburg Balljoint UCA
    -Wheelers O/R 1.5 progressive AAL
    -Duratracs 285-70-17

    My questions:
    -I removed my overload leaf as instructed. Now I sit a bit nose high. Should I add the overload leaf to get a bit of rake back? or should I adjust the CO down to bring the nose down?
    -What is going to be the best option for optimal travel and ride quality?

    I figured if I dial the coilovers down the ride would be even better since there is less tension on the coil.. is this correct? would this affect travel?
    I am also concern that if I dial the CO down I would have rubbing issues with my tires? I currently have no rubbing issues at all and no vibes. The ride is perfect just the bro lean.

    Thank you in advanced for your help!
     
    Last edited: Dec 17, 2014
  2. Dec 16, 2014 at 3:35 PM
    #2
    Mademan925

    Mademan925 Senor Taco

    Joined:
    Nov 7, 2012
    Member:
    #90668
    Messages:
    7,640
    Gender:
    Male
    First Name:
    Nick
    Discovery Bay, CA
    Vehicle:
    2014 4x4 TRD OFFROAD DCSB
    enough to go over stuff
    My first Icon setup was with the dakar leaf pack in the rear 2.75 in additional hight in the rear. I had my CO's with 13 inch 650 coils cranked down to 2 inches of preload on the drivers andf about 1.5 on the passinger. This was 3 inches of lift with the all pro plate bumper.

    When I added the relentless plate bumper, ifs skid, lca skids and Lights I lost height.

    I added a leaf in the rear for 3 inches of lift. Then got 14 inch 700 pound coils for the icons. I now have 1 inch of preload on the drivers and .85 on the passenger side for 3 inches of lift.

    When it comes to adjusting

    Spin the preload nut a couple times on each side. Drive it around the block. Measure hub to fender on flat ground and repeat untill desired hieght. It takes a few tries.

    Goodluck
     
  3. Dec 16, 2014 at 3:42 PM
    #3
    UrbanWarrior

    UrbanWarrior [OP] Well-Known Member

    Joined:
    Aug 24, 2012
    Member:
    #85414
    Messages:
    186
     
  4. Dec 16, 2014 at 3:43 PM
    #4
    Mademan925

    Mademan925 Senor Taco

    Joined:
    Nov 7, 2012
    Member:
    #90668
    Messages:
    7,640
    Gender:
    Male
    First Name:
    Nick
    Discovery Bay, CA
    Vehicle:
    2014 4x4 TRD OFFROAD DCSB
    enough to go over stuff
    Yep. I mean threads showing on top. Every truck is different so it is best just to start adjusting and pick a hieght you like.
     
  5. Dec 17, 2014 at 10:59 PM
    #5
    UrbanWarrior

    UrbanWarrior [OP] Well-Known Member

    Joined:
    Aug 24, 2012
    Member:
    #85414
    Messages:
    186
    Okay so I went back in there and put the overload leaf back in. Thanks to a local shop, Custom Trucks, I got a new pair of center pings since I had cut the other ones to short to fit with the OL.

    Left the coils at where they came from factory, with a couple turns to accommodate for the taco lean. I am super stoked with results. I haven't done measurements, but it looks like maybe .5" rake and it looks awesome. I took it around the block and I didn't notice the ride any different in the rear. I guess we will see. I hope this helps someone in my situation.

    Now I am just showing off my new grille :D
    [​IMG]
     
  6. Dec 18, 2014 at 7:57 AM
    #6
    Mademan925

    Mademan925 Senor Taco

    Joined:
    Nov 7, 2012
    Member:
    #90668
    Messages:
    7,640
    Gender:
    Male
    First Name:
    Nick
    Discovery Bay, CA
    Vehicle:
    2014 4x4 TRD OFFROAD DCSB
    enough to go over stuff
    Nice. Love the grill but it probably costs a pretty penny.
     
  7. Dec 18, 2014 at 9:45 AM
    #7
    UrbanWarrior

    UrbanWarrior [OP] Well-Known Member

    Joined:
    Aug 24, 2012
    Member:
    #85414
    Messages:
    186
    Thanks man, yeah I love it. It was definitely pricey for just being the insert, but I wouldn't say more than others. I was looking at the Rigid Induestires grille at first. That was $500 for just the insert and I had to buy the light bar which would be like $500 more. For a grille that I had to cut/modified to install it. There is something to be said about direct OEM replacement you know.

    Are you still running your Icons? What's the maintenence on this like?
     
  8. Dec 18, 2014 at 9:57 AM
    #8
    Mademan925

    Mademan925 Senor Taco

    Joined:
    Nov 7, 2012
    Member:
    #90668
    Messages:
    7,640
    Gender:
    Male
    First Name:
    Nick
    Discovery Bay, CA
    Vehicle:
    2014 4x4 TRD OFFROAD DCSB
    enough to go over stuff

    I havent done any maintenence yet but I do put a couple drops of dry lube on the uniballs on my Icon ucas once a month.

    I spent alot on my grill. I had a chrome one. I bought a new trd sport grill for 250 then bought the mesh insert for 200 and cut out the plasitc. Then I bought letters from bamf for 50 bucks but I think it turned out great.
     
  9. Dec 18, 2014 at 10:03 AM
    #9
    UrbanWarrior

    UrbanWarrior [OP] Well-Known Member

    Joined:
    Aug 24, 2012
    Member:
    #85414
    Messages:
    186
    Cool, I read a post on here about someone having bad luck with there Icons after only 4yrs and someone said it was probably due to poor maintenence. So I wasn't sure if I had to do anything special.

    Yeah your grille looks awesome! I considered doing the same thing, but I was afraid I would screw up with the cutting part and then I came across the PRO grille.

    Well thanks man for all your help! I'll post some pictures later to see what you think now that I have the height all figured out. Now I just have to get a realignment.
     
  10. Mar 1, 2015 at 4:14 PM
    #10
    TacoXtreme

    TacoXtreme North Georgia Member

    Joined:
    May 16, 2011
    Member:
    #56757
    Messages:
    285
    Gender:
    Male
    First Name:
    Adam
    Mt. Airy GA
    Vehicle:
    11 TRD TX DC.
    Bull Bar, Borla Exhaust, Pro Comp Emplorer 55's, Daystar 2 1/2" leveling kit, UWS Toolbox, Bed Extender, Anytime Fog Light mod.
    Thanks for starting this thread. I just installed my 2.5's and camburg uca's. To get it level with my rear set up, I have over 2" of thread showing on each side!! Front measures 24 1/4 " hub to fender. Rear measures same. Rear is tsb and wheelers 3 leaf aal. Spare tire removed also. Is this setup in front going to harm my cv axles?
     
  11. Mar 1, 2015 at 4:15 PM
    #11
    TacoXtreme

    TacoXtreme North Georgia Member

    Joined:
    May 16, 2011
    Member:
    #56757
    Messages:
    285
    Gender:
    Male
    First Name:
    Adam
    Mt. Airy GA
    Vehicle:
    11 TRD TX DC.
    Bull Bar, Borla Exhaust, Pro Comp Emplorer 55's, Daystar 2 1/2" leveling kit, UWS Toolbox, Bed Extender, Anytime Fog Light mod.
    2011 DC TX 4x4
     
  12. Mar 1, 2015 at 4:28 PM
    #12
    TacoXtreme

    TacoXtreme North Georgia Member

    Joined:
    May 16, 2011
    Member:
    #56757
    Messages:
    285
    Gender:
    Male
    First Name:
    Adam
    Mt. Airy GA
    Vehicle:
    11 TRD TX DC.
    Bull Bar, Borla Exhaust, Pro Comp Emplorer 55's, Daystar 2 1/2" leveling kit, UWS Toolbox, Bed Extender, Anytime Fog Light mod.
    Also the icons are non remote resi and no cdc
     
  13. Mar 24, 2015 at 12:21 PM
    #13
    epard

    epard Well-Known Member

    Joined:
    Feb 1, 2015
    Member:
    #147645
    Messages:
    53
    Gender:
    Male
    First Name:
    Ethan
    Ocala, Florida
    Vehicle:
    2012 DCLB TRD Sport 4x4
    Icon Stage 3 tubular UCA's
    :popcorn: sub'd Just got my icon stage 3... installing in the next week or two
     
  14. Mar 26, 2015 at 7:57 AM
    #14
    magnetic11

    magnetic11 Well-Known Member

    Joined:
    Feb 7, 2012
    Member:
    #72357
    Messages:
    976
    First Name:
    Matt
    "some nuke plant"
    Vehicle:
    11 trd sport
    Fab fours front and rear bumpers, B.A.M.F. weld on rock sliders, softopper, removed mud flaps and D-Badged everything. Icon 2.5 Extended Travel coil-overs, Total Chaos upppers, 2.0 Icon extended travel shocks with the resi's and Dekar Leaf packs.
    Sub'd. Ive got 2.5 extended travel (no resi's) in front with Total Chaos UCA's, I believe they have 650 coils on them. I've got 2.0 extended travel rear shocks (w/risi's) along with Dakar leafs. I've had a time adjusting them to stop the front tires from rubbing and still dont have the front up high enough. I'm running 255/75/17 Trail Grapplers.
     
  15. Mar 26, 2015 at 8:51 AM
    #15
    Westside

    Westside Southbound

    Joined:
    Jan 24, 2012
    Member:
    #71292
    Messages:
    5,328
    Gender:
    Male
    First Name:
    JT
    Nor Cal, East Bay
    Vehicle:
    TRD Sport 4X4
    I have a similar set up, just 285/70/17 My CO's are showing 1 3/4" of thread drivers side and 1 5/8 on passenger side. I had as much as 2" showing then backed them down to improve ride and still correct the lean. I dealt with rubbing by methodically trimming until I had the clearance that I needed. Be careful not to go beyond the 2" of thread showing rule. I still rubbed at that height and decided if I was faced with trimming I would get my preferred height set first and then trim.
     

Products Discussed in

To Top