1. Welcome to Tacoma World!

    You are currently viewing as a guest! To get full-access, you need to register for a FREE account.

    As a registered member, you’ll be able to:
    • Participate in all Tacoma discussion topics
    • Communicate privately with other Tacoma owners from around the world
    • Post your own photos in our Members Gallery
    • Access all special features of the site

.

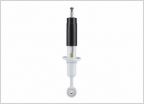
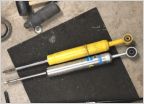
Discussion in 'Suspension' started by yotastaco, Jun 1, 2015.

  1. Jun 1, 2015 at 6:11 AM
    #1
    yotastaco

    yotastaco [OP] Well-Known Member

    Joined:
    May 25, 2014
    Member:
    #130552
    Messages:
    236
    Gender:
    Male
    NC
    Vehicle:
    2015 MGM TRD OR
    See Build
    a
     
    Last edited: Sep 26, 2015
  2. Jun 1, 2015 at 11:09 PM
    #2
    HiFire

    HiFire Well-Known Member

    Joined:
    Nov 28, 2013
    Member:
    #117508
    Messages:
    207
    Gender:
    Male
    First Name:
    Eric
    Hawaii
    Vehicle:
    SR5,4x4,DCSB,Auto
    Weathertech mats, BAMF sliders, US Offroad front winch bumper, RCI Alum. Skid plates, ICON suspension, Pelfreybilt rear bumper, JBA uca's, Allpro u-bolt flip,
    I'm spreading out my Icon install over a few days without issue. I would recommend the front struts first. You won't need a pickle fork for the front. I used a large hammer or sledge to break the joints loose. Next would be the rear shocks than springs. Make sure you have a good jack and sturdy jack stands. We want to keep you around for a while.
     
  3. Jun 1, 2015 at 11:12 PM
    #3
    NorthwestCruiser

    NorthwestCruiser Well-Known Member

    Joined:
    Nov 20, 2013
    Member:
    #117000
    Messages:
    13,081
    Gender:
    Male
    First Name:
    Brian
    Snohomish, WA
    Vehicle:
    1996 Land Cruiser
    Custom 3 link, 40's etc..
    Do the fronts first. Yes grease the zerks when installing. Also look up on YouTube, total chaos put up a perfect video on how to change out coil overs and uca's
     
  4. Jun 2, 2015 at 5:46 AM
    #4
    velillen

    velillen Well-Known Member

    Joined:
    Dec 14, 2013
    Member:
    #118589
    Messages:
    5,855
    Gender:
    Male
    First Name:
    Nick
    Wyoming
    Vehicle:
    2011 Access Cab 4x4
    Doesnt the stage 4 kit come with Icon UCA's? (Wheelers stage 4 kit shows they do) What Total Chaos parts are you installing that have zerks?

    But either way youll need a grease gun and some grease for the zerks on the UCA.

    As for breaking it up...

    -Rear shocks are super easy and should only take you ~20 minutes. Its literally two bolts. I would do them after the springs in case the springs slip or something. I removed springs and shocks then installed spring and then shock.

    - Rear leaf...can be a bit of a PIA. Helps to have a second pair of hands if you can. I think it took me about ~30 minutes per a side to do mine.

    The rear for me took ~2-3 hours as someone who had no experience doing this.

    For the front....

    -The shocks are pretty easy. I actually just changed mine out and it took ~1 hour (if that) to do both sides. Doing the UCA at the same time makes it a bit easier as you remove more stuff out of the way than just doing the shock.

    -The UCA's are were the most annoying part. Getting the UCA bolt out can be a pain. Youll have ot bend some metal a bit and just work it out the best you can.

    The front for me took ~5 hours. But again this was having no idea what i was doing and after doing the rear so a bit of fatigue might have set in.

    Once you get it all on (or a portion of it). Take it out for a ~5-10 mile drive to let everything "settle"


    Really for the install I'd rate it a 6 out of 10 for difficulty. Just cause you need to torque a lot of things and be somewhat careful. But for the most part its just unbolting things and then rebolting them. Tool wise its just sockets and wrenches. A nice rubber mallet was helpful to line things up. The arm puller was nice to have but a hammer would work too. Then just the standard jacks and jackstands. A headlamp can be nice to have too!
     
  5. Jun 10, 2015 at 4:15 PM
    #5
    velillen

    velillen Well-Known Member

    Joined:
    Dec 14, 2013
    Member:
    #118589
    Messages:
    5,855
    Gender:
    Male
    First Name:
    Nick
    Wyoming
    Vehicle:
    2011 Access Cab 4x4
    Youll be fine but will have a bit of a lean unless you are putting a good amount of weight in the bed. Theres plenty of people who do the rear first and then the front later
     
  6. Jun 10, 2015 at 6:25 PM
    #6
    NorthwestCruiser

    NorthwestCruiser Well-Known Member

    Joined:
    Nov 20, 2013
    Member:
    #117000
    Messages:
    13,081
    Gender:
    Male
    First Name:
    Brian
    Snohomish, WA
    Vehicle:
    1996 Land Cruiser
    Custom 3 link, 40's etc..
    You can easily do the install with one other person, I wouldn't by myself. Do it on a weekend in 2 seperate days, fronts first then rear next.
     
  7. Jun 10, 2015 at 6:25 PM
    #7
    NorthwestCruiser

    NorthwestCruiser Well-Known Member

    Joined:
    Nov 20, 2013
    Member:
    #117000
    Messages:
    13,081
    Gender:
    Male
    First Name:
    Brian
    Snohomish, WA
    Vehicle:
    1996 Land Cruiser
    Custom 3 link, 40's etc..
    As for Firestone I wouldn't ever take my truck to one. People around here said its spotty, depends on which location you go to and knowing my luck Id get the new guy at the good shop lol
     
  8. Jun 11, 2015 at 2:00 PM
    #8
    yotastaco

    yotastaco [OP] Well-Known Member

    Joined:
    May 25, 2014
    Member:
    #130552
    Messages:
    236
    Gender:
    Male
    NC
    Vehicle:
    2015 MGM TRD OR
    See Build
    A present arrived today.

    [​IMG]
     
    hossnugget likes this.
  9. Jun 11, 2015 at 2:07 PM
    #9
    Mademan925

    Mademan925 Senor Taco

    Joined:
    Nov 7, 2012
    Member:
    #90668
    Messages:
    7,633
    Gender:
    Male
    First Name:
    Nick
    Discovery Bay, CA
    Vehicle:
    2014 4x4 TRD OFFROAD DCSB
    enough to go over stuff
    Sick setup. I basically have the same setup but with the bamf relocation and 12" fox resis in the rear.
     
    hossnugget likes this.
  10. Jun 11, 2015 at 3:41 PM
    #10
    velillen

    velillen Well-Known Member

    Joined:
    Dec 14, 2013
    Member:
    #118589
    Messages:
    5,855
    Gender:
    Male
    First Name:
    Nick
    Wyoming
    Vehicle:
    2011 Access Cab 4x4
    Just a tip for the front superbumps....Youll have to cut the allen wrench to use it. Have to cut the "long end" by about an inch for it to fit.

    I havent seen the rear icons with the boots before


    oooo and now might be the perfect time for a ubolt flip kit :) Only be another 80 bucks or so
     
  11. Jun 11, 2015 at 3:50 PM
    #11
    NorthwestCruiser

    NorthwestCruiser Well-Known Member

    Joined:
    Nov 20, 2013
    Member:
    #117000
    Messages:
    13,081
    Gender:
    Male
    First Name:
    Brian
    Snohomish, WA
    Vehicle:
    1996 Land Cruiser
    Custom 3 link, 40's etc..
    Exactly, Relentless makes the best one IMO, get the 7 3/4" u bolts
     
  12. Jun 13, 2015 at 10:25 PM
    #12
    southernpanic

    southernpanic Well-Known Member

    Joined:
    Mar 23, 2015
    Member:
    #151638
    Messages:
    106
    Gender:
    Male
    ga.
    Vehicle:
    12 trd sport 4x4 dclb
    Pelfreybuilt,icon,camburg,allpro, method,Bushwacker,nfab,fox, Crown,toyo
    Nice setup, if you're doing it yourself. Get some new uca bolts. Passenger side is pretty hard to get off/on. If I did it over again I'd cut them off and install new one from the back to front.
     
  13. Jun 29, 2015 at 8:26 AM
    #13
    NorthwestCruiser

    NorthwestCruiser Well-Known Member

    Joined:
    Nov 20, 2013
    Member:
    #117000
    Messages:
    13,081
    Gender:
    Male
    First Name:
    Brian
    Snohomish, WA
    Vehicle:
    1996 Land Cruiser
    Custom 3 link, 40's etc..
    I've had take off vibes for a long time and just ignore them now.. Mainly when I'm at a stop sign and turn either way. Best way to get the bump stop off is probably do what you said
     
  14. Jul 2, 2015 at 7:57 PM
    #14
    Bsheriff11

    Bsheriff11 Remember Your ABC's. Always. Be. Casual.

    Joined:
    Apr 6, 2013
    Member:
    #101499
    Messages:
    5,363
    Gender:
    Male
    First Name:
    Brandon
    Virginia livin', South Carolina raised
    Vehicle:
    2000 Limited T4R
    Click My Sig Homie
    Driveline vibes are the worst. Take off shudder is the hardest thing to rid, mine happen at 6-9mph and that's the best I could tune it. I tried different degree axle shims-no shims, and a range of cb drops with those combinations and it's the best I could get it. Ended up with a 7/8" cb drop and 3 degree axle shims.
     

Products Discussed in

To Top