-
Welcome to Tacoma World!
You are currently viewing as a guest! To get full-access, you need to register for a FREE account.
As a registered member, you’ll be able to:- Participate in all Tacoma discussion topics
- Communicate privately with other Tacoma owners from around the world
- Post your own photos in our Members Gallery
- Access all special features of the site
 2017 Double Cab Long Bed Offroad Build
 PARKER315 Build
 Wife said buy a mini van
 The tRVck build: an overlanding rig with running water and electricity
 Bookiebob’s 3rd new Tacoma in 6 years. Introducing the 2021 Silver Sky edition
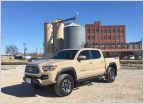 Watch Me Bolt Crap on to my Taco
Igc's BBP Build thread and trip log
Discussion in '3rd Gen. Builds (2016-2023)' started by igc, Dec 16, 2018.
Page 2 of 3
Page 2 of 3