1. Welcome to Tacoma World!

    You are currently viewing as a guest! To get full-access, you need to register for a FREE account.

    As a registered member, you’ll be able to:
    • Participate in all Tacoma discussion topics
    • Communicate privately with other Tacoma owners from around the world
    • Post your own photos in our Members Gallery
    • Access all special features of the site

Iggy's $1 Taco

Discussion in '2nd Gen. Builds (2005-2015)' started by Iggy, Mar 23, 2015.

  1. Jan 12, 2016 at 7:30 PM
    #261
    T4RFTMFW

    T4RFTMFW Well-Known Member

    Joined:
    Jul 23, 2014
    Member:
    #134525
    Messages:
    69,788
  2. Jan 12, 2016 at 8:43 PM
    #262
    ChandlerDOOM

    ChandlerDOOM International tent trafficker

    Joined:
    Nov 4, 2013
    Member:
    #115943
    Messages:
    3,838
    Gender:
    Male
    First Name:
    Chandler
    STL
    Vehicle:
    Truck
    37s yo
    Thats pretty smart, what did you use for the ring?
     
  3. Jan 12, 2016 at 9:06 PM
    #263
    CustomTacoma

    CustomTacoma Member

    Joined:
    Jan 2, 2016
    Member:
    #173829
    Messages:
    22
    Gender:
    Male
    First Name:
    Chad
    Vehicle:
    2015 Tacoma TRD
    3" Lift, ARB's and 4:56 gears front and rear, Allpro Off-road bumpers sliders, skid plates and Ubolt flip kit, 35" Maxxis tires, Trail Gear Creeper Locks, 8000lbs winch and lots of LED lights.
    And that is why I had to order your switch plate looks so clean, can't wait for it to arrive.
    And great build as well love it.
     
    Iggy[QUOTED][OP] likes this.
  4. Jan 13, 2016 at 8:21 AM
    #264
    Iggy

    Iggy [OP] Well-Known Member

    Joined:
    Feb 2, 2012
    Member:
    #71971
    Messages:
    4,016
    Gender:
    Male
    Northern CA
    Vehicle:
    09 4x4 Off-Road Access Cab
    Check out the build
    It's stainless 1.25" tube with .125" side walls. I welded a backing plate and then turned it down on my lathe. It was actually one of the spacers I prototyped for my battery trays I'm building. I experimented with stainless, but it's a pain to work with.
     
  5. Jan 13, 2016 at 1:42 PM
    #265
    CustomTacoma

    CustomTacoma Member

    Joined:
    Jan 2, 2016
    Member:
    #173829
    Messages:
    22
    Gender:
    Male
    First Name:
    Chad
    Vehicle:
    2015 Tacoma TRD
    3" Lift, ARB's and 4:56 gears front and rear, Allpro Off-road bumpers sliders, skid plates and Ubolt flip kit, 35" Maxxis tires, Trail Gear Creeper Locks, 8000lbs winch and lots of LED lights.
    Nope haven't seen any emails are you getting mine?
     
    Iggy[OP] likes this.
  6. Jan 14, 2016 at 2:14 PM
    #266
    tacomgee

    tacomgee just ain't care....

    Joined:
    Aug 5, 2014
    Member:
    #135522
    Messages:
    4,828
    Gender:
    Male
    First Name:
    Blake
    NorCal - Santa Rosa
    Vehicle:
    2015 Supercharged Taco
    Mostly whatever sweet stuff I can find at Vatozone
     
    T4RFTMFW and Iggy[OP] like this.
  7. Jan 23, 2016 at 11:44 AM
    #267
    Iggy

    Iggy [OP] Well-Known Member

    Joined:
    Feb 2, 2012
    Member:
    #71971
    Messages:
    4,016
    Gender:
    Male
    Northern CA
    Vehicle:
    09 4x4 Off-Road Access Cab
    Check out the build
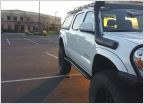
    Got back from SHOT to have this gem waiting for me. I went right ahead and installed it, so the engine bay and truck are super filthy.

    Over all it was really easy to install the snorkel, the instructions are easy to follow, but I'd figure pictures would explain it better.

    Remove your intake hose. It's easier to remove the entire thing with the filter box instead of just taking out the hose.

    Remove two bolts and the two latches and the whole thing comes out.
    IMG_6739.jpg

    IMG_6719.jpg

    Then you want to cut the part that sticks out into the fender area at the shoulder.
    IMG_6722.jpg

    The cutting template is taped on the inside of the box. Line it up with the top of the fender and the door jam.
    IMG_6717.jpg

    IMG_6716.jpg

    It should look like this.
    IMG_6715.jpg

    Then take a contrasting marker and trace all the cutouts on the template.
    IMG_6718.jpg

    Next get the small 4.5" hole saw and out out two holes where indicated.
    IMG_6723.jpg

    Then you have to cut along the top and bottom to remove the sharp centers. I used the same metal snips I used to cut my fenders.
    FullSizeRender.jpg

    IMG_6725.jpg

    Then drill out the rest of the holes. Used a step drill and only enlarged the holes as I needed. The instructions say 16mm but I thought those holes were too big. Once, it's all done, debur and clean up all holes. Paint.
    IMG_6726.jpg

    The rest is pretty simple but tedious. I first installed the hose that ties in the intake to the snorkel through the fender wall. The fit is pretty snug, so you want as much room as possible in the engine bay. Once it's through, feed it in as far as you can and put the hose clamp on.

    I then applied thin layer of Mobil1 synthetic grease on the plastic and the hose slipped right in.
    IMG_6728.jpg

    You need to do the same thing for the snorkel side. Put on hose clamp. Lightly grease plastic. Slip on.
    IMG_6727.jpg

    After that tighten the snorkel bolts and intake bolts and then hose clamps. Two of the snorkel bolts were in really tight spots and took some time to get on.

    I'm going to mount the pillar mount later. I don't like how they mount it using the plastic clips so I'm going to use rivet nuts that I can seal better.

    Here are some shots from the outside and inside of the truck.

    IMG_6731.jpg

    IMG_6732.jpg

    IMG_6734.jpg

    Some notes:

    The snorkel is a bit bigger than depicted in photos. Overall it's a good size, the width of it is maybe a bit more than I anticipated.
    The pillar mount uses bolts now instead of rivets, but you use some plastic retaining clips and self tapping screws. I don't see how that keeps water out of the A pillar so I'm going to use rivet just in stainless.
     
    T4RFTMFW, Acerwin and Nate87 like this.
  8. Jan 23, 2016 at 12:17 PM
    #268
    Nate87

    Nate87 Well-Known Member

    Joined:
    May 7, 2013
    Member:
    #103748
    Messages:
    751
    Gender:
    Male
    First Name:
    Nate
    CONUS
    Vehicle:
    2013 AC TRD OR
    That thing DOES look huge! Good job on the install. Let us know if you notice any difference in MPG's. And were there any instructions to seal up some of the drainage holes in the intake near the filter? When I did mine it said to epoxy/seal them so it's completely sealed shut.
     
  9. Jan 23, 2016 at 12:26 PM
    #269
    Iggy

    Iggy [OP] Well-Known Member

    Joined:
    Feb 2, 2012
    Member:
    #71971
    Messages:
    4,016
    Gender:
    Male
    Northern CA
    Vehicle:
    09 4x4 Off-Road Access Cab
    Check out the build
    The instructions do ask to seal a few holes. I didn't right now, because I wanted to see how it did in the rain. If it does a good job at collecting water I want to make sure it's got some place to go. I'll probably seal with RV black silicon in case I want to unplug them.

    I'll keep track on the next fill up and see how it does! So far I can't really tell it's there. The engine doesn't seem to struggle at all.
     
  10. Jan 23, 2016 at 1:10 PM
    #270
    ChandlerDOOM

    ChandlerDOOM International tent trafficker

    Joined:
    Nov 4, 2013
    Member:
    #115943
    Messages:
    3,838
    Gender:
    Male
    First Name:
    Chandler
    STL
    Vehicle:
    Truck
    37s yo
    Snorkel looks good, I really like how they tie the snorkel to the intake with that boot vs the jank airflow plumbing. As for the A pillar I used a heavy duty (15lb 3m I believe) double sided padded tape. It does a pretty good job plus its reversible :thumbsup:
     
    Pirhett and Iggy[OP] like this.
  11. Jan 23, 2016 at 1:12 PM
    #271
    Iggy

    Iggy [OP] Well-Known Member

    Joined:
    Feb 2, 2012
    Member:
    #71971
    Messages:
    4,016
    Gender:
    Male
    Northern CA
    Vehicle:
    09 4x4 Off-Road Access Cab
    Check out the build
    I like that idea!
     
  12. Jan 23, 2016 at 1:15 PM
    #272
    ChandlerDOOM

    ChandlerDOOM International tent trafficker

    Joined:
    Nov 4, 2013
    Member:
    #115943
    Messages:
    3,838
    Gender:
    Male
    First Name:
    Chandler
    STL
    Vehicle:
    Truck
    37s yo
    Yeah I wasn't keen on drilling into a piece I can't replace/ fix myself if I ever decide to lose the snorkel, It holds up to 80mph with heavy wind just fine, most of the support is in the fender anyways
     
    Iggy[QUOTED][OP] likes this.
  13. Jan 24, 2016 at 12:37 PM
    #273
    Iggy

    Iggy [OP] Well-Known Member

    Joined:
    Feb 2, 2012
    Member:
    #71971
    Messages:
    4,016
    Gender:
    Male
    Northern CA
    Vehicle:
    09 4x4 Off-Road Access Cab
    Check out the build
    Soon...

    image.jpg
     
  14. Jan 24, 2016 at 1:09 PM
    #274
    ChandlerDOOM

    ChandlerDOOM International tent trafficker

    Joined:
    Nov 4, 2013
    Member:
    #115943
    Messages:
    3,838
    Gender:
    Male
    First Name:
    Chandler
    STL
    Vehicle:
    Truck
    37s yo
    More cutting or making a pair of flares?
     
    Acerwin likes this.
  15. Jan 24, 2016 at 1:53 PM
    #275
    Acerwin

    Acerwin The unNORM NORM

    Joined:
    Nov 20, 2014
    Member:
    #142732
    Messages:
    32,623
    Gender:
    Male
    First Name:
    Andrew
    South Carolina
    Vehicle:
    Toyota Tundra
    Wondering the same
     
  16. Jan 24, 2016 at 2:02 PM
    #276
    Iggy

    Iggy [OP] Well-Known Member

    Joined:
    Feb 2, 2012
    Member:
    #71971
    Messages:
    4,016
    Gender:
    Male
    Northern CA
    Vehicle:
    09 4x4 Off-Road Access Cab
    Check out the build
    Making some flares. Mocking them out of cardboard.

    Progress. image.jpg
     
  17. Jan 24, 2016 at 11:56 PM
    #277
    Nate87

    Nate87 Well-Known Member

    Joined:
    May 7, 2013
    Member:
    #103748
    Messages:
    751
    Gender:
    Male
    First Name:
    Nate
    CONUS
    Vehicle:
    2013 AC TRD OR
    NICE!! I've been thinking about doing something similar!
     
    Iggy[QUOTED][OP] likes this.
  18. Jan 25, 2016 at 12:09 AM
    #278
    Iggy

    Iggy [OP] Well-Known Member

    Joined:
    Feb 2, 2012
    Member:
    #71971
    Messages:
    4,016
    Gender:
    Male
    Northern CA
    Vehicle:
    09 4x4 Off-Road Access Cab
    Check out the build
    I hope they turn out ok. I'm going to use 1/8" ABS and I hope I can mold it with a heat gun.
     
  19. Jan 25, 2016 at 12:13 AM
    #279
    Nate87

    Nate87 Well-Known Member

    Joined:
    May 7, 2013
    Member:
    #103748
    Messages:
    751
    Gender:
    Male
    First Name:
    Nate
    CONUS
    Vehicle:
    2013 AC TRD OR
    That's EXACTLY what I had planned too. I was thinking either that or Kydex. But I think ABS is cheaper
     
  20. Jan 25, 2016 at 12:15 AM
    #280
    Nate87

    Nate87 Well-Known Member

    Joined:
    May 7, 2013
    Member:
    #103748
    Messages:
    751
    Gender:
    Male
    First Name:
    Nate
    CONUS
    Vehicle:
    2013 AC TRD OR
    I wanted to extend them out like you have for splashing and all that jazz. Have them taper out from the front and taper in at the bottom/rear then if I wanted to get brave consider adding material on the flare itself to bolster it outwards to look more finished.
     

Products Discussed in

To Top