

-
Welcome to Tacoma World!
You are currently viewing as a guest! To get full-access, you need to register for a FREE account.
As a registered member, you’ll be able to:- Participate in all Tacoma discussion topics
- Communicate privately with other Tacoma owners from around the world
- Post your own photos in our Members Gallery
- Access all special features of the site
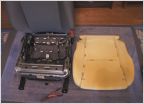 How much does is cost to replace the driver's side seat cushion?
 2016+ steering wheel controls swap.
 Best Quality Step Bars..
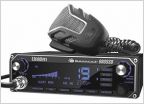 Triple Din Stereo? (Factory Double din head unit + CB Radio)
Illuminated Ignition Ring Mod
Discussion in '2nd Gen. Tacomas (2005-2015)' started by JdevTac, Feb 9, 2015.
Page 18 of 20
Page 18 of 20


