1. Welcome to Tacoma World!

    You are currently viewing as a guest! To get full-access, you need to register for a FREE account.

    As a registered member, you’ll be able to:
    • Participate in all Tacoma discussion topics
    • Communicate privately with other Tacoma owners from around the world
    • Post your own photos in our Members Gallery
    • Access all special features of the site

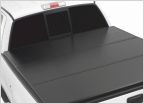
INSTALL: Access Limited Tonneau Cover (25189)

Discussion in 'Tonneau Covers, Caps and Shells' started by blacksheep515, Jul 29, 2012.

  1. Jul 29, 2012 at 9:32 PM
    #1
    blacksheep515

    blacksheep515 [OP] Active Member

    Joined:
    Jun 28, 2012
    Member:
    #81522
    Messages:
    34
    Gender:
    Male
    Today, in addition to installing my Amp Research Bed Extender HD, I also installed my Access Limited Tonneau cover. I decided to document and post it up here as well so that it may help someone else in the future.

    Step 1: Unpack the box. It comes in a long odd box, but is well-packed. You will find 2 side bars, a bag of hardware, 2 weatherstrip kits and the tonneau cover, of course. Don't go crazy using a box cutter on the box! You could risk cutting the top. Just cut the straps of and the box will open up.

    [​IMG]

    [​IMG]

    Step 2: Remove the factory channels on the driver and passengers side using a Torx T-30 bit. Pop off the plastic covers on the channels as there are 2 bolts (one on front and one on the back) on each rail hidden. They come off easily using a flathead screwdriver and pulling on them to pop it off. This is what it looks like with the channels off

    [​IMG]

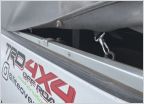
    Step 3: You have to assemble the Access tonneau cover side rails. From the back looking at the sides, the access rails are sandwiched between the factory channels and the bed sides.

    Also, side the bed sides contour or taper front to back, Access provides plastic spacers and extended 4mm allen bolts.

    The plastic spacer rests between the bed sides and the access side rail.

    Lastly, the order of the bolt setup is as follows:

    The bolt, followed by the washer which then passes thru the channel and the access rail thru the spacer and into the hole on the bed sides. I know this sounds confusing, but look at the pictures below and you will see what I mean, hopefully.

    [​IMG]

    [​IMG]

    Here is the picture of the driver and passenger side Access rails all installed...

    [​IMG]

    [​IMG]

    Step 4: Clean off the front lip of the bed. You will need to apply one of the weatherstripping kits provided. Its the thinner of the two. I cleaned it using a soapy water spray. Then, I used the alcohol pack provided to wipe it down. Start with peeling off a little of the double-sided tape and peel it off as you go across. End result will be something like this...

    [​IMG]

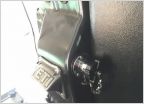
    Step 5: Now comes the tricky part of installing the front of the tonneau cover. Provided are two adjusters (marked L and R). These control the tension of the cover front to back.

    It's a funny-shaped piece. It has a plastic wing which is marked L and R and they have a hole which lines up on a hole on each side rail. Attached to it is an threaded adjustment bolt with a knob ended by a bracket that slides into the front underside of the tonneau cover and bolts into it. Nuts, bolts and washers are provided for it all.

    Just remember the long bolt and washer goes into the front part under the tonneau cover while the short bolt, nut and washer is used on the side specific wings.

    The pictures below shows the wing slid under the side rails and lined up to the holes on each side. Hope it makes sense now as to what I was trying to describe.

    [​IMG]

    [​IMG]

    Step 6: In the step above, do not bolt it all down. First, loosely install the bolt with washer thru the nut in the underside of the front bar of the tonneau cover. If you tighten it, you won't be able to slide the over from side to side and you have to center it at a later on step.

    Then, put a bolt with washer thru the top of the side wing and then thread the nut on from underneath. This will a PITA for a bit to get the bolt to pass thru completely. You will have to move tonneau cover/front bar from side to side and front to back if needed.DON'T MESS WITH THE KNOB.

    Tighten this up fully.

    Step 7: You need to center the cover/front rail on the bed. This was fairly easy to do since I did not tighten the front bar bolt underneath on each side. Once it is centered, tighten the bolt. 14mm socket and ratcheting wrench is what I used on side rails and 14mm long on the front. Tighten both sides too, I almost forgot in my excitement to put cover on.

    The picture below shows the bolt on the front rail and bolt/nut setup on the side rail.

    [​IMG]

    Step 8: The Access Limited also comes with a tailgate seal which goes between the bed bottom and tailgate. This is the larger weatherstrip kit provided. Again, clean it off using soapy water and then alcohol. Cut the strip to size and install similar to the front seal. I let it overlap on both sides and went about an inch over instead of 1/2 inch like the instruction stated. I went completely from end to end.

    [​IMG]

    [​IMG]

    [​IMG]

    Step 9: Roll the cover back and see how loose or taut it is when it locks in. If loose, roll it back up and tighten the adjustment knob and you will see the cover moving backwards (towards front of the truck). Do both sides with the same # of turns to ensure its on tight. When locked in, it should be tight and taut - sound like when tapping on a snare drum.

    That's it - You are done. Enjoy your new Access Limited Tonneau cover. I really am impressed with the fit and finish. I had no issues whatsoever during the install .

    Here are some pictures of the final product

    [​IMG]

    [​IMG]

    [​IMG]


    Hope this helps. If you need assistance with your install, just holler - I will be glad to help any way I can. :D
     
  2. Jul 30, 2012 at 5:34 AM
    #2
    TruckXL

    TruckXL New Member

    Joined:
    Aug 9, 2011
    Member:
    #61424
    Messages:
    4
    Gender:
    Male
    Nice write-up! Did you happen to do the same for the Amp Bed Extender? Would love to hear what you think about it as well!
     
  3. Jul 30, 2012 at 7:51 PM
    #3
    blacksheep515

    blacksheep515 [OP] Active Member

    Joined:
    Jun 28, 2012
    Member:
    #81522
    Messages:
    34
    Gender:
    Male
    Yes, I sent you a link.

    If you want me to do an install of something, let me know. I can be your write-up guy :)
     
  4. Aug 22, 2012 at 8:01 AM
    #4
    Roobs

    Roobs New Member

    Joined:
    Jul 22, 2012
    Member:
    #83165
    Messages:
    4
    Gender:
    Male
    First Name:
    Rob
    Atlanta, GA
    Vehicle:
    08 TRD Sport, Super White
    Great write up blacksheep! Really appreciate the detail. I'm about to buy both the Access Limited (2008 TRD Off Road 5 ft bed) and Amp Bed Extender. Been talking with a guy at Truckaddons.com about compatibility of the two accessories together and he raised the concern that the Access Limited's bed rails and factory slide rails would cause a problem with the Amp extender clearing on each side when flipping it up into the bed.

    1. Does your Amp extender clear the rails with the stock (not quick release) brackets provided, or did you have to space the brackets in a little and narrow the bed extender?

    2. Did you install using the stock brackets or the quick release brackets?

    3. Since you mentioned the Amp extender "HD" model, is that the new one that looks a lot like the Amp "Moto" model where they effectively cut of the corners of the bed extender a bit? Not sure why in the world Amp did this as it reduces the effective total bed length. It looks like the Amp extender that Toyota sells as OEM is the old model, but too expensive so I'm going with the new (albeit ridiculous) model.

    Thanks again for the writeup!
     
  5. Aug 22, 2012 at 9:11 AM
    #5
    TacoCat

    TacoCat These pretzels are making me thirsty

    Joined:
    Oct 26, 2009
    Member:
    #24912
    Messages:
    8,222
    Gender:
    Male
    First Name:
    Johnny-5
    Chantilly, VA
    Vehicle:
    25 Crosstrek Premium CVT (first ever automatic!)
    IIRC truckalterations has the cheapest prices on the access tonneaus. He has a special webpage for toyota pricing. Quick shipping too. Im on my phone and cant search but the site is floating around out there.

    I dont know about the aftermarket bed extender but my oem one fits just fine. It rubs on the rails just a tiny bit when flipping but not enough to even scrape the paint off.
    I love my access limited but have noticed that the new bolts provided for the rails are rusting, even with them covered by the tonneau 90% of the time. Not a big deal, just an observation.
     
  6. Aug 22, 2012 at 9:50 AM
    #6
    Roobs

    Roobs New Member

    Joined:
    Jul 22, 2012
    Member:
    #83165
    Messages:
    4
    Gender:
    Male
    First Name:
    Rob
    Atlanta, GA
    Vehicle:
    08 TRD Sport, Super White
    Thanks joneill

    I'm assuming this is the link, which at $385 is the lowest I've seen quoted online. http://www.truckalterations.com/html/tacomaworld.html

    I called Scott Nauman at Truckaddons.com and he quoted me $350 shipping included! Amazing price, didn't even haggle. The AMP HD is only $189 and quick release brackets are $18. His number is 800-388-8637 x1167 in case anyone else is interested. He's a nice guy and pretty active poster on this forum.

    I can't seem to find a difference between the OEM (which is an Amp product if I'm not mistaken) and the current AMP HD model out there other than the redesign of the shape. Good to know the OEM clears, if just barely. I'll probably just add a washer or two to narrow the overall width if it comes to that. If you say the bolts are rusting I may prime/paint them as well as the washers.

    I hope blacksheep responds with his specific AMP extender model. Once I put it all together I'll post again with the install and any required modifications. With these two products being best in class for the Taco, I'm sure others have this very same question.
     
  7. Aug 25, 2012 at 5:35 PM
    #7
    GatorQ

    GatorQ Member

    Joined:
    Jul 24, 2012
    Member:
    #83292
    Messages:
    15
    Gender:
    Male
    First Name:
    Erik
    Rochester, NY
    Vehicle:
    12 TRD Sport, DCSB, AT, 4x4, Nautical Blue
    JBL Entune, TRD Exhaust, Skid Plate, DRLs, Tow Package. Seat heaters w/ Toyota OEM rotary switches, Access LE Tonneau, OEM Chrome Grille Surround Future Mods: WeatherTechs & Locking Tailgate.
    Thanks Blacksheep!

    Just finished installing my Access Limited Tonneau and your write up definitely helped!

    Only took me about 50 minutes (and two trips to Lowe's earlier today to get the right sized Torx bit) D'oh!

    Thanks again!

    Tonneau Open.jpg
    Tonneau Closed.jpg
     
  8. Oct 4, 2014 at 11:13 AM
    #8
    tgriff

    tgriff Well-Known Member

    Joined:
    Jul 27, 2014
    Member:
    #134791
    Messages:
    525
    Gender:
    Male
    First Name:
    Tim
    CT
    Vehicle:
    2014 TRD Sport 4x4 Black DCLB
    8.5" x 17" Fuel Hostage black wheels P265/65/R17 Toyo Open Country AT II tires Rigid Industries Dually LED pods on back bumper (Diffused pattern) Rigid Industries 10" SR2 amber LED light bar behind grille (Driving pattern) - Custom mount Magnaflow 18" performance muffler Magnaflow 4" resonator exhaust tip - Welded on 3M 35% tint on front windows Access Limited roll-up tonneau cover Uniden Bearcat 880 CB radio 4' Firestik Firefly CB antenna on Relentless Fab hood mount AVS vent visors Lamin-X amber fog light covers ND4's fog light anytime mod Ultragauge MX 1.3 mounted on dash - Custom mount Weathertech floor liners front & rear Access LED battery-powered bed light CravenSpeed stubby antenna OEM Bed Mat Bosch Icon windshield wipers Plasti-dipped front emblem Debadged TRD Sport bedside decals removed Mud flaps removed
    Thanks for posting this, I will be installing my access limited on Monday and I will probably rely on this thread for doing it since I heard that the instructions that come with it are not very helpful. I can't see any of the pictures though, anybody else having this problem or is it just something on my end (computer/browser)? OP any chance you can send me the pictures in this thread? I would really appreciate it and would probably make my install alot easier. Thanks and great post!
     

Products Discussed in

To Top