1. Welcome to Tacoma World!

    You are currently viewing as a guest! To get full-access, you need to register for a FREE account.

    As a registered member, you’ll be able to:
    • Participate in all Tacoma discussion topics
    • Communicate privately with other Tacoma owners from around the world
    • Post your own photos in our Members Gallery
    • Access all special features of the site

Install Tips - BA4x4 Revo Rock Sliders

Discussion in '3rd Gen. Tacomas (2016-2023)' started by Taco_bro, Jan 15, 2023.

  1. Feb 12, 2024 at 8:35 AM
    #61
    YE2KA

    YE2KA Well-Known Member

    Joined:
    Jan 19, 2020
    Member:
    #316550
    Messages:
    606
    Gender:
    Male
    First Name:
    JB
    Vehicle:
    19 Cement Grey Tacoma Offroad
    I just used some of the protective rubber trim the sliders got shipped with
     
  2. Feb 13, 2024 at 8:29 AM
    #62
    NE-Taco66

    NE-Taco66 Well-Known Member

    Joined:
    Apr 12, 2021
    Member:
    #362433
    Messages:
    206
    Gender:
    Male
    Vehicle:
    2023 TRD OR DCSB MGM
    Yeah I used those for the brake lines
     
  3. Feb 13, 2024 at 8:36 AM
    #63
    YE2KA

    YE2KA Well-Known Member

    Joined:
    Jan 19, 2020
    Member:
    #316550
    Messages:
    606
    Gender:
    Male
    First Name:
    JB
    Vehicle:
    19 Cement Grey Tacoma Offroad
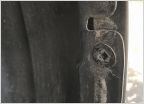
    This is how the rear bolt looks on mine20240212_144413.jpg
     
  4. Feb 13, 2024 at 8:55 AM
    #64
    NE-Taco66

    NE-Taco66 Well-Known Member

    Joined:
    Apr 12, 2021
    Member:
    #362433
    Messages:
    206
    Gender:
    Male
    Vehicle:
    2023 TRD OR DCSB MGM
    Ahh okay, that actually looks to be the best way to do it. I'll probably go add that in when I get a chance
     
  5. Feb 23, 2024 at 11:40 AM
    #65
    NE-Taco66

    NE-Taco66 Well-Known Member

    Joined:
    Apr 12, 2021
    Member:
    #362433
    Messages:
    206
    Gender:
    Male
    Vehicle:
    2023 TRD OR DCSB MGM
    Wanted to also add this information for anyone who may be looking to purchase these. The Step Sliders weigh 55lbs each. I couldn't find this information anywhere online so I took it upon myself before installing.

    IMG_6416.jpg
     
    GrizzNWA likes this.
  6. Apr 22, 2024 at 9:21 AM
    #66
    MWS

    MWS Member

    Joined:
    Feb 12, 2024
    Member:
    #443675
    Messages:
    12
    Gender:
    Male
    First Name:
    mark
    Vehicle:
    TRD Sport 2022
    Thank you for posting this, it made it a lot easier. Love these sliders btw. IMG_3519.jpg
     
  7. May 19, 2024 at 9:19 AM
    #67
    BadArchitect

    BadArchitect New Member

    Joined:
    Mar 22, 2024
    Member:
    #446395
    Messages:
    2
    Gender:
    Male
    Vehicle:
    23' Black TRD Pro Tacoma
    Thanks for all the helpful advice, yall!

    I installed these yesterday and without my girlfriend helping, this would’ve been much harder. She helped a lot by interpreting this forum, the horrible Extreme Terrain Toyota How-To video, and the printed instructions. Also, when getting the Long Handle Nut Plate into the driver’s side frame. My hands and wrist were having a real hard time at adjacent break lines. I do want to note a few things…

    1.) The online instructions have color photos, which are more helpful.
    2.) Passenger side first! We staged the up the slider install with jack stand. We used cardboard creeps, and the jack stands were slid around incrementally on a large cardboard opened box, to get things lined up perfectly.

    upload_2024-5-19_11-45-42.jpg

    3.) Make sure you prep step 7 in the instructions prior to step 4. To clarify, put the Center Nut Plate in the front crossmember BEFORE reattaching the 14mm Bolt by the driveshaft center supporting bracket. Otherwise, with the slider on, you there is not enough space to put in the Center Nut Plate with the slider already on.
    4.) As a follow up to the previous tip, the first bolts attached to the frame with the sliders in position using the jackstands, should be the (step 4) 14mm AND the (step 7) Center Nut Plate and Bolt (with washers) wrapping around under the frontmost crossmember.
    5.) For my install, I only needed to use the spacers at the L-Nut Plate and not the S-Nut Plate.
    6.) Thanks to the previous posts for advice on protecting breaklines, cables, and tubing! I followed the breakline recommendations with zip-ties. I didn’t have the best sizes available to protect the cabling, but here’s a photo of what I ended up doing. (Note that I only had to remove 1 clip at this cabling, not 2) Sorry, for the black goo in my photos, immediately after install, I sprayed NHOU on everything.

    upload_2024-5-19_12-0-9.jpg

    7.) When tightening and torquing everything down, I used the FT-Lbs typical for Grade 8 Zinc coated M12 Bolts! I forgot what my GF set the torque wrench at, but you can Google this. This is the type of metal used on these parts. Tighten and torque the sliders on with a jack lift. I used a hi-lift jack holding the slider at the rear with chock blocks at the wheels. Rear outside bolts first. Front underside bolts last. You want to do the outside bolts first because they pull the sliders to the frames, taking advantage of the slotted holes in the slider plates.
    8.) When reattaching the driver’s side conduit box, I was weary it would crack because it was mounting against one of the slider mounting points. Therefore, one of the slider bolts was hitting the middle of the electrical box housing (the hidden side, against the frame). I added spacers here. The spacers provided were too big for the electrical box mounting bolts, so I had to find a pair about half the depth.
    9.) Lastly, after the install. After spraying with NHOU at corners and connections, I sprayed chipped/scratched areas with POR 15 Topcoat to protect from rust.

    All in all, really happy about how this came out! Thanks, Carson from Thrashed Off-Road! Really happy about this purchase and experience!

    upload_2024-5-19_12-15-59.jpg
     
  8. May 19, 2024 at 6:41 PM
    #68
    NE-Taco66

    NE-Taco66 Well-Known Member

    Joined:
    Apr 12, 2021
    Member:
    #362433
    Messages:
    206
    Gender:
    Male
    Vehicle:
    2023 TRD OR DCSB MGM
    Looks good man, well done.
     
  9. Apr 26, 2025 at 9:15 AM
    #69
    manilaboy1vic

    manilaboy1vic Member

    Joined:
    Aug 22, 2024
    Member:
    #455661
    Messages:
    15
    Gender:
    Male

    That L bracket space makes sense.. Me and my buddy are like what a ghetto design when installing these :) I just used my 1 left over space for 1 of my L brackets.

    I used two spacers up front b/c it seems like the bolt would hit inside that cross member, and a spacer for the module drivers side for room to get the module back on..

    BA Pdf I downloaded from their site makes no mention of where to use the spacers.
     

Products Discussed in

To Top