

-
Welcome to Tacoma World!
You are currently viewing as a guest! To get full-access, you need to register for a FREE account.
As a registered member, you’ll be able to:- Participate in all Tacoma discussion topics
- Communicate privately with other Tacoma owners from around the world
- Post your own photos in our Members Gallery
- Access all special features of the site
 Best edge trim?
 Can I Put 17" Tires/Wheels on My 2012 4x4 Base?
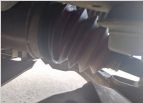 CV boot ripped.
 Low idle
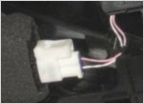 Where to find this pigtail for turn signal mirror?
Installed 30" Light Bar in lower bumper
Discussion in '2nd Gen. Tacomas (2005-2015)' started by norcalz7, Jun 14, 2013.


