

-
Welcome to Tacoma World!
You are currently viewing as a guest! To get full-access, you need to register for a FREE account.
As a registered member, you’ll be able to:- Participate in all Tacoma discussion topics
- Communicate privately with other Tacoma owners from around the world
- Post your own photos in our Members Gallery
- Access all special features of the site
 Spark plugs v6
 Top end maint. replace/clean injectors? gaskets? sensors? hoses? what else?
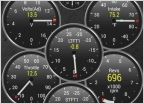 Bluetooth obd2
 Baldwin oil filter VS Toyota
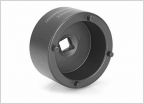 Tool Recommendations for Wheel bearing Replacement
 01-04 Fender Flared Pads
Is It Easier To Remove Lower Ball Joints To Replace Front Shocks?
Discussion in '1st Gen. Tacomas (1995-2004)' started by skeezix, Oct 28, 2017.
Page 1 of 2
Page 1 of 2


