1. Welcome to Tacoma World!

    You are currently viewing as a guest! To get full-access, you need to register for a FREE account.

    As a registered member, you’ll be able to:
    • Participate in all Tacoma discussion topics
    • Communicate privately with other Tacoma owners from around the world
    • Post your own photos in our Members Gallery
    • Access all special features of the site

JLee50's daily driver, weekend toy build thread

Discussion in '1st Gen. Builds (1995-2004)' started by JLee50, Dec 6, 2013.

  1. Dec 6, 2013 at 2:40 PM
    #1
    JLee50

    JLee50 [OP] Well-Known Member

    Joined:
    Nov 20, 2013
    Member:
    #116986
    Messages:
    391
    Gender:
    Male
    Phoenix
    Vehicle:
    Stockish 99 4x4 TRD
    ToyTec coilovers
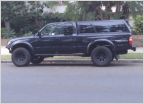
    Now that I'm almost finished with my MR2, it's time to start on the truck. I've seen some incredibly organized build threads here, so I am hoping to do the same to aid in keeping track of everything that's been done, everything I want to do, and also for ideas from others for something I may be missing.

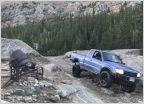
    The goal is to retain daily driver and truck utility abilities (i.e. not losing substantial bed space or any towing ability) while adding casual offroad ability. The planned rear suspension should result in spring-limited bump and droop travel without requiring bumpstops or straps.

    Purchased in spring-ish of 2012 with ~263k:

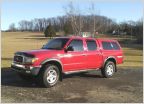
    1999 Toyota Tacoma 4x4 V6 TRD
    5 speed w/e-locker

    I replaced upper/lower ball joints, inner/outer tie rod ends, and (poly) steering rack bushings. Replaced worn/mismatched tires with 31x10.50 Falken Rocky Mountain ATS.

    ToyTec coilovers: Installed by previous owner
    Front spacers: Installed by previous owner; removed

    2013: Replaced alternator, starter, front e-brake cable, and clutch/brake pedal covers. I've also removed the spring on the clutch pedal, since it had ripped itself out of the mounting tabs.

    We are at 274k now.

    The done list:
    12-21-13: Extended rear brake line
    12-21-13: Add a stronger return spring on the parking brake
    12-17-13: OME Dakar leaf springs and OME Nitrocharger Sport shocks

    The to do list:
    Grey wire mod
    Remove lower rear spare tire mount
    Replace throttle position sensor (intermittent CEL)
    Crossmember for upper shock mounts
    Reloate upper and lower shock mounts
    U-bolt flip kit
    Replace valve cover gaskets
    Blinker relocation
    Diagnose/fix clutch pedal squeak
    Disassemble/reassemble rear brakes to diagnose/fix occasional sticking

    The want list, prioritized-ish:
    New head unit / speakers (I have Infinity Kappa components waiting in a box)
    Maybe sub/amp (have sub and a 4+1 amp - but I may just get a little mono amp)
    Front tube bumper / skidplate
    Winch
    Sliders
    Rear tube bumper
    New seats (have 4Runner seats but they're old and shitty)
    20" LED bar on bumper
    Tundra brakes
    255/85/16 or 285/75/16 tires (now thinking about 315/75/16) (need wheels as well)
    Icon extended travel coilovers with UCA's
    GT30/GT35 turbocharger (CX Racing has manifolds/crossover/downpipe) - this'll happen when I have a spare spare vehicle and/or a replacement motor waiting to drop in. Will require replacing fuel pump, injectors, clutch, and deciding on OBDII-compliant engine management (AEM FIC, Megasquirt running parallel, etc).
     
    Last edited: Dec 23, 2013
  2. Dec 6, 2013 at 5:36 PM
    #2
    JLee50

    JLee50 [OP] Well-Known Member

    Joined:
    Nov 20, 2013
    Member:
    #116986
    Messages:
    391
    Gender:
    Male
    Phoenix
    Vehicle:
    Stockish 99 4x4 TRD
    ToyTec coilovers
  3. Dec 6, 2013 at 7:24 PM
    #3
    zacksblacktaco

    zacksblacktaco Well-Known Member

    Joined:
    Oct 17, 2011
    Member:
    #65378
    Messages:
    549
    Gender:
    Male
    west virginia
    Vehicle:
    06 trd sport access
    AEM CAI Throttle body spacer Borla cat back exhaust Doug Thorley long tubes RCD 4.5 anzo halo projectors with 4300k hids 12000k hid fogs T-rex stainless mesh mesh grille kit in pro car wear LED taillights & 3rd brake LED reverse lights LED license plate lights LED dome & map lights all Kicker speakers with 15 inch L7 subwoofer Jensen 7inch flipout headunit Trd sport seatcovers Re-badged red Tacoma
    good looking truck.
    seems like you have lots of plans for her
     
  4. Dec 6, 2013 at 7:40 PM
    #4
    Buckoma

    Buckoma Well-Known Member

    Joined:
    Jan 26, 2013
    Member:
    #96125
    Messages:
    1,060
    Gender:
    Male
    First Name:
    Chris
    Buckeye, AZ
    Vehicle:
    2016 TRD Sport 4x4
  5. Dec 6, 2013 at 7:49 PM
    #5
    JLee50

    JLee50 [OP] Well-Known Member

    Joined:
    Nov 20, 2013
    Member:
    #116986
    Messages:
    391
    Gender:
    Male
    Phoenix
    Vehicle:
    Stockish 99 4x4 TRD
    ToyTec coilovers
    Thanks. I'm guessing it's the pin/clevice squeaking - on my MR2 it actually wore an oval hole in the pedal over time, so I drilled it out and put a bearing in to replace the factory nylon bushing. I removed my spring entirely, since it has already ripped its way completely through the bracket.
     
  6. Dec 17, 2013 at 9:26 AM
    #6
    JLee50

    JLee50 [OP] Well-Known Member

    Joined:
    Nov 20, 2013
    Member:
    #116986
    Messages:
    391
    Gender:
    Male
    Phoenix
    Vehicle:
    Stockish 99 4x4 TRD
    ToyTec coilovers
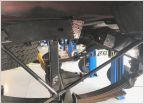
    Installed new stuff.

    [​IMG]

    Used ratchet straps to align the axle with the spring - bumpstops are allegedly unnecessary with OME springs due to the overloads:
    [​IMG]

    I discovered I had no battery tie down rod, which caused the battery to bounce around - sent a nice spark through the fender/hood gap the other night. So, I fixed that using the retainers that OME used to hold the shocks in a compressed state for shipping:
    [​IMG]

    [​IMG]

    I measured a 4" gain in the back. It should settle some, though.
    [​IMG]

    I briefly tried to adjust the coilovers on the truck, but they're pretty seized up. I'll either have to disassemble them first, try soaking them in lube for a while, or just replace them with Icons. wtb winning lottery ticket. :p
     
  7. Dec 17, 2013 at 11:39 AM
    #7
    Box Rocket

    Box Rocket Well-Known Member

    Joined:
    Mar 1, 2010
    Member:
    #32389
    Messages:
    7,184
    Gender:
    Male
    First Name:
    Adam
    Syracuse, Utah
    Vehicle:
    1995 FZJ80 Land Cruiser
    3xLocked, lifted, well used
    still not a bad idea to use bumpstops
     
  8. Dec 17, 2013 at 12:31 PM
    #8
    JLee50

    JLee50 [OP] Well-Known Member

    Joined:
    Nov 20, 2013
    Member:
    #116986
    Messages:
    391
    Gender:
    Male
    Phoenix
    Vehicle:
    Stockish 99 4x4 TRD
    ToyTec coilovers
    If I do run them, I will worry about it after I install the u-bolt flip -- I can't do much of anything now without an extended brake line, so it's not going to play very hard for a little while.
     
  9. Dec 17, 2013 at 12:34 PM
    #9
    Box Rocket

    Box Rocket Well-Known Member

    Joined:
    Mar 1, 2010
    Member:
    #32389
    Messages:
    7,184
    Gender:
    Male
    First Name:
    Adam
    Syracuse, Utah
    Vehicle:
    1995 FZJ80 Land Cruiser
    3xLocked, lifted, well used

    Yeah, I'm just saying. Get the rest completed first like the ubolt flip and definitely want to get the longer brakeline, then tackle the bumpstops.
     
  10. Dec 21, 2013 at 3:23 PM
    #10
    JLee50

    JLee50 [OP] Well-Known Member

    Joined:
    Nov 20, 2013
    Member:
    #116986
    Messages:
    391
    Gender:
    Male
    Phoenix
    Vehicle:
    Stockish 99 4x4 TRD
    ToyTec coilovers
    I installed a longer brake line today - I'm using a spring to pull the slack out horizontally so it doesn't catch on anything. I was going to run the spring from the bed crossbrace, but then the brake line would be touching either the wire bundle going to the rear diff, or the rod for the rear proportioning valve. I went a bit longer than necessary, but I should never have to worry about it being too short. It's a very gentle spring, so I am not worried about it upsetting the proportioning valve by having it attached there.

    [​IMG]

    Next will be the proportioning valve bracket - waiting for paint to dry on a piece of flat stock.

    I also added a helper spring to my parking brake bracket, but I'm not sure if that merits a picture. :p
     

Products Discussed in

To Top