1. Welcome to Tacoma World!

    You are currently viewing as a guest! To get full-access, you need to register for a FREE account.

    As a registered member, you’ll be able to:
    • Participate in all Tacoma discussion topics
    • Communicate privately with other Tacoma owners from around the world
    • Post your own photos in our Members Gallery
    • Access all special features of the site

Jon's Tan '95 (re)Build Thread

Discussion in '1st Gen. Builds (1995-2004)' started by mobes, Jun 12, 2018.

  1. Jun 12, 2018 at 8:57 AM
    #1
    mobes

    mobes [OP] Member

    Joined:
    Oct 26, 2016
    Member:
    #200754
    Messages:
    16
    Gender:
    Male
    Hi guys and gals,

    I've wanted a 1st gen Tacoma since 1996... before I had a driver's license. I was in middle school and there was a sierra beige metallic extracab owned by a customer on my paper route. I drooled over it every morning. Unfortunately that truck was trashed within a couple years by the driver, the owner's son who was only a few years older than me.

    Actually owning a Tacoma, since I've had a driver's license, was never a priority for me. I either didn't have the money, didn't want or need a truck, or had a full-size truck.

    That changed in October 2016 when I bought a truck identical to the one I used to drool over. It was a 1995 with over 300K on the clock but was still running strong, and I exactly what I was looking for.

    Since then I've made lots of small improvements, mostly just fixing small things and adding things like power windows/locks, RKE, stereo, etc.

    Fast forward to March 12, 2018 - on my way to work I hit a patch of black ice which sent me sliding sideways off the highway and into a power pole. I am thankful that I kept the shiny side up and walked away without a scratch. The pole didn't really slow me down much, I'm glad it was an older one and not a fresh one. It sheared off pretty readily, stopping me no faster than I could have with the brakes on dry pavement. The airbag did not deploy. There are no forward crash sensors on this generation, only an internal one to the SRS module under the dash.
    [​IMG]

    Here's a closer view of the damage. I only have liability on this one so I'm fixing it myself. It's still not worth scrapping - it's a Toyota, there's lots of life left! Replacing it would be $6K or more in this local market.
    [​IMG]

    After removing some more parts. Needs a new radiator, fan, condenser, fuse box, driver fender apron, bumper, and front clip metal.
    [​IMG]

    Damaged apron removed.
    [​IMG]

    Salvage yard apron and aftermarket radiator support test-fit. Notice the alignment vs the frame rails. I thought at first the frame was straight up until this point. Clearly I was wrong, so I took it to a body shop to have them take care of that part as my only frame tool is BFH. The driver frame horn was 15mm out of alignment in the front, pushed inward. The cab was tweaked on the mounts as well, making the frame look seem worse than it actually was. The body shop owner was commenting on how tough Toyota frames are compared to any other trucks that he works on. Now if only they could make them so they don't rust through.
    [​IMG]
     
  2. Jun 12, 2018 at 9:02 AM
    #2
    mobes

    mobes [OP] Member

    Joined:
    Oct 26, 2016
    Member:
    #200754
    Messages:
    16
    Gender:
    Male
    Back from the frame rack. Grinding off what was left of the core support mount.
    [​IMG]

    New mount tacked. Thankfully you can buy them separately from the frame from Toyota.
    [​IMG]

    New toy in action. I haven't tried any thin-gauge sheet metal yet, which is where my cheapo welder really struggled. I will say I really like the adjustability, it sure beats the "4 settings and always wrong" of the DUAL-MIG 151.
    [​IMG]

    I pulled the drivetrain. Figured I might as well since I have the access right now with the radiator support off. Here's the front end after some pressure washing and touch-up of the frame horns with Rust Reformer. Still have more touch-up to do. It was pretty nasty - but now I know what the rack and diff look like, they're no longer one single amorphous blob of black nastyness.
    [​IMG]

    Here's why I pulled the drivetrain. Yikes. Looks like a number of years with a leaky shifter housing. They seem to be a pain point on these - but nothing some FIPG can't fix. I ran out of time today, but this will be the next victim of the pressure washer.
    [​IMG]

    The engine is a little bit better than the trans, but I will be doing VCG's, timing belt, water pump, spark plugs, re-seal the oil pan as well as a general "external" overhaul - not going to dig into the internals. It still runs like a top other than some smoke on cold start but for now will just leave well-enough alone internally.
    [​IMG]

    I am contemplating painting it Sunfire Red Pearl, which I prefer (despite the tan being the example I drooled over as a teen), but that's more work of course. I could get away with just painting the front clip and blending to the doors if I keep the Sierra Beige Metallic color. But then again I do have severe oxidation on the roof, a deep scratch behind the driver door, and wheel-arch rust on the bed so there's certainly the "since I was painting anyway..." temptation to just do a full respray. I don't think the tan color is bad per se, but I do so drool over the red.
     
  3. Jun 12, 2018 at 9:05 AM
    #3
    mobes

    mobes [OP] Member

    Joined:
    Oct 26, 2016
    Member:
    #200754
    Messages:
    16
    Gender:
    Male
    After a game of Klotski, I got the drivetrain pressure washed. The engine hoist was in the shop behind the Tacoma, which was behind the trailer, which was behind the Expedition. Moved the trailer, pulled out the Tacoma with the Expedition, pushed it beside the shop, hitched the trailer back up, backed it into the shop, put the drivetrain on it, pulled it out, washed it, got covered in grime in the process. Took a shower, changed clothes, had dinner, and "assembly is reverse of removal".
    [​IMG]

    That's much better, at least. Some of it seems to be tar, or at least reduced to tar. Will have to clean that up chemically.

    I stripped the intake side of the engine down to the block and found my coolant leak. Yikes.
    [​IMG]

    I was having to regularly top off the coolant as well as noticing a coolant smell on cold start. No BHG symptoms and this was the suspected issue after reading up on the forums. Sure enough, the head surface had significant pitting on the coolant passage gasket surfaces. I wire wheeled them and filled with JB-weld, then used the Right Stuff on both sides of the gasket. I also replaced the knock sensor pigtail while I was in there.

    I also did the timing belt, and here is what I found, Toyota belt replaced 64K miles ago:
    [​IMG]

    ...and the pilot bearing/rear main.
    [​IMG]

    Everything is back together, with new seals, new water pump and timing kit, and a thorough cleaning. I re-sealed the oil pan and rear main housing as well with the Right Stuff. It had been done poorly with some sort of tan sealer previously, which was hardened and crispy, and not adhered to the block at all. Please excuse my shop mess - cleaning day comes when I can't take it anymore. I like to keep things clean but with limited time it just isn't always a priority.
    [​IMG]

    I also bought a cheap clutch kit off eBay. $100 shipped for the whole shebang. It included a Valeo pressure plate, and the other parts, while unbranded, appear to be excellent quality, especially considering the price. Time will tell, but I don't see anything that concerns me in the least.
    [​IMG]
     
    Last edited: Jun 12, 2018
    This site contains affiliate links for which the site may be compensated.
    #3
  4. Jun 12, 2018 at 9:07 AM
    #4
    mobes

    mobes [OP] Member

    Joined:
    Oct 26, 2016
    Member:
    #200754
    Messages:
    16
    Gender:
    Male
    Got this in the mail from Singapore. Suzuki Samurai shifter locator bolt. There are two sizes, you want the "long" "early" one with the 6mm pin. The newer one is a flange bolt, shorter with an 8mm pin.
    [​IMG]

    One of the factory locator pins was worn and sloppy in the R150F housing, likely causing or contributing to the gear lube leak from the top of the transmission that made such a mess of it. You can't see it here, but the pin is loose in the housing.
    [​IMG]

    Took the head off with a roloc.
    [​IMG]

    Drilled to 17/64" and tapped to M8-1.25
    [​IMG]

    Now to get the stand-out right... caliper shows .233 ~6mm
    [​IMG]

    Vs current length
    [​IMG]

    Put the bolt in the vise and took some off with the roloc. Close enough. It's not a critical dimension.
    [​IMG]

    Installed with some washers to set the depth.
    [​IMG]

    Shifter fits perfectly. Fixed for $8 vs $70 for a new housing.
    [​IMG]
     
  5. Jun 12, 2018 at 9:08 AM
    #5
    mobes

    mobes [OP] Member

    Joined:
    Oct 26, 2016
    Member:
    #200754
    Messages:
    16
    Gender:
    Male
    Got the new clutch installed.
    [​IMG]

    Cleaned up the inside of the bellhousing, installed new TOB, clutch slave and soft line. Installed trans to engine and installed crossover pipe with new gaskets. It's ready to drop in.
    [​IMG]
     
  6. Jun 27, 2018 at 10:35 PM
    #6
    mobes

    mobes [OP] Member

    Joined:
    Oct 26, 2016
    Member:
    #200754
    Messages:
    16
    Gender:
    Male
    Lots of updates...

    Used the easy access with the apron off and used the no-spring-compressor method to swap in the new shock for the driver side. Got a set of nearly-new 4100's for free. Can't beat that. Couldn't get the LBJ bolted back up though without the weight of the drivetrain. Once that was back in it bolted right back up.
    [​IMG]

    Got the replacement apron welded, seam sealed, and primed. Used weld-thru on the front edge which mates to the radiator support.
    [​IMG]

    Welds on the other side.
    [​IMG]

    Apron painted. Used the 4M4 basecoat. The OEM color is basically a flatter and non-metallic version. So it's not a perfect match to OEM underhood, but it'll do for this truck. Then I only have to buy paint once for the front clip and apron/core support.
    [​IMG]

    Radiator support painted.
    [​IMG]

    Drivetrain back in place.
    [​IMG]

    Radiator support bolted (bottom) and riveted (top). I used rivets instead of welding along the top and sides of the aprons. I'll plug weld the lower, thicker pieces of the aprons to the radiator support, but didn't feel it was necessary for the rest. Less welding = less paint touch-up.
    [​IMG]
     
  7. Jul 13, 2018 at 12:35 PM
    #7
    mobes

    mobes [OP] Member

    Joined:
    Oct 26, 2016
    Member:
    #200754
    Messages:
    16
    Gender:
    Male
    Got the apron lowers welded, finished putting the engine bay bits back together and got fluids in her. I went to bleed the clutch and the MC wasn't functioning. Autopsy revealed a torn seal. I also had a small brake fluid leak so I ordered new clutch and brake MCs and installed and bled. It turns out the leak was from the brake line between the master and front wheel splitter as it was damaged in the crash. I figured it was good insurance to go ahead and replace the brake master anyway.

    [​IMG]

    Still need to charge the AC but other than that it's mechanically complete. Just need to finish the body work now.
     
    Last edited: Jul 13, 2018
  8. Sep 6, 2018 at 9:40 AM
    #8
    mobes

    mobes [OP] Member

    Joined:
    Oct 26, 2016
    Member:
    #200754
    Messages:
    16
    Gender:
    Male
    Lots to update...

    Hood and fenders fitted. Bought the CAPA certified stuff. They fit pretty well for the most part. I had to drill some missing mounting holes and straighten/fill a couple minor shipping blemishes.
    [​IMG]

    Paint! It's not a perfect match to the 23 year old paint, but it does match really well to the unfaded stuff in the door jams upload_2018-9-6_10-39-19.gif I decided not to blend it because a) it's too far off color wise to blend well and b) I don't have time before we move and c) I intend to paint the rest of it anyway. Some time. upload_2018-9-6_10-39-19.gif
    [​IMG]

    Front end back together.
    [​IMG]

    Back on the road!
    [​IMG]

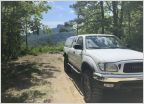
    Took it up to the Little Belt mountains over Labor Day, up over Yogo Peak.
    [​IMG]
     
  9. Sep 6, 2018 at 3:30 PM
    #9
    cazinpa

    cazinpa Well-Known Member

    Joined:
    Dec 5, 2016
    Member:
    #204074
    Messages:
    429
    Gender:
    Male
    First Name:
    Andy
    Lancaster, PA
    Vehicle:
    '96 Tacoma
    A few tweaks
    Kudos to you on replacing the front clip! I drilled out two a while back and it was a job! Lining it all up to get good gaps all around was no picnic either!
     
  10. Jun 10, 2020 at 2:55 PM
    #10
    mobes

    mobes [OP] Member

    Joined:
    Oct 26, 2016
    Member:
    #200754
    Messages:
    16
    Gender:
    Male
    As a follow-up to this thread, I ended up selling this truck to my father-in-law. I recently bought a 2000 pre-runner in Sunfire Pearl with just 170k on it.
     

Products Discussed in

To Top