

-
Welcome to Tacoma World!
You are currently viewing as a guest! To get full-access, you need to register for a FREE account.
As a registered member, you’ll be able to:- Participate in all Tacoma discussion topics
- Communicate privately with other Tacoma owners from around the world
- Post your own photos in our Members Gallery
- Access all special features of the site
 Inner Tie Rod from Amazon
 Cb Radio already installed. how do i use it?
 AC and frontend repair
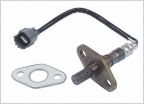 Exhaust sensor
 Torn CV boot. Is it age, lift, or both?
Just had a rod bust its way out 3.4L
Discussion in '1st Gen. Tacomas (1995-2004)' started by dankgus, Jun 26, 2019.
Page 5 of 6
Page 5 of 6


