

-
Welcome to Tacoma World!
You are currently viewing as a guest! To get full-access, you need to register for a FREE account.
As a registered member, you’ll be able to:- Participate in all Tacoma discussion topics
- Communicate privately with other Tacoma owners from around the world
- Post your own photos in our Members Gallery
- Access all special features of the site
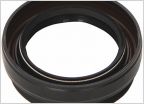 Transfer case output shaft seals
 Drilling through the headliner?
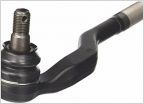 2004 Tacoma TRD front end part number check and your input
 Does anyone make a Sway Bar Extended Link?
 Blockage in gas tank filler neck
Katzkin Leather Kit DIY - 2001 Tacoma DCSB PreRunner
Discussion in '1st Gen. Tacomas (1995-2004)' started by m32, Aug 13, 2018.


