1. Welcome to Tacoma World!

    You are currently viewing as a guest! To get full-access, you need to register for a FREE account.

    As a registered member, you’ll be able to:
    • Participate in all Tacoma discussion topics
    • Communicate privately with other Tacoma owners from around the world
    • Post your own photos in our Members Gallery
    • Access all special features of the site

KC | LED Fog Lights (Universal & Tacoma specific versions)

Discussion in 'Lighting' started by Taylor@KC HiLiTES, Feb 1, 2017.

  1. Aug 29, 2017 at 4:56 PM
    #21
    memario1214

    memario1214 Hotshot Offroad Moderator Vendor

    Joined:
    Oct 1, 2009
    Member:
    #23628
    Messages:
    19,788
    Gender:
    Male
    First Name:
    Colton
    Missoula, MT
    Vehicle:
    SOLD - 05 Dub Cab TRD Sport 4x4, CURRENT - '21 Tundra MGM Limited
    Dang Jeremy that is bummer. Shoot some pics so that I can make sure I have my mind wrapped around it correctly. Just to confirm... I did get you the correct part # right?

    Let me know if I can help.
     
  2. Aug 29, 2017 at 5:44 PM
    #22
    Taylor@KC HiLiTES

    Taylor@KC HiLiTES [OP] Well-Known Member Vendor

    Joined:
    Nov 11, 2016
    Member:
    #202104
    Messages:
    1,056
    Gender:
    Male
    First Name:
    Taylor
    Arizona
    Vehicle:
    2010 DCSB TRD OR 4x4
    See build thread
    Please keep us posted on how the install process goes, and send me pics of everything. Especially of how you describe the light brackets as being different than in the OP. Pics would really help me see what you're experiencing so that I can be sure people don't go through this unexpectedly again in the future. Let me know what I can do to help you out!!
     
  3. Aug 29, 2017 at 5:44 PM
    #23
    buyobuyo

    buyobuyo Read The Fucking Manual

    Joined:
    Jan 24, 2008
    Member:
    #4417
    Messages:
    6,291
    Gender:
    Male
    First Name:
    Jeremy
    Camden, AR
    Vehicle:
    08 PreRunner SR5, I4, Manual, Silver
    A thing or two...
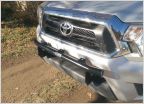
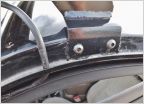
    Yeah, you got me the right part number. In the picture below, you can see the two holes I mentioned that provide for height adjustment. The lights came mounted in the upper hole. Mounted in the upper hole, the light hit the top of the fog light opening (picture below). With the light moved down to the lower hole as pictured, the light isn't centered in the opening, so I just need to shim it up to center it in the opening.

     
  4. Aug 29, 2017 at 5:46 PM
    #24
    buyobuyo

    buyobuyo Read The Fucking Manual

    Joined:
    Jan 24, 2008
    Member:
    #4417
    Messages:
    6,291
    Gender:
    Male
    First Name:
    Jeremy
    Camden, AR
    Vehicle:
    08 PreRunner SR5, I4, Manual, Silver
    A thing or two...
    You snuck in while I was posting. See my post above.
     
  5. Aug 30, 2017 at 7:49 AM
    #25
    Taylor@KC HiLiTES

    Taylor@KC HiLiTES [OP] Well-Known Member Vendor

    Joined:
    Nov 11, 2016
    Member:
    #202104
    Messages:
    1,056
    Gender:
    Male
    First Name:
    Taylor
    Arizona
    Vehicle:
    2010 DCSB TRD OR 4x4
    See build thread
    Ah I gotcha! Yeah we actually added those extra holes so that there would be a greater degree of adjustment to get it properly lined with aftermarket applications, such as this one! Any pics of trying to get it centered? Just curious as to how much it was off on with of those (upper or lower) height settings.
     
  6. Aug 30, 2017 at 5:15 PM
    #26
    buyobuyo

    buyobuyo Read The Fucking Manual

    Joined:
    Jan 24, 2008
    Member:
    #4417
    Messages:
    6,291
    Gender:
    Male
    First Name:
    Jeremy
    Camden, AR
    Vehicle:
    08 PreRunner SR5, I4, Manual, Silver
    A thing or two...
    Sorry, I don't have a good way to hold the light and get pictures showing alignment without mounting them, and I didn't want to have to mount/unmount them a bunch of times. Here are a couple of pictures with the lights mounted up. Strangely enough, the two sides are slightly different. Both sides required the lights to be on the lower mounting hole, but only the passenger side needed the spacer. I used a 1/8" piece of aluminum as I had it on hand, and it gets it nearly perfect vertically. The passenger side needs a little shifting left/right still to get it perfect, but I can deal with that when I get around to mounting the bumper and aiming the lights.

    Driver Side (no spacer)

    Passenger Side (1/8" spacer)


    @memario1214 @Taylor@KC HiLiTES @Me. Projekt
     
  7. Aug 31, 2017 at 8:42 AM
    #27
    Taylor@KC HiLiTES

    Taylor@KC HiLiTES [OP] Well-Known Member Vendor

    Joined:
    Nov 11, 2016
    Member:
    #202104
    Messages:
    1,056
    Gender:
    Male
    First Name:
    Taylor
    Arizona
    Vehicle:
    2010 DCSB TRD OR 4x4
    See build thread
    Dang it looks like you got em to look pretty good!! Does that bumper require the shipping of the stock headlight bracket? I know the Pelfreybilt bumpers do.
     
  8. Aug 31, 2017 at 3:09 PM
    #28
    buyobuyo

    buyobuyo Read The Fucking Manual

    Joined:
    Jan 24, 2008
    Member:
    #4417
    Messages:
    6,291
    Gender:
    Male
    First Name:
    Jeremy
    Camden, AR
    Vehicle:
    08 PreRunner SR5, I4, Manual, Silver
    A thing or two...
    Thanks. I'm not sure what you're asking.
     
  9. Aug 31, 2017 at 4:26 PM
    #29
    Taylor@KC HiLiTES

    Taylor@KC HiLiTES [OP] Well-Known Member Vendor

    Joined:
    Nov 11, 2016
    Member:
    #202104
    Messages:
    1,056
    Gender:
    Male
    First Name:
    Taylor
    Arizona
    Vehicle:
    2010 DCSB TRD OR 4x4
    See build thread
    Whoops. I meant snipping. So in other bumpers you have to cut a metal piece that helps hold the headlights up (not a significant loss of rigidity) in order to get any fog lights to fit.
     
  10. Aug 31, 2017 at 5:15 PM
    #30
    buyobuyo

    buyobuyo Read The Fucking Manual

    Joined:
    Jan 24, 2008
    Member:
    #4417
    Messages:
    6,291
    Gender:
    Male
    First Name:
    Jeremy
    Camden, AR
    Vehicle:
    08 PreRunner SR5, I4, Manual, Silver
    A thing or two...
    I'm not sure. There is something they call the center grill support bracket that gets removed and not replaced to install the bumper and another piece that gets cut off to install a winch. Nothing about having to cut anything to fit fogs. I'm quickly finding out that off-road companies make good products, but their install instructions are absolute shit. I'm fairly mechanically inclined, but I have no idea how this bumper is supposed to install from reading the directions.
     
  11. Feb 5, 2018 at 10:36 AM
    #31
    mlo14

    mlo14 Active Member

    Joined:
    Mar 14, 2013
    Member:
    #99742
    Messages:
    31
    Gender:
    Male
    First Name:
    Mike
    Charlotte, NC
    Vehicle:
    10 TRD Off Road
    @Taylor@KC HiLiTES or anyone else confirm whether PN 500 will fit a 2010 Tacoma that has factory fogs?

    I emailed KC directly and a representative said they work for 2006-16 but the website doesn’t agree...
     
  12. Feb 5, 2018 at 11:35 AM
    #32
    Taylor@KC HiLiTES

    Taylor@KC HiLiTES [OP] Well-Known Member Vendor

    Joined:
    Nov 11, 2016
    Member:
    #202104
    Messages:
    1,056
    Gender:
    Male
    First Name:
    Taylor
    Arizona
    Vehicle:
    2010 DCSB TRD OR 4x4
    See build thread
    It does NOT fit on the early 2nd gens (the pre-facelift models) unfortunately. You may be able to modify it to get it to work, but it won't fit direct bolt in from us. Would you mind PMing so I can get more info about your email conversation?
     
  13. Feb 5, 2018 at 11:46 AM
    #33
    mlo14

    mlo14 Active Member

    Joined:
    Mar 14, 2013
    Member:
    #99742
    Messages:
    31
    Gender:
    Male
    First Name:
    Mike
    Charlotte, NC
    Vehicle:
    10 TRD Off Road
    Thanks man, sent you a message
     
    Taylor@KC HiLiTES[OP] likes this.
  14. Apr 19, 2018 at 4:32 PM
    #34
    lpfe42

    lpfe42 Well-Known Member

    Joined:
    Jul 2, 2015
    Member:
    #158633
    Messages:
    401
    Gender:
    Male
    First Name:
    Kenny
    Santa Barbara County
    Vehicle:
    20 DCSB CEMENT
    5100/887 Icon uca
    Are they adjustable for a 17’ taco with a lift ??
     
  15. Apr 20, 2018 at 11:32 AM
    #35
    Taylor@KC HiLiTES

    Taylor@KC HiLiTES [OP] Well-Known Member Vendor

    Joined:
    Nov 11, 2016
    Member:
    #202104
    Messages:
    1,056
    Gender:
    Male
    First Name:
    Taylor
    Arizona
    Vehicle:
    2010 DCSB TRD OR 4x4
    See build thread
    Yep! There is a mechanism for some slight adjustments - perfect for your billies/887 coils!
     
  16. Jul 6, 2018 at 4:30 PM
    #36
    SaphiraTaco

    SaphiraTaco Well-Known Member

    Joined:
    Feb 8, 2018
    Member:
    #243869
    Messages:
    483
    Gender:
    Male
    First Name:
    Sean
    Seattle WA
    Vehicle:
    2013 DCLB TRD Sport
    About halfway done...
    @Taylor@kchilites
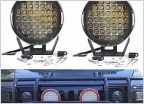
    I planning on getting the same Pelfreybrit front bumper. Do you think trimming the fog light cut outs would make it possible to mount the G3 more flush? Trying to avoid some of the beam getting cut off...
     
  17. Jul 9, 2018 at 1:06 PM
    #37
    Taylor@KC HiLiTES

    Taylor@KC HiLiTES [OP] Well-Known Member Vendor

    Joined:
    Nov 11, 2016
    Member:
    #202104
    Messages:
    1,056
    Gender:
    Male
    First Name:
    Taylor
    Arizona
    Vehicle:
    2010 DCSB TRD OR 4x4
    See build thread
    The G4s (rounds)? I currently don't have my truck (driving my DD instead lately), but I will give it a look on Wednesday evening. Where exactly in the cutouts are you thinking of trimming?
     
  18. Jul 9, 2018 at 4:39 PM
    #38
    SaphiraTaco

    SaphiraTaco Well-Known Member

    Joined:
    Feb 8, 2018
    Member:
    #243869
    Messages:
    483
    Gender:
    Male
    First Name:
    Sean
    Seattle WA
    Vehicle:
    2013 DCLB TRD Sport
    About halfway done...
    Yes, the G4 round. I have made the assumption that the lights are a larger diameter than the cutout. So I cant just push them in as far as I need.
    The cutouts look like they are about 2" or 3" in depth. I thought cutting the depth down so the outside of the cutout would be flush with the bummer face.

    Fullscreen capture 792018 41613 PM.jpg
    IMG_4368.jpg
     
  19. Jul 9, 2018 at 5:20 PM
    #39
    Taylor@KC HiLiTES

    Taylor@KC HiLiTES [OP] Well-Known Member Vendor

    Joined:
    Nov 11, 2016
    Member:
    #202104
    Messages:
    1,056
    Gender:
    Male
    First Name:
    Taylor
    Arizona
    Vehicle:
    2010 DCSB TRD OR 4x4
    See build thread
    Thanks! That helps a lot. You're dead on - that is the exact reason why the beam pattern gets slightly cutoff. I don't recall how much material there is that you can remove (the outside edges are the limiting factor, as shown in your lower drawing), but I think there's only maybe 1-2" instead of 2-3". But again, I'll give it a look very soon for you! We'll get you all sorted out ASAP.
     
  20. Aug 10, 2018 at 4:36 AM
    #40
    MY50cal

    MY50cal ---- Tread Lightly ---- Leave No Trace

    Joined:
    Apr 5, 2009
    Member:
    #15613
    Messages:
    4,232
    Gender:
    Male
    First Name:
    Mojo
    Camden County, NC
    Vehicle:
    09 PM RC / 05 SWB AC (RIP)
    Yep.
    Taylor@KC HiLiTES

    I'm about to order a set of the universal G4's, do you have any discounts going on by chance?

    Also... did you ever get around to taking those additional pics of your install? :boink:
     

Products Discussed in

To Top