1. Welcome to Tacoma World!

    You are currently viewing as a guest! To get full-access, you need to register for a FREE account.

    As a registered member, you’ll be able to:
    • Participate in all Tacoma discussion topics
    • Communicate privately with other Tacoma owners from around the world
    • Post your own photos in our Members Gallery
    • Access all special features of the site

Ken the electrical guy Q n A

Discussion in 'Technical Chat' started by Kens04Taco, Oct 8, 2019.

  1. May 4, 2021 at 7:37 AM
    #581
    Kens04Taco

    Kens04Taco [OP] Well-Known Member

    Joined:
    Sep 11, 2016
    Member:
    #196991
    Messages:
    1,770
    Gender:
    Male
    Sunland, CA
    Vehicle:
    2004 PreRunner 4x4
    kangs and thanngs
    When ever you sizing for fuses take your calculated draw @ 12 volts.

    So lets say we have 2 x 24 watt light at 12 volts we have. watts= volts x amps 24 watts = 12 volts x amps 24watts/ 12 volts = amps amps = 2A x 2 lights = 4 Amps total draw on the circuit.

    Normally you'd want to have a fuse that's just a bit over. Most people use the 1.5 rule so 4 amps x 1.5 = 6 amps.

    Here's the thing. When it comes to fuses, the idea is we want to be able to have something permanently wired into the circuit to protect from high resistance situations and or ground shorts. You want to have the fuse be large enough so it doesn't blow while its flowing the required draw to power your accessory, light, what ever. If the fuse is too big however it can let more current flow than your wire can handle which can melt, catch fire, or actually ignite materials around it.
    It's important that we calculate these values when doing electrical. We use the 1.5 rule because there a times when we have spikes of relative high draw in systems which are short lived and not a danger for the system. However we give the fuse a bit of "breathing" room to account for this. 1.5x the value of an appropriately size circuit will still blow the fuse in the event of a short or high resistance event. [There may be some debate on this and if we got into some super trick circuits this 1.5 value may change but for general automotive accessory install this is fine].


    What's the draw? watts = volts x amps
    What's the run? how long of wires do we need to reach from the battery/power source to the accessory.
    What's the appropriate size fuse for this draw?

    There's tons of graphs and charts on google to show you what size copper wire to use for 12volt applications.

    DC_wire_selection_chartlg.jpg
     
    davidstacoma and Sna[QUOTED] like this.
  2. May 4, 2021 at 7:40 AM
    #582
    Kens04Taco

    Kens04Taco [OP] Well-Known Member

    Joined:
    Sep 11, 2016
    Member:
    #196991
    Messages:
    1,770
    Gender:
    Male
    Sunland, CA
    Vehicle:
    2004 PreRunner 4x4
    kangs and thanngs
    The left side of the graph shows 3% voltage drop and 10% voltage drop. I personally try to stay within 3% even though it's not "necessary". I'm a hot rodder and custom car builder, If I thought the minimum was good I wouldn't do what I do lol. If you have a question about if something can be within 3% or 10% you can always ask me.
     
    Sna likes this.
  3. May 5, 2021 at 7:59 AM
    #583
    BZ4X4

    BZ4X4 Well-Known Member

    Joined:
    Sep 20, 2018
    Member:
    #266873
    Messages:
    170
    Gender:
    Male
    First Name:
    Brian
    Vehicle:
    2018 Blue Tacoma TRD Off-Road
    I have an aux battery in the engine bay and I ran #4 to the bed to a Blue Sesa Fuse block. I'm thinking of getting the ground off the frame. I'd like your input on the best attachment method to get a good ground connection. Thanks
     
    tfro33 likes this.
  4. May 5, 2021 at 2:31 PM
    #584
    Kens04Taco

    Kens04Taco [OP] Well-Known Member

    Joined:
    Sep 11, 2016
    Member:
    #196991
    Messages:
    1,770
    Gender:
    Male
    Sunland, CA
    Vehicle:
    2004 PreRunner 4x4
    kangs and thanngs
    Well ultimately the best ground is back at the battery. However it’s not necessary for what you’re doing. Make yourself a ground cable that is equal to the size of your power cable. Route it safely down to the frame and bond it to the frame.
    It’s very important that the mating surface be metal to metal. I normally get a small grinder, sand paper, or something abrasive and remove all the paint from where the cable lug will bond to the frame. If removing the paint is not something you’re willing you to do you need to use a star washer or something that will really dig into the metal.

    Now you need to make sure that the frame is also grounded at the front of the vehicle to the battery or the block. If you haven’t upgraded your grounding system now would be a good time.

    When it comes to grounding a vehicle you should have large gauge cables from...

    Battery to block
    Block to frame
    Battery to body or body to block. Normally I just upgrade the battery to block and block to frame. If I’m adding a grounding point at the rear of the vehicle I’ll run a cable to the rear of the frame described as above with a stud or distribution buss.
     
    Last edited: May 5, 2021
    BZ4X4[QUOTED] likes this.
  5. May 5, 2021 at 3:06 PM
    #585
    BZ4X4

    BZ4X4 Well-Known Member

    Joined:
    Sep 20, 2018
    Member:
    #266873
    Messages:
    170
    Gender:
    Male
    First Name:
    Brian
    Vehicle:
    2018 Blue Tacoma TRD Off-Road

    Thanks, Ken! Sounds like I have some work to do.
     
  6. May 5, 2021 at 8:27 PM
    #586
    Slacker1017

    Slacker1017 Stop the world I want to get off.

    Joined:
    Mar 22, 2018
    Member:
    #248100
    Messages:
    22
    Gender:
    Male
    First Name:
    Ed
    Delco, PA
    Vehicle:
    2018 Tacoma Off Road
    OV2 Tune, Redline Hood Struts, 20% Window Tint, AVS Vent Shades, Gator Tri Fold Tonneau Cover, Sidesteps, T A C O M A tailgate letter inserts, LED Interior lights, More S**T on the way...
    Hi Ken, I have a problem and I hope you can help. I installed LED's in the cabin, license plate and reverse spots. When I finished the install all was good. Tonight I went out to see how the reverse lights looked at night and found that I had no reverse lights. When I opened up the lamp assembly I found one of the bulbs had fallen out of its socket. Putting it back in did not help. I replaced the LED's with the old bulbs but still nothing. Along with that I lost the left turn signal. Turns and flashers work but not brakes. I did not get a chance to check the fuses yet. Any ideas ?
     
  7. May 6, 2021 at 6:38 AM
    #587
    ACEkraut

    ACEkraut Well-Known Member

    Joined:
    May 11, 2014
    Member:
    #129627
    Messages:
    4,541
    Gender:
    Male
    First Name:
    Aaron
    Durham, Maine
    Vehicle:
    2014 DCSB TRD Off Road

    Start with the fuses then report back to confirm they have not been blown. For me personally, with electrical issues I always try to start with the simplest fix first then move on from there. Too many times I have torn apart too much only to find out it was a fuse.
     
    Slacker1017[QUOTED] likes this.
  8. May 6, 2021 at 7:11 AM
    #588
    Slacker1017

    Slacker1017 Stop the world I want to get off.

    Joined:
    Mar 22, 2018
    Member:
    #248100
    Messages:
    22
    Gender:
    Male
    First Name:
    Ed
    Delco, PA
    Vehicle:
    2018 Tacoma Off Road
    OV2 Tune, Redline Hood Struts, 20% Window Tint, AVS Vent Shades, Gator Tri Fold Tonneau Cover, Sidesteps, T A C O M A tailgate letter inserts, LED Interior lights, More S**T on the way...
    I checked the fuses this morning and "backup#1"was blown. That took care of the reverse lights. I'm thinking I just have to replace the brake light bulb. That may have been out before yesterday and I just didn't know. Thanks for getting back to me, much appreciated !
     
    Kens04Taco[OP] and ACEkraut like this.
  9. May 6, 2021 at 10:57 AM
    #589
    TacoFergie

    TacoFergie Well-Known Member

    Joined:
    Dec 21, 2015
    Member:
    #172832
    Messages:
    1,302
    Gender:
    Male
    First Name:
    Chris
    Iowa
    What Dielectric Grease do you prefer? I have always used Permatex and it works. But I'm always on the hunt for new stuff and mine is about gone.
     
  10. May 6, 2021 at 6:23 PM
    #590
    Kens04Taco

    Kens04Taco [OP] Well-Known Member

    Joined:
    Sep 11, 2016
    Member:
    #196991
    Messages:
    1,770
    Gender:
    Male
    Sunland, CA
    Vehicle:
    2004 PreRunner 4x4
    kangs and thanngs
    I do the same. I almost always start at the fuse and or relay. The relays nice cause you can get a lot of info there. Thanks for helping him out :thumbsup:
     
    ACEkraut[QUOTED] likes this.
  11. May 6, 2021 at 6:24 PM
    #591
    Kens04Taco

    Kens04Taco [OP] Well-Known Member

    Joined:
    Sep 11, 2016
    Member:
    #196991
    Messages:
    1,770
    Gender:
    Male
    Sunland, CA
    Vehicle:
    2004 PreRunner 4x4
    kangs and thanngs
    I don’t really have one but Permatex would be good :thumbsup:
     
    TacoFergie[QUOTED] likes this.
  12. May 7, 2021 at 10:33 AM
    #592
    jjt131229

    jjt131229 Active Member

    Joined:
    Oct 20, 2020
    Member:
    #344365
    Messages:
    38
    Gender:
    Male
    Gaithersburg, MD
    Vehicle:
    2003 Lunar Mist TRD OR Dual Cab V6 4x4
    Ken, I need your help with something. I have a 2003 TRD 4x4. A few months ago I replaced all of the turn signals with non-hyper flashing LEDs that others on this forum had absolutely no issues with. Install in the rear L anf R, brakes and back-up lights went without a flaw. When it came to the front, the front left had no issues. When I replaced the RF turn signal, one of the wires (green/yellow) was old and cracked, and I had issued with the LED light. At first, I noticed it was dimmer than the RF, I replaced it with the OEM incandescent bulb, and it did not seem as bright as it should be. After pulling and plugging different bulbs to make sure it wasn't the bulb, the pigtail wire failed and came out of the socket. I bought an aftermarket 3-wire pigtail, (can't find OEM) and wired it up according to how others have done it. The new pig tail is a thicker gauge wire than the OEM harness. Connections were crimped and shrink tubed. It worked, but the LED was dim, and then eventually stopped working altogether, and now my right rear turn signal hyper flashes with light at the RF. I replaced the old trailer wiring harness in the back and thought that might be the issue. I even tried switching the wires on the new pigtail, but that didn't work either. I have a heavy-duty relay that I have not installed, but looking for some other ideas before I do that since the LF turn signal has never had an issue. Do you have any thoughts on this?
     
  13. May 7, 2021 at 1:03 PM
    #593
    Kens04Taco

    Kens04Taco [OP] Well-Known Member

    Joined:
    Sep 11, 2016
    Member:
    #196991
    Messages:
    1,770
    Gender:
    Male
    Sunland, CA
    Vehicle:
    2004 PreRunner 4x4
    kangs and thanngs
    The turn signal wire(s) that broke and you replaced is also damaged inside the loom. Cut the electrical
    Tape off the plastic loom and expose the wires as far back as necessary. It’s probably dried and broke in other places. It may need to be replaced. Can you send me pictures of your repair?


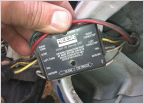
    https://www.diodedynamics.com/led-flasher-for-1995-2004-toyota-tacoma.html
    replace your flasher with this. That will take care of the hyper flash
     
  14. May 7, 2021 at 1:27 PM
    #594
    jjt131229

    jjt131229 Active Member

    Joined:
    Oct 20, 2020
    Member:
    #344365
    Messages:
    38
    Gender:
    Male
    Gaithersburg, MD
    Vehicle:
    2003 Lunar Mist TRD OR Dual Cab V6 4x4
    Ok. Will do thank you. I'll take a pic and upload when it stops raining.
     
  15. May 10, 2021 at 6:06 AM
    #595
    jjt131229

    jjt131229 Active Member

    Joined:
    Oct 20, 2020
    Member:
    #344365
    Messages:
    38
    Gender:
    Male
    Gaithersburg, MD
    Vehicle:
    2003 Lunar Mist TRD OR Dual Cab V6 4x4
    Turns out my crimps were crap and the roads knocked one loose. Crimp fixed and heat shrunk. Relay in. All works now. Thanks
     
  16. May 10, 2021 at 8:12 AM
    #596
    Kens04Taco

    Kens04Taco [OP] Well-Known Member

    Joined:
    Sep 11, 2016
    Member:
    #196991
    Messages:
    1,770
    Gender:
    Male
    Sunland, CA
    Vehicle:
    2004 PreRunner 4x4
    kangs and thanngs
    Believe it or not this experience is going to help you alot going forward. When I first started doing electrical work I made mistakes and after discovering my mistake I always remembered it and helped me get better. Happens to the best of us big dog happy you figured it out.

    :thumbsup::mudding:
     
  17. May 10, 2021 at 8:13 AM
    #597
    Kens04Taco

    Kens04Taco [OP] Well-Known Member

    Joined:
    Sep 11, 2016
    Member:
    #196991
    Messages:
    1,770
    Gender:
    Male
    Sunland, CA
    Vehicle:
    2004 PreRunner 4x4
    kangs and thanngs
    If you have any questions about crimping or anything HMU I've made all the mistakes and might be able to share my mistakes lol
     
  18. May 11, 2021 at 6:35 AM
    #598
    tmartin110

    tmartin110 Member

    Joined:
    Apr 15, 2019
    Member:
    #290196
    Messages:
    11
    Northern VA
    Hey there @Kens04Taco
    Hopefully a quick question. I want to add two rear USB (2.4A or 3.0 quick charge)ports to my 2019. My center console has two 2.1A ports. Would tapping (T-Tap connectors) into those ports provide enough power for a rapid quick charge port? I don't have a 12v CLA adapter in my center console like others do. I'm assuming that my center console is on a 15A fuse so I should be okay. Interested in your opinion.
     
  19. May 11, 2021 at 9:42 PM
    #599
    Kens04Taco

    Kens04Taco [OP] Well-Known Member

    Joined:
    Sep 11, 2016
    Member:
    #196991
    Messages:
    1,770
    Gender:
    Male
    Sunland, CA
    Vehicle:
    2004 PreRunner 4x4
    kangs and thanngs
    You just need to be mindful of the total load on the fused circuit. I’m sure you’ll be fine. Worst case since do you overload the circuit. Pop
    The fuse. Then just go other option and run a new circuit through the interior to where you want your charging ports.

    Try it and let me know
     
  20. May 11, 2021 at 9:43 PM
    #600
    Kens04Taco

    Kens04Taco [OP] Well-Known Member

    Joined:
    Sep 11, 2016
    Member:
    #196991
    Messages:
    1,770
    Gender:
    Male
    Sunland, CA
    Vehicle:
    2004 PreRunner 4x4
    kangs and thanngs
    just make sure you use the same or better size wire. Do not use smaller wire than what’s there.
     
    tmartin110[QUOTED] likes this.

Products Discussed in

To Top