-
Welcome to Tacoma World!
You are currently viewing as a guest! To get full-access, you need to register for a FREE account.
As a registered member, you’ll be able to:- Participate in all Tacoma discussion topics
- Communicate privately with other Tacoma owners from around the world
- Post your own photos in our Members Gallery
- Access all special features of the site
 3rd gen Stereo Upgrade using Loaded Low Profile Sub
 Amp Install 2013 Tacoma with standard touch screen head unit
 2015 DCSB entune speaker upgrade
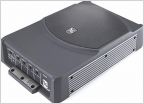 Is it possible to upgrade the sound but keep the factory head unit?
 Doing some audio upgrades on my 09...
 I ordered some gear.
KickerCS Upgrade with Kicker Key amp Install Assistance
Discussion in 'Audio & Video' started by siKjiTz, Sep 18, 2018.
Page 24 of 24
Page 24 of 24
Products Discussed in