1. Welcome to Tacoma World!

    You are currently viewing as a guest! To get full-access, you need to register for a FREE account.

    As a registered member, you’ll be able to:
    • Participate in all Tacoma discussion topics
    • Communicate privately with other Tacoma owners from around the world
    • Post your own photos in our Members Gallery
    • Access all special features of the site

LBJ Concerns/Replacement Guide Recommendation

Discussion in '1st Gen. Tacomas (1995-2004)' started by dgshelto, Nov 8, 2017.

  1. Nov 8, 2017 at 1:19 PM
    #1
    dgshelto

    dgshelto [OP] Well-Known Member

    Joined:
    Apr 19, 2017
    Member:
    #216704
    Messages:
    90
    Gender:
    Male
    First Name:
    David
    Colorado
    Vehicle:
    2002 Tacoma Base
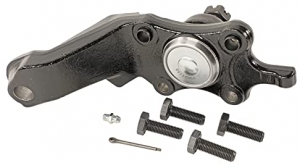
    With some recent news of LBJ failure, I've decided to replace mine as I don't recall when they were last done by the previous owner. I'm looking for a recommended step by step guide, not so much OEM vs aftermarket (please, not another discussion...)
     
  2. Nov 8, 2017 at 1:55 PM
    #2
    TeeYoda

    TeeYoda Well-Known Member

    Joined:
    Aug 6, 2017
    Member:
    #226056
    Messages:
    228
    Gender:
    Male
    PNW
    Vehicle:
    2003/2025 Tacoma sr5 4x4
    dgshelto[OP] likes this.
  3. Nov 8, 2017 at 2:16 PM
    #3
    01GreenTacoma

    01GreenTacoma Well-Known Member

    Joined:
    Jan 9, 2017
    Member:
    #207086
    Messages:
    849
    Gender:
    Male
    Use blue loctite on everything that doesn't have a cotter pin...
     
    Prayn4surf likes this.
  4. Nov 8, 2017 at 2:17 PM
    #4
    Tbimm

    Tbimm Well-Known Member

    Joined:
    Sep 23, 2017
    Member:
    #230865
    Messages:
    126
    Gender:
    Male
    First Name:
    Tom
    Belle Chasse La.
    Vehicle:
    2000 Tacoma Prerunner
    Bilstein 5100's front and back. OME 880 front coils. General HD rear springs. Fuel 16x8 Enduro rims. Dick Cepek Extreme Country 285/75/16's Some kind of headers. K&N cold air intake.
    My God that guy in the second video makes that job harder than it has to be. LOL
     
  5. Nov 8, 2017 at 2:52 PM
    #5
    jbrandt

    jbrandt Made you look

    Joined:
    Feb 12, 2011
    Member:
    #51038
    Messages:
    17,612
    Gender:
    Male
    First Name:
    Justin
    El Dorado, CA (NOT El Dorado Hills)
    Vehicle:
    '04 TRD Tacoma 4x4 DC
    Kings, J59's Total Chaos UCAs Custom skids Sticker mod
    Here's the method I used, more or less: This one goes into a lot more work because he was replacing the lower control arms and other stuff, too. So for just the ball joints, you just need the first 1.5 pages.

    http://bajataco.com/tech/control_arms_01.html
     
    dgshelto[OP] and El Taco Diablo like this.
  6. Nov 8, 2017 at 6:02 PM
    #6
    Timmah!

    Timmah! Well-Known Member

    Joined:
    Feb 25, 2016
    Member:
    #179385
    Messages:
    1,224
    Gender:
    Male
    First Name:
    TIM
    I love when guys swear buy the hammer technique to break free connections like the outer tie rods to the knuckle of the balljoint and the lower balljoint to the lower control arm. I prefer pullers because they work every time and you don't end up mashing your front end components or possibly miss with a strike and bend the shit out of the brake dust shield like that guy did.
     
  7. Nov 8, 2017 at 6:17 PM
    #7
    Tbimm

    Tbimm Well-Known Member

    Joined:
    Sep 23, 2017
    Member:
    #230865
    Messages:
    126
    Gender:
    Male
    First Name:
    Tom
    Belle Chasse La.
    Vehicle:
    2000 Tacoma Prerunner
    Bilstein 5100's front and back. OME 880 front coils. General HD rear springs. Fuel 16x8 Enduro rims. Dick Cepek Extreme Country 285/75/16's Some kind of headers. K&N cold air intake.
    Pullers are great if you are saving the components but as a mechanic you won't make any money with that method. On my truck I would strike the spindle to pop the tie rod end if not replacing and use a fork to pop the ball joint. The main thing I noticed is unbolting the joint before breaking it loose. They break loose much easier when still connected to the upper suspension.
    I do realize though that things are different for me as a life long mechanic. I loved Toyota LBJ's because they didn't have to be pressed. Was a real money maker job for me.
     
  8. Nov 8, 2017 at 6:26 PM
    #8
    Timmah!

    Timmah! Well-Known Member

    Joined:
    Feb 25, 2016
    Member:
    #179385
    Messages:
    1,224
    Gender:
    Male
    First Name:
    TIM
    I guess minutes count a lot in your business. I can literally get a puller on and the joint broken free in a few minutes. But hey, to each his own I reckon.
     
  9. Nov 9, 2017 at 8:59 AM
    #9
    skeezix

    skeezix Well-Known Member

    Joined:
    Oct 31, 2010
    Member:
    #45512
    Messages:
    2,301
    Gender:
    Male
    Colorado
    Vehicle:
    1998 Limited
    About those pullers - you must have one that fits, and the ones at O'Reillys or AutoZone for ~$16 are either too big or too small. I know 'cause I tried 'em.

    I thought I would save time by disconnecting the tie rods, so I went to O'Reillys and bought a tie rod puller. Too big. Went back, got my money back, and bought the smaller one. Too small. Went back, got my money back. Neither puller would fit around the joint and have the bolt in line with the bolt on the joint. I was going to buy a pickle fork but was told by the clerk that using a pickle fork would damage the rubber cap in the joint. So I went back home, got out a claw hammer and banged on the joint. Wouldn't budge. Not enough force. Got a (much) bigger hammer and beat until I was blue in the face. No movement. I gave up and reinstalled the castle nut, torqued it and cotter-pinned it.

    That little exercise cost me about 3 hours of travel and trying to use the tools. Since this is the last time I'll replace shocks, I chose to forgo a decent $55 tool and another week of waiting for it to arrive. 'Specially after paying $35 for 4 shock cushions...
     
  10. Nov 9, 2017 at 9:30 AM
    #10
    jbrandt

    jbrandt Made you look

    Joined:
    Feb 12, 2011
    Member:
    #51038
    Messages:
    17,612
    Gender:
    Male
    First Name:
    Justin
    El Dorado, CA (NOT El Dorado Hills)
    Vehicle:
    '04 TRD Tacoma 4x4 DC
    Kings, J59's Total Chaos UCAs Custom skids Sticker mod
    The pitman arm puller in my above link works perfectly. Fits both the LBJ and TRE, and doesn't damage the rubber boots if you are careful installing it. It's so simple to use because there are no moving parts like those damn 3 arm "universal" pullers.

    I bought 2 of them, and modified one of them like my link describes above. That was to install a new upper balljoint, but I found that method is a royal PITA, because it was near impossible to keep the balljoint perfectly straight as you're pressing it in. For those, get yourself a proper BJ tool from Autozone (free rental) and do it right, lol...

    The pitman arm puller is seriously a 30 second job. A minute if you count fiddling with the cotter pin.

    Granted, for a mechanic that works on my different makes/models, this probably doesn't really apply. A BFH is a "universal fit" tool.

    But if you work of 1st gens a lot, IMO this is the way to go.
     
    dgshelto[OP] and Dalandser like this.
  11. Nov 9, 2017 at 12:06 PM
    #11
    ThunderOne

    ThunderOne Well-Known Member

    Joined:
    May 20, 2009
    Member:
    #17473
    Messages:
    10,043
    First Name:
    Mitchell
    Nashville
    Vehicle:
    1ST GEN OR GTFO
    Toyota NERD
    weird... I rented a pitman arm puller and tie rod end puller from AutoZone and I managed to get both to work just fine. Maybe the rentals are different?
     
  12. Nov 9, 2017 at 12:43 PM
    #12
    jbrandt

    jbrandt Made you look

    Joined:
    Feb 12, 2011
    Member:
    #51038
    Messages:
    17,612
    Gender:
    Male
    First Name:
    Justin
    El Dorado, CA (NOT El Dorado Hills)
    Vehicle:
    '04 TRD Tacoma 4x4 DC
    Kings, J59's Total Chaos UCAs Custom skids Sticker mod
    Could be a wear and tear issue on the rentals, too. I know the BJ press I got was in "less than ideal" condition. Some of the fittings were pretty badly dented and scuffed up.

    I bought my pitman arm puller, think it was $15...
     
  13. Nov 9, 2017 at 2:29 PM
    #13
    Tbimm

    Tbimm Well-Known Member

    Joined:
    Sep 23, 2017
    Member:
    #230865
    Messages:
    126
    Gender:
    Male
    First Name:
    Tom
    Belle Chasse La.
    Vehicle:
    2000 Tacoma Prerunner
    Bilstein 5100's front and back. OME 880 front coils. General HD rear springs. Fuel 16x8 Enduro rims. Dick Cepek Extreme Country 285/75/16's Some kind of headers. K&N cold air intake.
    Don't get me wrong. The puller is fine and probably the right way to do it. For me it was just way faster and easier to use the hammer method. Doing this for years you learn what you will and won't hurt with a hammer. 2 good strikes with a 2 1/2 pound maul will pop loose just about any tie rod or ball joint. As I said before I loved Toyota ball joints because they were quick work. Both side lowers in less than 30 mins start to finish. If I didn't do it for a living I would for sure be doing a job like this by the book!
     
  14. Nov 9, 2017 at 3:55 PM
    #14
    jbrandt

    jbrandt Made you look

    Joined:
    Feb 12, 2011
    Member:
    #51038
    Messages:
    17,612
    Gender:
    Male
    First Name:
    Justin
    El Dorado, CA (NOT El Dorado Hills)
    Vehicle:
    '04 TRD Tacoma 4x4 DC
    Kings, J59's Total Chaos UCAs Custom skids Sticker mod
    I must not be holding my mouth right or something. I tried the hammer method, last time I did the BJs, and nothing budged. Ended up going back to the puller.

    Guess that's why you're the pro, and I'm the shade-tree mechanic, lol
     
  15. Nov 9, 2017 at 4:00 PM
    #15
    tony2018

    tony2018 Well-Known Member

    Joined:
    Feb 24, 2014
    Member:
    #123866
    Messages:
    5,288
    Gender:
    Male
    Whatever works guys. Heck, I'm getting old and get tired of banging away at anything. Ear protection helps a little.
     
  16. Nov 9, 2017 at 6:22 PM
    #16
    Dalandser

    Dalandser ¡Me Gustan Las Tacos-mas!

    Joined:
    Feb 19, 2015
    Member:
    #149090
    Messages:
    17,583
    First Name:
    Anthony
    Downey
    Vehicle:
    08 PreRunner Regular Cab / 98 4x4 Extra Cab
    Empty Wallet Mod
  17. Nov 9, 2017 at 6:26 PM
    #17
    tony2018

    tony2018 Well-Known Member

    Joined:
    Feb 24, 2014
    Member:
    #123866
    Messages:
    5,288
    Gender:
    Male
    Dalandser[QUOTED] likes this.
  18. Nov 9, 2017 at 6:44 PM
    #18
    Dalandser

    Dalandser ¡Me Gustan Las Tacos-mas!

    Joined:
    Feb 19, 2015
    Member:
    #149090
    Messages:
    17,583
    First Name:
    Anthony
    Downey
    Vehicle:
    08 PreRunner Regular Cab / 98 4x4 Extra Cab
    Empty Wallet Mod
    99 cent store atf and a jug of Home Depot acetone makes for some cost effective stuff lol
     
    Last edited: Nov 9, 2017
  19. Nov 9, 2017 at 7:51 PM
    #19
    tony2018

    tony2018 Well-Known Member

    Joined:
    Feb 24, 2014
    Member:
    #123866
    Messages:
    5,288
    Gender:
    Male
    got some rusted u-joint cups soaking in kroil.
     
    Dalandser likes this.
  20. Nov 11, 2017 at 8:28 AM
    #20
    skeezix

    skeezix Well-Known Member

    Joined:
    Oct 31, 2010
    Member:
    #45512
    Messages:
    2,301
    Gender:
    Male
    Colorado
    Vehicle:
    1998 Limited
    I don't know. I couldn't position the jaws of the puller to fit far enough underneath the LBJ so that the pushout screw was anywhere near centered above the bolt in the tie rod. Because the tie rod was nice and tight I didn't want to booger it up, so I returned the tools. Just as well. Using the Tacoma's jack I was able to easily push the control arms down more than far enough to remove and reinsert the lower shock mount bolt.
     

Products Discussed in

To Top