-
Welcome to Tacoma World!
You are currently viewing as a guest! To get full-access, you need to register for a FREE account.
As a registered member, you’ll be able to:- Participate in all Tacoma discussion topics
- Communicate privately with other Tacoma owners from around the world
- Post your own photos in our Members Gallery
- Access all special features of the site
 Just an Excitable Boy
 OEM Bedliner Side Caps
 Rear differential oil change - '04 Prerunner
 Electric Fan conversion question...
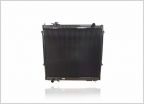 1st gen Tacoma Radiator size. Distance between tanks?
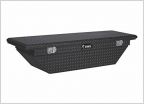 UWS Tool Box Issue
LED Flood light wiring path
Discussion in '1st Gen. Tacomas (1995-2004)' started by TacoTaco02, Dec 30, 2019.