1. Welcome to Tacoma World!

    You are currently viewing as a guest! To get full-access, you need to register for a FREE account.

    As a registered member, you’ll be able to:
    • Participate in all Tacoma discussion topics
    • Communicate privately with other Tacoma owners from around the world
    • Post your own photos in our Members Gallery
    • Access all special features of the site
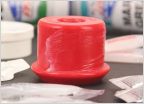
Long Travel BS Thread

Discussion in 'Long Travel Suspension' started by amaes, Aug 20, 2010.

  1. Mar 17, 2017 at 7:11 AM
    snowsk8air2

    snowsk8air2 how hard can it be?

    Joined:
    Sep 16, 2011
    Member:
    #63607
    Messages:
    10,180
    Gender:
    Male
    First Name:
    Ryan
    Flagstaff, AZ
    Vehicle:
    Supercharged TX Pro
    2011 S/C and basic mods
    Just replaced mine with the kit from energy suspension and it did a fair bit for leveling the cab out. Now my bed just seems crooked so I'll probably add some washers to line it back up with the cab
     
  2. Mar 17, 2017 at 7:30 AM
    anthony250f

    anthony250f Well-Known Member

    Joined:
    Feb 18, 2012
    Member:
    #73066
    Messages:
    16,544
    Gender:
    Male
    First Name:
    Anthony
    San Diego, CA
    Vehicle:
    2008 dcsb trd offroad 4wd
    Was it pretty easy to replace? When driving over a shitty road I can hear the door seal squeeking
     
  3. Mar 17, 2017 at 8:48 AM
    snowsk8air2

    snowsk8air2 how hard can it be?

    Joined:
    Sep 16, 2011
    Member:
    #63607
    Messages:
    10,180
    Gender:
    Male
    First Name:
    Ryan
    Flagstaff, AZ
    Vehicle:
    Supercharged TX Pro
    2011 S/C and basic mods
    Very easy. Just loosen one whole side and jack the body up enough to pull them out. Hardest part for me was finding a spot to lift from but I did it right by the front door mount. Took about 30 min max
     
    ls1 prerunner likes this.
  4. Mar 17, 2017 at 9:05 AM
    ls1 prerunner

    ls1 prerunner Internet Scientist

    Joined:
    Jun 19, 2013
    Member:
    #106580
    Messages:
    709
    Gender:
    Male
    First Name:
    Andy
    El Paso, TX
    Vehicle:
    19 Golf .:R & 11 4x4 TRD LT S/C
    TRD S/C, Camburg LT, DMZ SUA, SAW Shocks in all four corners, Glassworks hood, fenders and Bedsides, 35" Toyo MT, KMC Enduros
    Yeah do one side at a time, I jacked it up from the pinch weld using a 2x4 length-wise to get the most surface area and always had a jack stand just in case something happened when my hands were under the cab. The original rear mount was kind of stuck on mine so I had to used a long pry bar to get the body to release. It took me maybe an hour tops and that's because I installed the core support mounts wrong and had to loosen the cab to reinstall.
     
  5. Mar 17, 2017 at 9:11 AM
    ls1 prerunner

    ls1 prerunner Internet Scientist

    Joined:
    Jun 19, 2013
    Member:
    #106580
    Messages:
    709
    Gender:
    Male
    First Name:
    Andy
    El Paso, TX
    Vehicle:
    19 Golf .:R & 11 4x4 TRD LT S/C
    TRD S/C, Camburg LT, DMZ SUA, SAW Shocks in all four corners, Glassworks hood, fenders and Bedsides, 35" Toyo MT, KMC Enduros
    Do you have a drop bracket lift and are you planning on running it with the LT kit? The TC and Camburg kit only work with the stock spindle as far as I know for 4x4. On my truck, 33s will rub at full bump using the Camburg kit. If you want to stick with 35s LSK and Dirt Designs have kits that will clear 35s with minor trimming but they are a bit more expensive than TC and Camburg. I'm gonna install 35s soon but gonna mess with the alignment and maybe add a spacer to the bump pad like SMP Fab did on one of the trucks they built.
     
  6. Mar 17, 2017 at 9:12 AM
    Coot83

    Coot83 DORKEL NATION

    Joined:
    Aug 9, 2016
    Member:
    #194134
    Messages:
    13,251
    Gender:
    Male
    First Name:
    Chris
    Scottsdale, Az
    Vehicle:
    2012 Baja TX
    TC 3.5 LT, RCV axles, Demello sliders, BD light bar/fogs, LP6, DMZ rear, SOS skids, custom bumper, King 16" triples, Locked-on hydro rear bumps...
    I like where you are going with this. If I had to do it over, I would of went with LSK just for the fact that they got those nice spindles!

    Coot
     
    ls1 prerunner[QUOTED] likes this.
  7. Mar 17, 2017 at 11:52 AM
    txmxer

    txmxer Well-Known Member

    Joined:
    Jun 20, 2010
    Member:
    #39228
    Messages:
    1,742
    Gender:
    Male
    California and Texas
    Vehicle:
    06 dc tacoma
    - Total Chaos 3.5 Long travel kit - Fox 2.5 coilovers w/ resis -Prerunner bumper -Fiberglass front fenders -Fiberwerx tt bedsides - Dmz Sua - fox 2.5x16 triple bypasses
    Im not anti hydro bump haha shoulda clarified but seemed like he wants a simple set up with minimal work and cost efficiency so better off using the hydros in the rear than the front in that case!
     
  8. Mar 17, 2017 at 12:07 PM
    shawnphoto

    shawnphoto Well-Known Member

    Joined:
    Nov 12, 2012
    Member:
    #90958
    Messages:
    1,623
    Gender:
    Male
    MT
    Vehicle:
    First Gen Tundra
    First Gen Tundra Linked and Long Travel
  9. Mar 17, 2017 at 12:31 PM
    shawnphoto

    shawnphoto Well-Known Member

    Joined:
    Nov 12, 2012
    Member:
    #90958
    Messages:
    1,623
    Gender:
    Male
    MT
    Vehicle:
    First Gen Tundra
    First Gen Tundra Linked and Long Travel
    Mine took a good slam and the cab moved forward, and the bed lost alignment. They don't offer any bushing kits for the tundra, so I'll probably be going the direction of universal mounts for now
     
  10. Mar 17, 2017 at 12:55 PM
    VolcomTacoma

    VolcomTacoma Well-Known Member

    Joined:
    May 25, 2011
    Member:
    #57205
    Messages:
    20,617
    Gender:
    Male
    First Name:
    Jeff
    NorCal
    Vehicle:
    2015 TRD Sport 4x4 6 Speed Supercharged
    Front- Camburg 4x4 Long Travel 2.5" King Coilovers 2.5" King Triple Bypasses Wheelers Superbumps Rear- DMZ SUA 16" 3.0 King Triple Bypasses 3" 2.0 Fox bumps Wheels and Tires- 295/75/16 Toyo ATII XTREME SCS SR8 Dark Matte Bronze 16" Lighting- (2) 30" Combo light bars (4) Iggycorp diffused pods Tepui Ayer TRD Supercharger URD Mark III 3" Exhaust URD 4x4 Y Pipe URD CAI URD 2.85 Stealth Pulley Hurst Core Shifter with Hurst T URD Stage 3 clutch URD Lightweight flywheel URD Throw out bearing upgrade AEM Wideband AFR Gauge Speedhut Boost Gauge Craven Speed Flex Pod mount Weathertech Floor Liners BAMF Sliders Ultragauge sPod SE ARB CKMTA12 Hella Supertone horns Relentless Tailgate Reinforcement
    Note to those replacing bushings- make sure you loosen ALL of your bushings for the cab. Not just the side you are working on. Also, I wanna say its passengers side, the ABS lines that run from the inner fender to the cab need to have the wire clip released or popped out. I didn't do it until the end because I couldnt get the connector to release, but I jacked the cab up to where I needed it and the line was getting tight so I released the wire clip and it was fine.

    I jacked mine up with a 4x4 right at a good flat spot near the punch weld (left a ligjt imprint but no damage) and then was able to cram some 2x6s in between my sliders and the cab to keep it up, while leaving pressure on the jack. Wasn't a fan of sticking my hand in somewhere that could cut them off if my jack failed. Jack placement is key, someone who will not be named jacket his up in the wrong spot and split the seam right under his drivers seat. Could poke your hand through.

    Do yourself a favor and just use a wrench, i got those bolts out with the quickness using a socket and suddenly realized the fuckin wrench was stuck against the cab lol.
     
  11. Mar 17, 2017 at 3:18 PM
    thebeeler

    thebeeler part of the problem

    Joined:
    Dec 22, 2012
    Member:
    #93535
    Messages:
    643
    Gender:
    Male
    First Name:
    Daniel
    Yuma
    Vehicle:
    Your sister
    Total Chaos, Plate bumpers, e-locker, etc
    The steel-it is a urethane resin with stain-less pigment in it, the Seymour is an acrylic lacquer resin with stain-less pigment in it. That's the difference. Also neither of them are designed to be used as a bare metal coating, they are a top coat, they both require a primer underneath for full adhesion. They are both also not anymore "weldable" than a normal spray can.
     
  12. Mar 17, 2017 at 7:16 PM
    glorifiedwelder

    glorifiedwelder IG= @Liquid_Torch

    Joined:
    Feb 14, 2015
    Member:
    #148647
    Messages:
    3,661
    Gender:
    Male
    First Name:
    jason
    Santa Clarita, ca
    Vehicle:
    double cab trd sport
    Watch the YouTube videos it's super easy as long as you used a solid metal surface to hit the axle on(not concrete or wood). Don't use a press. I've never broke a cv if I've done it without the press. I have seen one broken with a press.
     
  13. Mar 17, 2017 at 8:17 PM
    glorifiedwelder

    glorifiedwelder IG= @Liquid_Torch

    Joined:
    Feb 14, 2015
    Member:
    #148647
    Messages:
    3,661
    Gender:
    Male
    First Name:
    jason
    Santa Clarita, ca
    Vehicle:
    double cab trd sport

    I only use the pipe method. But it only has worked for me if I use my welding table or a thick piece of metal on the ground. Couldn't make it happen on concrete
     
  14. Mar 17, 2017 at 8:33 PM
    Tbasch

    Tbasch Well-Known Member

    Joined:
    Oct 28, 2015
    Member:
    #168007
    Messages:
    520
    Gender:
    Male
    First Name:
    Tanner
    Orange County, California/ Forth worth, Texas
    Vehicle:
    2008 DCSB Tacoma
    I guess this could be the Third dumb question, i never knew why everyone disapproved or hated engage kits i'm just curious lol i have a TC kit.
     
  15. Mar 17, 2017 at 10:54 PM
    Sacrifice

    Sacrifice Motorcycle Goon

    Joined:
    Oct 8, 2013
    Member:
    #114093
    Messages:
    15,198
    Gender:
    Male
    First Name:
    Chris
    KS
    Vehicle:
    DCSB OR 4X4 LT
    Pelfreybilt Front Bumper,BAMF sliders, Airflow Snorkel,Mini D2S Retrofits, ADS Rear Shocks, Deaver U402 Leafsprings, 35s, AllPro +2LT
    Buy extended axle shafts. Send them to CVJ, receive full extended axles then install the same day you remove the stock
     
  16. Mar 17, 2017 at 11:57 PM
    shawnphoto

    shawnphoto Well-Known Member

    Joined:
    Nov 12, 2012
    Member:
    #90958
    Messages:
    1,623
    Gender:
    Male
    MT
    Vehicle:
    First Gen Tundra
    First Gen Tundra Linked and Long Travel
    thank you! great info. is there a particular primer you would recommend?

    [​IMG]
     
  17. Mar 18, 2017 at 8:43 AM
    tetten

    tetten Cynical Twat Waffle

    Joined:
    Nov 2, 2014
    Member:
    #141581
    Messages:
    2,504
    First Name:
    Andy
    Socal
    The 2nd gen CV axle horror stories are blown out of proportion. Either use the pipe drop method or better yet, source 2 extra CVs from a junk yard and rebuild those however you want before you even start installing the kit. If you off-road you're going to need at least 1 spare anyway. I've pressed CV stars apart doing the TC recommended way and pipe dropped the last one I pulled apart. The first 2 I pressed sheared the circlip perfectly the last sheared the splines off the shaft. I think I recall reading a report where someone sheared the splines off the star and ruined it but I can't recall where the report was.

    Also the instructions for rebuilding the CVs should be on TCs website, if not, email them and ask, I received instructions with my order. Also, there are instructions in the FSM for rebuilding CVs. I used both when rebuilding mine.

    IMG_20161231_171831.jpg IMG_20170222_141101.jpg
     
    ninja89 likes this.
  18. Mar 18, 2017 at 9:09 PM
    VolcomTacoma

    VolcomTacoma Well-Known Member

    Joined:
    May 25, 2011
    Member:
    #57205
    Messages:
    20,617
    Gender:
    Male
    First Name:
    Jeff
    NorCal
    Vehicle:
    2015 TRD Sport 4x4 6 Speed Supercharged
    Front- Camburg 4x4 Long Travel 2.5" King Coilovers 2.5" King Triple Bypasses Wheelers Superbumps Rear- DMZ SUA 16" 3.0 King Triple Bypasses 3" 2.0 Fox bumps Wheels and Tires- 295/75/16 Toyo ATII XTREME SCS SR8 Dark Matte Bronze 16" Lighting- (2) 30" Combo light bars (4) Iggycorp diffused pods Tepui Ayer TRD Supercharger URD Mark III 3" Exhaust URD 4x4 Y Pipe URD CAI URD 2.85 Stealth Pulley Hurst Core Shifter with Hurst T URD Stage 3 clutch URD Lightweight flywheel URD Throw out bearing upgrade AEM Wideband AFR Gauge Speedhut Boost Gauge Craven Speed Flex Pod mount Weathertech Floor Liners BAMF Sliders Ultragauge sPod SE ARB CKMTA12 Hella Supertone horns Relentless Tailgate Reinforcement
    Cancel your order for front LT and do the rear first. Your truck will thank you.
     
    mjp2, ls1 prerunner and nfs257 like this.
  19. Mar 18, 2017 at 9:11 PM
    dirt addiction

    dirt addiction Well-Known Member

    Joined:
    Aug 11, 2014
    Member:
    #135936
    Messages:
    1,136
    Gender:
    Male
    Flagstaff
    Solo motorsports XLT LT, foxshox
    I don't think this is correct but it seems like you know what your talking about. It says right on steel-it's can that primer is not necessary. And yes you can weld right through it and the weld comes out just as clean as if it was bare metal. Normal spray paint does not obviously
     
    shawnphoto, nfs257 and Rextinkleton93 like this.
  20. Mar 18, 2017 at 10:36 PM
    J.Maynard

    J.Maynard Well-Known Member

    Joined:
    Feb 21, 2015
    Member:
    #149276
    Messages:
    386
    Gender:
    Male
    First Name:
    Josh
    Oceanside
    Vehicle:
    2001 Tacoma Long Traveled Daily
    -K&N cold air Intake, Spintech catback exhaust with fender outlet, Total Chaos Front Long Travel with Fox 2.5 10" coilover, Bed cage with Fox 2.5 16" smoothies with dsc, TC shackles, fiberwerx bedsides, frame boxing,
    i know ppl have asked but whats a good locker for the t100 axle? dont say ARB cause that snot gonna happen
     
    FlapJack935 likes this.

Products Discussed in

To Top