1. Welcome to Tacoma World!

    You are currently viewing as a guest! To get full-access, you need to register for a FREE account.

    As a registered member, you’ll be able to:
    • Participate in all Tacoma discussion topics
    • Communicate privately with other Tacoma owners from around the world
    • Post your own photos in our Members Gallery
    • Access all special features of the site

Long Travel BS Thread

Discussion in 'Long Travel Suspension' started by amaes, Aug 20, 2010.

  1. Apr 30, 2018 at 2:21 PM
    anthony250f

    anthony250f Well-Known Member

    Joined:
    Feb 18, 2012
    Member:
    #73066
    Messages:
    16,493
    Gender:
    Male
    First Name:
    Anthony
    San Diego, CA
    Vehicle:
    2008 dcsb trd offroad 4wd
    I did it.

    It seriously sucked and I hope to never do it again lol
     
  2. Apr 30, 2018 at 3:18 PM
    Dalandser

    Dalandser ¡Me Gustan Las Tacos-mas!

    Joined:
    Feb 19, 2015
    Member:
    #149090
    Messages:
    16,442
    First Name:
    Anthony
    Downey
    Vehicle:
    08 PreRunner Regular Cab / 98 4x4 Extra Cab
    Empty Wallet Mod
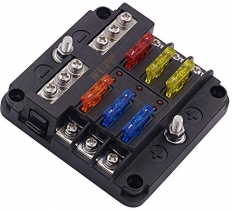
    Are those wires going directly to the lights or to a relay? They shouldn't be carrying current in from the battery to the cab which they will be doing if you didn't put a relay in the harness. That's enough power that could start a fire and therefore you'll need a relay in the circuit. If you do have a relay and you have the positive, negative, and ground wires there, then ground out the ground wire to one of the bolts already used to ground in the interior - usually by the kickpanel down by your feet next to the door. The other two will hook up to the two prongs on the switch and like said before you can trial and error to see which goes where - it's a coin toss so it shouldn't take too long to figure it out.

    The switch I used had a wire that got power from the interior fuse panel, a ground, and the wire that went to the relay to feed it the small current that opens and closes the light circuit.

    Watch these videos and it will be hopefully way easier to understand wiring up lights. Also here's my aux lights wiring writeup:

    https://www.tacomaworld.com/threads/anthony-y-el-burrito-blanco.372728/page-4#post-13547645


    Also buying a few soldering tools makes your wiring way more reliable - using flux core solder heat shrink tubing, and a wet sponge (I stick a wet rag in a used yogurt cup) to keep your iron tip clean will make soldering a breeze and you'll never worry about running out of length to make it to a ground etc. I use a $4 and a $5 they get the job done no problem for the light gauge wires we use for this stuff.
     
    Last edited: Apr 30, 2018
    MadTaco461 likes this.
  3. Apr 30, 2018 at 3:43 PM
    buyobuyo

    buyobuyo Read The Fucking Manual

    Joined:
    Jan 24, 2008
    Member:
    #4417
    Messages:
    6,291
    Gender:
    Male
    First Name:
    Jeremy
    Camden, AR
    Vehicle:
    08 PreRunner SR5, I4, Manual, Silver
    A thing or two...
    Dalandser likes this.
  4. Apr 30, 2018 at 3:58 PM
    MadTaco461

    MadTaco461 BRO runner

    Joined:
    Dec 30, 2009
    Member:
    #28470
    Messages:
    13,118
    Gender:
    Male
    First Name:
    Mike
    CA
    Vehicle:
    99 turbo 5 lug long travel
    Kinda stock
    Got any of those YouTube videos how to wire your truck up like a race truck?
     
  5. Apr 30, 2018 at 4:18 PM
    89ztrain

    89ztrain Well-Known Member

    Joined:
    Aug 11, 2012
    Member:
    #84569
    Messages:
    400
    Gender:
    Male
    North Carolina
    Vehicle:
    '11 TRD Sport 4x4
    Posted this in my build thread, thought you guys would get a kick out of it. Glad I kept my bed lol2201D090-2136-406C-A584-B325DC400690.jpg
    And a few pics of the truck since I finally got it home:22C74B36-CE97-4103-98B8-F731B7DB5BD0.jpgB8DA1A10-C149-4500-B844-308A58701F4C.jpg AFB7052F-8108-4B5E-888C-359235CF3644.jpgCAA67631-F193-49B8-A767-23D91FAC0B3C.jpg
     
  6. Apr 30, 2018 at 4:24 PM
    dillonk1602

    dillonk1602 Well-Known Member

    Joined:
    Apr 2, 2013
    Member:
    #101176
    Messages:
    1,031
    Gender:
    Male
    First Name:
    dillon
    san diego
    Vehicle:
    tacoma 5 lug
    Vehicle Modifications: TACOMA 2007 FRONT TOTAL CHAOS 5LUG ,LONG TRAVEL KIT 13" OF TRAVEL KING COIL OVER (550 POUND SPRING RATE) (18 INCH COIL) REAR BED CAGE 16" SMOOTH BODY FOX SHOCKS 2.5 2.0 / 2.5 BUMP STOPS FOX ICON ADD LEAF PACK WITH OEM SPRING 11" OF TRAVEL TRUCK COMES SPRING UNDER BY MANUFACTURE TOYOTA REGEAR TO 4.0 WITH AUBURN UNIT ENGINE 2TR-FE WITH AFE COLD AIR IN TAKE DOUG THORLEY HEADER MAGNAFLOW EXHAUST TIRE S NEW KO2 32/11.5 METHOD RIM 15" WITH -20MM OFF SET
    :bowdown::jerkoff::cheers::D
     
  7. Apr 30, 2018 at 4:26 PM
    Coot83

    Coot83 DORKEL NATION

    Joined:
    Aug 9, 2016
    Member:
    #194134
    Messages:
    13,251
    Gender:
    Male
    First Name:
    Chris
    Scottsdale, Az
    Vehicle:
    2012 Baja TX
    TC 3.5 LT, RCV axles, Demello sliders, BD light bar/fogs, LP6, DMZ rear, SOS skids, custom bumper, King 16" triples, Locked-on hydro rear bumps...
    I’m digging that strap set up on the spare. Got a link for who makes it?
     
  8. Apr 30, 2018 at 4:30 PM
    Taco Suave

    Taco Suave Taco Fever

    Joined:
    Aug 14, 2014
    Member:
    #136131
    Messages:
    708
    Gender:
    Male
    First Name:
    Griffin
    Oxnard
    Vehicle:
    2012 TRD Off Road
    Go fast stuff
    Do you have a link to your build thread?
     
  9. Apr 30, 2018 at 4:31 PM
    89ztrain

    89ztrain Well-Known Member

    Joined:
    Aug 11, 2012
    Member:
    #84569
    Messages:
    400
    Gender:
    Male
    North Carolina
    Vehicle:
    '11 TRD Sport 4x4
    Coot83[QUOTED] likes this.
  10. Apr 30, 2018 at 4:32 PM
    89ztrain

    89ztrain Well-Known Member

    Joined:
    Aug 11, 2012
    Member:
    #84569
    Messages:
    400
    Gender:
    Male
    North Carolina
    Vehicle:
    '11 TRD Sport 4x4
    Taco Suave[QUOTED] likes this.
  11. Apr 30, 2018 at 4:39 PM
    SilverGhost

    SilverGhost Well-Known Member

    Joined:
    Sep 16, 2013
    Member:
    #112635
    Messages:
    8,704
    Gender:
    Male
    First Name:
    RayRay
    Reunion, Co
    Vehicle:
    02,03 some 04, it's complicated
    #junkyardparts
    PRP Seats has one. That's where I was plainging on picking one up from.
     
    Coot83[QUOTED] likes this.
  12. Apr 30, 2018 at 4:53 PM
    Coot83

    Coot83 DORKEL NATION

    Joined:
    Aug 9, 2016
    Member:
    #194134
    Messages:
    13,251
    Gender:
    Male
    First Name:
    Chris
    Scottsdale, Az
    Vehicle:
    2012 Baja TX
    TC 3.5 LT, RCV axles, Demello sliders, BD light bar/fogs, LP6, DMZ rear, SOS skids, custom bumper, King 16" triples, Locked-on hydro rear bumps...
    89ztrain[QUOTED] likes this.
  13. Apr 30, 2018 at 7:31 PM
    Dalandser

    Dalandser ¡Me Gustan Las Tacos-mas!

    Joined:
    Feb 19, 2015
    Member:
    #149090
    Messages:
    16,442
    First Name:
    Anthony
    Downey
    Vehicle:
    08 PreRunner Regular Cab / 98 4x4 Extra Cab
    Empty Wallet Mod
    lol I'm going to have a lot more experience in a few months when I start wiring up all my stuff. I think this is the general route I'm going with unless I get a good deal on a solid state relay block:

    https://www.tacomaworld.com/threads/poor-mans-relay-box.532401/#post-17068912

    Along with a battery / alt / starter diy big 3 upgrade.
     
    Last edited: Apr 30, 2018
    MadTaco461[QUOTED] likes this.
  14. Apr 30, 2018 at 7:47 PM
    raco.the.taco

    raco.the.taco Well-Known Member

    Joined:
    May 11, 2016
    Member:
    #186720
    Messages:
    462
    Gender:
    Male
    First Name:
    Chad
    Denver, CO
    Vehicle:
    Locked, Geared & 1/2 Long Traveled
    Pelfreybilt Front Bumper, All-Pro Rear Bumper & Sliders, 35's, Toytect Boss Coilovers, JBA UCA's, DTF SUA Kit w/ E30 Deavers, Wheelers superbumps, Front & Rear Locked, 4.56 Gears
    Hey Guys, I picked up a DTF SUA kit and am looking for some beginner info on how to install. The guy at DTF will not respond to phone calls, emails or Facebook mssg’s so I’m coming to you all. I live in Denver and will mainly be daily driving and blazing Rocky Mountains trails along with occasional trips to Moab. Won’t be hucking this thing 6’ in the air (for now).

    I will be building a bed cage (similar to DMZ’s) with 18” either 3.0 or 2.5 triple bypass kings. I have the E30 Deavers.

    The questions I have is, with the deavers, do I just need to maintain the factory hanger locations when I weld on the new ones or is it different? Is there different pro’s and cons to a 25 or 30 degree angle for the shocks? Where is the preferred shock tab mount location on the axle as far as top, back or lower?

    Any other advice for the install you guys can throw at me would be much appreciated!3162902E-57E7-4847-A3D8-3C15A87E914D.jpg E554E5EF-A655-4779-98A4-937E35EB49D8.jpg
     
    Dalandser likes this.
  15. Apr 30, 2018 at 7:52 PM
    Dalandser

    Dalandser ¡Me Gustan Las Tacos-mas!

    Joined:
    Feb 19, 2015
    Member:
    #149090
    Messages:
    16,442
    First Name:
    Anthony
    Downey
    Vehicle:
    08 PreRunner Regular Cab / 98 4x4 Extra Cab
    Empty Wallet Mod
    Anthony is busy all the time plus sometimes leaves the states for races down south for a couple / few weeks at a time on occasion. @Basikbiker would probably be a person who could give you some advice. I believe he had the kit on his truck before linking it.

    https://www.tacomaworld.com/threads/basik-built-taco.296798/

    I sold an axle that Anthony used on his truck with the kit to @chasecamper who could maybe take some pics of how everything's set up on the axle.

    Edit: Here are all the pics I've got of the axle:

    [​IMG]
    [​IMG]
     
    Last edited: Apr 30, 2018
    Speedo and raco.the.taco[QUOTED] like this.
  16. Apr 30, 2018 at 8:01 PM
    raco.the.taco

    raco.the.taco Well-Known Member

    Joined:
    May 11, 2016
    Member:
    #186720
    Messages:
    462
    Gender:
    Male
    First Name:
    Chad
    Denver, CO
    Vehicle:
    Locked, Geared & 1/2 Long Traveled
    Pelfreybilt Front Bumper, All-Pro Rear Bumper & Sliders, 35's, Toytect Boss Coilovers, JBA UCA's, DTF SUA Kit w/ E30 Deavers, Wheelers superbumps, Front & Rear Locked, 4.56 Gears
    Thanks for the heads up! Hopefully I can hear from him before I start welding. I will see if your contacts have any info that can help.
     
    chasecamper likes this.
  17. Apr 30, 2018 at 8:04 PM
    SanClemTaco

    SanClemTaco Well-Known Member

    Joined:
    Sep 6, 2012
    Member:
    #86354
    Messages:
    566
    Gender:
    Male
    First Name:
    Sean
    San Clemente
    Vehicle:
    01 Prerunner on 37's
    Solo Motorsports XLT Kit, Giant 64
    is the kit completely weld on?
    if it is DM and i can tell you what i told dalandser about the giant 64 kit install.
     
    Dalandser likes this.
  18. Apr 30, 2018 at 8:13 PM
    Speedo

    Speedo Well-Known Member

    Joined:
    May 5, 2013
    Member:
    #103540
    Messages:
    8,114
    Gender:
    Male
    First Name:
    Jason
    Sacramento, CA
    Vehicle:
    2006 dcsb 4x4
    Wrecked!
    share for all of us. im hear to learn not judge.
     
  19. Apr 30, 2018 at 8:17 PM
    SanClemTaco

    SanClemTaco Well-Known Member

    Joined:
    Sep 6, 2012
    Member:
    #86354
    Messages:
    566
    Gender:
    Male
    First Name:
    Sean
    San Clemente
    Vehicle:
    01 Prerunner on 37's
    Solo Motorsports XLT Kit, Giant 64
    heres the short version.

    Parts:
    front hangars
    rear hangars
    shackles
    springs
    shock tabs
    hardware

    Setting Springs:
    remove all the stock stuff. bolt on only.
    measure stock springs; axle pin to front bushing. center-line to center-line
    measure new springs; axle pin to front bushing. center-line to center-line
    mark the current center line of the front hangar. scribe the line. DO NOT use pen; scribe
    scribe another line as follows: new spring measurement - old spring measurement - .25" (or .5") forward of first scribe
    cut off old hangar.
    locate and tack new hangar.
    do this one side at a time.
    break down the new leafs.
    mount leaf (the main one) to front hangar
    compress the leaf against the frame until flat
    mount shackle to leaf
    mount shackle mount to shackle
    let mount touch off top of the frame
    tack shackle mount into location
    let the suspension droop out, do not pull the spring down
    measure spring to frame
    subtract axle tube diameter and net spring perch height. this is your total travel.
    confirm shackle is at 90 deg to the frame
    if the shackle swings forward, measure difference. use trig if needed
    cut tacks and move shackle mount forward this distance.
    cycle suspension till flat again
    move onto pinion angle

    when everything is correct burn spring mounts in
    repeat on other side

    Pinion Angle:
    slide axle onto perches and springs. install u bolts and u bolt plates. use wood/square stock to make spring near assembled thickness
    bolt on driveshaft
    confirm driveshaft isnt bottomed out. .25" is enough. even .125" is enough though a bit close
    if drive shaft is bottoming, move front perches back to prevent this. repeat above, again
    set pinion 3 or 4 deg below driveshaft
    cycle suspension to middle, measure angles again
    cycle to bump, measure angles again
    confirm everything is good
    adjust pinion at droop as required
    pinion should be equal to or below driveshaft, always
    tack perches when satisfied
    cycle again with everything tacked

    Welding:
    Weld in front mounts
    recycle
    weld in shackle mounts
    recycle
    weld in perches
    recycle

    Setting Bump:
    cycle till leafs are flat. this is after all mounts are set and pinion is too
    if clearance to frame permits, go 1 ish inches higher
    place and tack bump mount flat at max compression
    depressurize bumps
    put bumps in cans and place perpendicular to bump pads
    measure and build bump can mounts

    Setting Shocks:
    depressurize shocks
    collapse shocks to rubber bump pads, no further
    install lower shock mounts
    pick where you want to mount them. try not to go lower than the bottom of the axle tube
    tack mounts
    shocks can angle a bit. mine at 15 deg at bump. 7 at droop. 16" shock pulling over 17" travel

    Bed Cage:
    this is up to you
    shocks may protrude above bedline if mounted higher on axle tube

    Droop:
    droop suspension
    pick limit strap location
    adjust 1" per 12" of limit strap up from bottom out
    order parts accordingly

    that the short of it
     
  20. Apr 30, 2018 at 8:19 PM
    SanClemTaco

    SanClemTaco Well-Known Member

    Joined:
    Sep 6, 2012
    Member:
    #86354
    Messages:
    566
    Gender:
    Male
    First Name:
    Sean
    San Clemente
    Vehicle:
    01 Prerunner on 37's
    Solo Motorsports XLT Kit, Giant 64
    granted the above is for first gens, if its a tension shackle keep the leaf pack whole and jack it up until the shackle hangar touches off on the frame and move it back 1.5-2". this preloads the leaf and prevents the leafs from splaying out at droop.

    i can go into more detail is there are questions
     
    chasecamper, Speedo and raco.the.taco like this.

Products Discussed in

To Top