1. Welcome to Tacoma World!

    You are currently viewing as a guest! To get full-access, you need to register for a FREE account.

    As a registered member, you’ll be able to:
    • Participate in all Tacoma discussion topics
    • Communicate privately with other Tacoma owners from around the world
    • Post your own photos in our Members Gallery
    • Access all special features of the site

Lower dash (below a/c control) removal

Discussion in '2nd Gen. Tacomas (2005-2015)' started by Sterling_vH111, Mar 24, 2016.

  1. Mar 24, 2016 at 3:24 PM
    #1
    Sterling_vH111

    Sterling_vH111 [OP] Go do something real instead.

    Joined:
    Oct 4, 2015
    Member:
    #165793
    Messages:
    2,969
    Gender:
    Male
    First Name:
    Sterling
    socal
    Vehicle:
    2012 DCLB Prerunner V6
    Secretly Long Travel & Supercharged
    There was a thread on removing the lower part of the dash, below climate controls. I remember it was pretty involved, but don't want to miss something and break an interior piece.

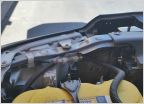
    Does anyone have the link to that thread? I remember seeing and reading through it, I think it was here on TW but I could be wrong.image.jpgThe pice with 12v plugs, usb etc. just the grey lower dash area.
    Thanks!
     
  2. Mar 24, 2016 at 3:30 PM
    #2
    Unchained 5150

    Unchained 5150 Rick

    Joined:
    Sep 25, 2014
    Member:
    #139054
    Messages:
    65,410
    Gender:
    Male
    First Name:
    Rick
    Auburn Ma
    Vehicle:
    2021 TRD Poser Pro Manual.
  3. Mar 24, 2016 at 4:05 PM
    #3
    imageomega

    imageomega Well-Known Member

    Joined:
    Oct 18, 2015
    Member:
    #166998
    Messages:
    327
    Gender:
    Male
    First Name:
    Jarrod
    I dont have full pics or the link, but will try to recall the basics for ya.

    You first remove the screws inside the bottom of the center console.

    I think theres 2 more screws holding two sections of the center console together. Take them out before sliding it back/up/out. I removed the entire center piece as 1 unit. Like so;

    Xg7XlawIDCitQ3kxKiYB1AOmanRfBBuhz1i9fwrz_fd7bfb649d805e27c1bceca205e5f7ab0e8a3579.jpg


    Thats the easy part.

    Passenger side is easier. Take the glove out (2 screws and some tabs that rotate into place). Any other screws on that side should then be visibile, if I'm remembering right...

    The center area - remove the A/C control knobs (just pull off) and the unit (just pull out) then you can take any screw/bolts out for the radio (maybe not required to get that piece out. Dont remember, but will be fairly obvious at this point).

    The driver side is the SOB. Theres a few metal brackets behind the plastic, holding various parts of the console together and to the truck. Pictures would be easier but as I dont have any... gently pull at different areas and you should feel where resistance is coming from. Theres 2 difficult bolts as I recall. You definitely have to be firm but gentle and pull some plastics aside while you unscrew behind. Funny angles and some hand scratches are likely.


    You dont need to remove the plastics around/under the wheel, or the A/C vent surrounds. Everything else goes before that piece with the switch blanks.

    BUT you do need to completely loosen/unscrew the piece under the wheel, as it all matches up to the piece you're trying to get out. The center piece + under wheel piece line up together then screw into the metal tabs I mentioned.

    I'm not sure if I'm helping you at all, but until someone with detailed pics comes along, maybe this suffices. Heres a success pic for motivation!

    -ZEhxPYpfbI9ATapMwwfNes4yEZgrA1R_wuFwN17_0a4f832e6be52efc9979278e159b60113552d8d9.jpg

    bElr1Htvh6VRZ1Bciv5f9GRxehl0FCWiLVm7UJV6_b18c543671026ddd535ac2d1dc7745157dac7f9a.jpg
     
    Last edited: Mar 24, 2016
    Biscuits likes this.
  4. Mar 24, 2016 at 5:05 PM
    #4
    Robman

    Robman Well-Known Member

    Joined:
    May 26, 2014
    Member:
    #130638
    Messages:
    536
    Gender:
    Male
    First Name:
    Rob
    Hawaii
    Vehicle:
    '14 Tacoma Double Cab
    sub'd
     
  5. Mar 24, 2016 at 5:49 PM
    #5
    TheTrooper

    TheTrooper Someone has to be part of the problem

    Joined:
    Apr 6, 2015
    Member:
    #152625
    Messages:
    205
    First Name:
    Nick
    Asheville, NC
    Vehicle:
    2015 Silver TRD Sport DCSB
    Access Cover; SOS Sliders; Pop'n Lock
  6. Mar 24, 2016 at 5:58 PM
    #6
    imageomega

    imageomega Well-Known Member

    Joined:
    Oct 18, 2015
    Member:
    #166998
    Messages:
    327
    Gender:
    Male
    First Name:
    Jarrod
    That write up is much better that what I wrote, obviously.

    However, for those looking to do this, you do not HAVE to remove the dash trim under the steering wheel or around the instrument panel to get out the large center section with plugs/blanks. No need to remove the door sill or foot plate either. It does take some effort to get the center piece disconnected from the trim under the wheel and the metal tabs they both end up bolting to.


    Edit: based on that writeup, I skipped pictures 11-17 and 19-22. Picture 18 shows the tricky bolt well (not the big one he's pointing at, but the small one on the right side of the picture); you would have to gently bend the trim below the wheel to reach this bolts, or else remove all the trim as he does. Nice write up @ramonortiz55! Wish I had read that before going at it, haha.

    Edit 2: You have to take out the bolt in his pic 16 either way.
     
    Last edited: Mar 24, 2016
    Biscuits likes this.
  7. Mar 24, 2016 at 7:33 PM
    #7
    Sterling_vH111

    Sterling_vH111 [OP] Go do something real instead.

    Joined:
    Oct 4, 2015
    Member:
    #165793
    Messages:
    2,969
    Gender:
    Male
    First Name:
    Sterling
    socal
    Vehicle:
    2012 DCLB Prerunner V6
    Secretly Long Travel & Supercharged
  8. Mar 24, 2016 at 7:35 PM
    #8
    Sterling_vH111

    Sterling_vH111 [OP] Go do something real instead.

    Joined:
    Oct 4, 2015
    Member:
    #165793
    Messages:
    2,969
    Gender:
    Male
    First Name:
    Sterling
    socal
    Vehicle:
    2012 DCLB Prerunner V6
    Secretly Long Travel & Supercharged
    Thanks for the summary! I had done it once about 6 months ago, and between that and your post I was fine!
     
  9. Nov 13, 2016 at 1:42 PM
    #9
    Dust

    Dust Boost Junkie

    Joined:
    Dec 4, 2012
    Member:
    #92445
    Messages:
    135
    Gender:
    Male
    Riverton, Nj
    Vehicle:
    Black 2012 TRD Sport, Long Bed
    TRD Super Charger, TRD Exhaust, TRD Bronze Bead Locks, Sprint Booster, Factory Nav Entune system, Billy 5100 with stock Sport springs at 2.5" and Toytec progressive AAL, Avid Off Road front and rear bumper guards, heated mirrors Mod, ect...
    Thanks for the info on disassembly of the dash! Came in handy installing the illuminated 4x4 switch.
     

Products Discussed in

To Top