1. Welcome to Tacoma World!

    You are currently viewing as a guest! To get full-access, you need to register for a FREE account.

    As a registered member, you’ll be able to:
    • Participate in all Tacoma discussion topics
    • Communicate privately with other Tacoma owners from around the world
    • Post your own photos in our Members Gallery
    • Access all special features of the site

Matthew's Jade Green 4x4 Conversion. (and other upgrades)

Discussion in '1st Gen. Builds (1995-2004)' started by mjhenks, Nov 28, 2018.

  1. Apr 17, 2019 at 8:47 PM
    #61
    mjhenks

    mjhenks [OP] Well-Known Member

    Joined:
    Feb 2, 2010
    Member:
    #30553
    Messages:
    483
    Gender:
    Male
    So.Cal
    Vehicle:
    04 Jade Green TRD V6 DC
    The next phase. Convert the trans over and install it.

    Since i already spent alot of time cleaning the new trans what i had left to transfer was the oil pan and all the switches. I switched everything over including the solenoid harness. Also made sure the valve bodies were the same and everything was clean. Also both of these transmissions are from a 03/04. That is pretty important.


    Using the same wheel barrel method i got the trans back under the truck but how do you lift it up under the truck to get the transmission jack underneath? To get it off i lifted it down by reaching through the shifter hole in the tunnel. Not strong enough to lift it back up so in the image below see if you can see how i... MacGyver'd it.


    String a ratched strap around the roof. (Protect your roof) Then using a block and tackle system go through the tunnel hole and lift her up. Easy does it.

    I was particularly proud of this.


    From here it was work, work, work so not alot of pictures here. In the end it looked like this.


    The transfer case was pretty easy but one bolt i could not get in because the rear cross plate was in the way. Also i had trouble aligning the rear trans mount. In the end i left everything loose and brought it all tight slowly.

    So the big mistake we made which forced the removal of the transmission was to confirm the torque converter was seated. I checked and checked but it was not seated. We tightened up the trans bolts and found that the engine would not (manually) rotate over to align the torque converter bolts. Oops...

    Out it went and try again.

    So, what mistakes did i make and what did i learn?
    - Rotate the engine over and over and over again as you slowly tighten up the trans. Then rotate it again.
    - Long skinny arms help. The upper two passenger side bolts are hard to reach.
    - The starter motor is not easy to get out and i damaged one of the splash guards.
    - It is impossible to torque most of the bolts so do your best.
    - When you remove the trans do not move or re-position your jack adjustment to aid getting it to line back up.
    - Grease your alignment pins on the trans to reduce friction.
    - If you are changing torque converters then before you install the trans check the fit of your torque convertor to the engine flex plate. It must fit nice. (Thanks @gearcruncher)
    - Remove the transfer case shifter before you try to install.

    This was my goal for the weekend. I dropped off my 2WD drive shaft at Drivelines Inc. In Mission Viejo. Wade took care of me and i get it back tomorrow. This weekend was to be the install of the front diff and drive axles.

    BUT.... I was so far ahead i already did that. Read on...
     
    Area51Runner and Jmarvel like this.
  2. Apr 17, 2019 at 9:15 PM
    #62
    mjhenks

    mjhenks [OP] Well-Known Member

    Joined:
    Feb 2, 2010
    Member:
    #30553
    Messages:
    483
    Gender:
    Male
    So.Cal
    Vehicle:
    04 Jade Green TRD V6 DC
    So i got antsy and had time.

    I already knew my rear drive shaft has to be modified what about the front one?

    When i got it from @Tour991 we were not sure which i needed so i chose the longer one. Time to find out if i choose wisely.

    Again i watched timmy the tool man and took notes. I knew ahead of time that the differential was a pain to get out and then back in. I mean a pain. I knew that the lower stud near the propeller shaft flange did not clear between the engine and front cross member. I had an idea i would test out.

    https://www.youtube.com/watch?v=w_gPiDvh9v4

    That bolt is part of a bracket that is bolted to the diff.

    Why i asked myself???

    I don't know but what if i leave it loose and install in after the diff is in the slot.

    Would that work?

    Lets find out...

    In the diff goes. Man it is heavy. rear mount bracket is off and both rear ones are on and tight. (The image below shows bad things coming... Do you see it?)


    Get it in there and then slide in the rear mount piece. Hey, it went in. Cool.

    Now align the front bolts and get the jack out of the way.


    Now is where i found my problems. The front bolts would not go in. They were about 1/2" too wide.

    No matter what i did they would not mount. I finally loosened the front mount brackets to the diff and the bolts went it. Great but that is not right.

    What is wrong.

    Maybe the manual diff tube is longer than the ADD one??? Nope. I checked.


    Then it dawned on me. I am an idiot.

    I mounted the passenger side mount bracket to the wring side of the diff. That is my 1/2" offset. Change to the other side and things mounted.

    Great. That was the hard part. Nope!!

    In choosing to not pre-mount that rear bracket what i also chose is the hard path to mount that bracket. There is almost no room to get that bolt started and i fought for 30 minutes to figure out how to do it. There is a small slot between the steering rack and the front beam to stick a screw driver and skinny fingers up in there to start the bolt threading. It sucked!!!


    After i got the bolt started the bolt tightened up using a swivel head ratcheting wrench. Fwew. Glad that was done.

    Check the front drive shaft now and.... It was too long. I needed the shorter 27" one. Working on a swap right now.

    Was i done there? Nope. Read on.
     
    Last edited: Apr 18, 2019
    Area51Runner likes this.
  3. Apr 17, 2019 at 9:17 PM
    #63
    Jmarvel

    Jmarvel Member

    Joined:
    Jul 28, 2018
    Member:
    #260910
    Messages:
    10
    Gender:
    Male
    Vehicle:
    2003 tacoma
    You are well on your way!! I’m doing the same exact thing to mine. I actually had to buy a second transmission since I didn’t know that 03 and up have electric throttle body and aah but now I know. I have to say I have been really learning a lot as I move forward. Where in so cal do you live? Maybe we can get together to help each other out haha
     
  4. Apr 17, 2019 at 9:43 PM
    #64
    mjhenks

    mjhenks [OP] Well-Known Member

    Joined:
    Feb 2, 2010
    Member:
    #30553
    Messages:
    483
    Gender:
    Male
    So.Cal
    Vehicle:
    04 Jade Green TRD V6 DC
    Still had more time. So what about these drive shafts. Wonder how hard it is to install them. Lets go for it.

    Most people take off the upper or lower ball joint at the pivot. Since i have a lifetime alignment deal with a local shop i went the easier route and took off the four bolts from the lower ball joint to swing the spindle out of the way.


    When trying to install the axle i found it would not fit. It would not pass through between the shock, A arm and sway bar. So, i also had to remove the sway bar mount bolt to the lower A arm and then i had room.

    I had to install the metal grease shield onto the axle shaft and the rubber seal cup to the spindle. If you recall from an earlier post i installed the 2WD spindle backing plate to keep my hubs clean. Off that came and on went the seal. Installing both of these was harder than i anticipated. Getting them started and tapped in without bending them took patience as they were a really tight press fit. I used a 1/4" punch to do the job slowly.

    Install the axle into the transfer case. Note to self. When using a screw driver to tap the axle in past the snap ring don't hit on the dust shield you just installed. Had to straighten one back out. Otherwise easy to install. Also remember to lube things.


    Now swing the spindle out a little and in goes the drive shaft. Had to press a little to get it past the seal but in she went. On goes the groove washer and the snap ring.


    Then the inner part of the manual lock, the lock bolt/washer and then the outer. Pretty easy but i did forget a step in there and had to do it twice. Glad i cleaned up all these parts ahead of time.


    Both side done in about an hour. unlock and lock the hubs to make sure the axles move when locked and do not when free. Looking good!
     
    Area51Runner likes this.
  5. Apr 17, 2019 at 10:09 PM
    #65
    mjhenks

    mjhenks [OP] Well-Known Member

    Joined:
    Feb 2, 2010
    Member:
    #30553
    Messages:
    483
    Gender:
    Male
    So.Cal
    Vehicle:
    04 Jade Green TRD V6 DC
    So now it is time to start her up. Lets see what i have here.

    I know i do not have a drive shaft yet but i should be able to start the engine and shift into gears to make sure the propeller shaft hub spin right??? Easy and no problems right??

    Nope!

    OK, truth be told i did this right after the trans was installed but i will write about this adventure now. Again @gearcruncher was a big help here because i thought i was in deep trouble. I also referenced some things that @BartMaster1234 had shared with me at this point as well.

    Thanks guys.

    So here is the long story. No real pictures but a lesson in how to waste money and turn your brain off.

    My first mistake was being too hasty in reading the capacity for the AT fluid. 2 quarts of Dextron III. the web site said. OK. Does not sound right but off we go to Pep Boys to ultimately waste over $100, 3 hours of my time and i am sure grow some gray hair.

    You see 2 quarts is way off. More line 4-6 quarts. Also Dextron III is for the 4 cylinder. The 3.4L uses Dextron IV. You ask if i figured this out before or after i installed and turned over the engine.... Yup. I figured it out too late.

    I am happily pouring in the fluid into the trans and notice the dip stick says "IV" but i am just working like a happy blind fool. :)

    Start up the truck and everything is fine. Shifts into all gears. Everything is fine. Back into Park and... massive grinding.

    Oh no.... Try it again... and again... and again. Shoot.

    Adjust the neutral sensor. Adjust the shift linkage. Remove the shift linkage all together. Nothing works. grinding every time. Oh now.

    Now about his time i also realize Dextron III is not Dextron IV. O crap, did i just fry my trans.

    Search TW and google. Nothing. Post to TW for help.

    https://www.tacomaworld.com/threads/4x4-automatic-transmission-grinding-in-park-help-needed.604392/

    @gearcruncher to the rescue. Duhhh... No drive shaft means nothing stops the trans from rotating and therefor parking pawl has a hard time engaging and grinds away. OK then.

    Now about that fluid....

    Off to PepBoys to spend more than i like to admit on Dextron IV to flush out the trans. Pull the hoses off the radiator. Rig up a poor spout and flush 12 quarts of fluid literally down the drain.


    I can tell you that you can pump 12 quarts pretty fast through a trans. I guess my pump works. Shift through all the gears and flush away.

    In the end i do not think any damage was done through both of these adventures. I also know i may have over stressed my torque converter and oil pump when we first installed the trans but i also think we are ok there.

    Time will tell.
     
    Area51Runner likes this.
  6. Apr 17, 2019 at 10:13 PM
    #66
    BartMaster1234

    BartMaster1234 Well-Known Member

    Joined:
    Aug 21, 2016
    Member:
    #195197
    Messages:
    45,848
    Gender:
    Male
    First Name:
    Tyler
    Pittsburgh, Pennsylvania
    Vehicle:
    1998 PreRunner 4x4 2.7l Supercharged
    Flux Capacitor
    I made the same mistake as you with the fluid. I ended up using close to I want to say 17 Quarts.
     
  7. Apr 17, 2019 at 10:18 PM
    #67
    mjhenks

    mjhenks [OP] Well-Known Member

    Joined:
    Feb 2, 2010
    Member:
    #30553
    Messages:
    483
    Gender:
    Male
    So.Cal
    Vehicle:
    04 Jade Green TRD V6 DC
    Really kicked myself for that...
     
  8. Apr 17, 2019 at 10:19 PM
    #68
    BartMaster1234

    BartMaster1234 Well-Known Member

    Joined:
    Aug 21, 2016
    Member:
    #195197
    Messages:
    45,848
    Gender:
    Male
    First Name:
    Tyler
    Pittsburgh, Pennsylvania
    Vehicle:
    1998 PreRunner 4x4 2.7l Supercharged
    Flux Capacitor
    The Dexron III vs IV makes zero sense to me. Unless you are Manual, both engines use the exact identical transmission. A340F no difference whatsoever.
     
  9. Apr 18, 2019 at 7:15 AM
    #69
    mjhenks

    mjhenks [OP] Well-Known Member

    Joined:
    Feb 2, 2010
    Member:
    #30553
    Messages:
    483
    Gender:
    Male
    So.Cal
    Vehicle:
    04 Jade Green TRD V6 DC
    Ya. I was obviously confused. My buddy who is a master mechanic for a large German mfg said it does not matter and would not hurt anything but i flushed it anyways. Of course then PepBoys said it does and in fact the stuff Toyota sells is better than what they sell.... Anyways.
     
  10. Apr 18, 2019 at 10:29 AM
    #70
    mjhenks

    mjhenks [OP] Well-Known Member

    Joined:
    Feb 2, 2010
    Member:
    #30553
    Messages:
    483
    Gender:
    Male
    So.Cal
    Vehicle:
    04 Jade Green TRD V6 DC
    Lousy image but a fresh drive shaft just showed up. I may get to test drive tonight.

     
  11. Apr 18, 2019 at 5:46 PM
    #71
    mjhenks

    mjhenks [OP] Well-Known Member

    Joined:
    Feb 2, 2010
    Member:
    #30553
    Messages:
    483
    Gender:
    Male
    So.Cal
    Vehicle:
    04 Jade Green TRD V6 DC
    So 5 months after i started and 1 week after the big swap my truck runs again. Not yet 4WD but close. Very close.

    Drive shaft by Drivelines Inc was delivered today. Very nice guys and a perfectly fitting, nice and clean drive shaft with cool alignment stickers and all. This may be normal but i was stoked.


    Truck started right up and ran through the gears just fine. I was for a moment freaked out when it still had the grinding noise going into park but then i realized the transfer case was in neutral. As soon as i shifted into 2H the grinding was gone. Fwew.

    Started out driving slow and worked up to 25mph. No issues. Drove in 2H, 4H & 4L. No issues. (Even though i have no front propeller shaft yet)

    I tell you man you can really feel it shift low in 4L. Totally different feel.

    I then locked the hubs and made sure i could drive around with the front axles spinning. I want to say i feel more drag in the steering. Is that normal or my imagination?

    I would look at the position of the propeller shaft flange to make sure things were spinning. Unlocked them and check again. All was fine. My neighbors probalby thought i was nuts. Start, stop, start, stop...

    Next hurdle is higher speeds.


    So, i have a few questions.

    What do you all do with the three sensors for the transfer case? I think i read someones build where they routed these into the dash somehow.

    What is recommended for extending the speed sensor? Just cut, extend & wrap it up to protect the wire joint?

    This new trans did not have a bolt location to attach the front smog sensor cable. Was that a one year thing? Figured i would just zip tie it to the trans coolant lines.


    I am still missing a few parts that the dealer is digging out for me. Taking a while as a few of them i guess are not common. Should be here Saturday along with the front propeller shaft.

    Part Number Part Name
    90949-01996 Clamp for transfer case vent hose
    90080-10213 Bolt Flange for front dif mount
    28199-46080 Cover for starter motor drain hole
    91619-61235 Bolt W Washer for mounting dynamic dampner
    90170-08015 Nut Hexagon for mounting propeller shaft.

    The end is in site.
     
    Area51Runner likes this.
  12. Apr 21, 2019 at 9:42 PM
    #72
    mjhenks

    mjhenks [OP] Well-Known Member

    Joined:
    Feb 2, 2010
    Member:
    #30553
    Messages:
    483
    Gender:
    Male
    So.Cal
    Vehicle:
    04 Jade Green TRD V6 DC
    Minor things and a major milestone.

    The speedometer sensor is something not covered alot it seems. A few builds go into it like @04Pre_Runner, @turbodb & @frenchee but i did not notice details about how the cable was extended. May not be a big deal but i really did not like the idea of cutting my stock harness especially leaving a splice under the truck. So here is how i went about the splice.

    For sure you will have a dead speedometer without this step and i will say up front for my 04 4x4 trans into my 04 DC i did not have to change the gearing. So...

    the war chest. Heat gun, soldering iron, wire, zip ties and electrical tape. Not shown are my striping tool and heat shrink tubing.


    First route the connector back over the top of the trans to the side opposite the sensor. this give you more room to work. Remove the plastic corrugated covering from the stock connector end back about 10". Cut off about 6" from the end of the connector.


    I used some industrial jacketed cabling with 5 conductors in it. Cut two off and used the other three. Make sure you know what colors you connect to what. I tinned each conductor, installed some small heat shrink on each conductor and soldered them together. I then shrunk the heat shrink to seal each solder joint. The goal here is the water proof the connections.


    I then slit over the new cable extension a long piece of larger heat shrink that goes over the spice just done and extends up and back from there at least 2". Shrink that into place.


    Then overlay that with some good quality electrical tape. Red is all i had.


    One end done. Now run the cabling back over the top of the trans and back toward the speedometer sensor connector in the transfer case. Figure out how you will route things and how long the cable needs to be. What i did is took the old bracket for the speedo sensor from the 2WD trans and mounted it to the transfer case on the upper passenger side so i could strain relief the cable when done with the factory clip.


    Now repeat the same procedure on this side but now you have to pre-string the heat shrink tubing before you solder.


    The last thing i did is take some of the corrugated covering removed in the beginning and place it around the cable near the sensor so that the clip i re-used from the 2WD system would snap around that material and hold the cable in place. I also zip tied the cable near one of the transfer case sensor cable brackets as well to secure things. Speedo worked just fine after that.

    A few speed runs past the local "Slow down" sign around 20 , 40 and 50 said i was with-in reason. Hence i do not plan to replace the gear at this point.

    Beyond that i installed the missing bolt from my front differential. This is the one from the top that is super easy to install. I know i made a big deal about how hard it was to install the front differential but if i had to do it again i would still fight that one bolt instead of fighting the heavy lift if the differential while trying to squeeze the bolt past the suspension.

    I also installed my dynamic balancer chuck of metal.


    Noticed a few thing about the transfer case.

    1. I may have a weeping issue. Will watch it.


    2. I really need a new skid plate. Anyone have one???


    I also installed the replacement starter motor weep cover but no image.

    For the front differential breather i did not want to spend $45 for the right hose system so i re-used the ADD unit. I pulled off the ADD vacuum hoses and mounted the unit as normal. It was a bit tough to hook up to the front differential breather but after a few minutes it went on.


    There is one end of the unit that sort of hangs out into nowhere because i do not have an ADD actuator to mount it to but it seems fine. I routed the breather hose up into the engine compartment where it naturally wanted to go. Anyone know how this is supposed to mount? I bought the clip from the dealer that was supposed to hold this but cannot find anywhere that it goes into. I just zip tied the hose to the fender wall.


    Last order of business was the front drive shaft. @Tour991 hooked me up with the correct length unit. (Totally cool guy to do business with) New one installed just fine although i am missing two lock washers and one nut. Will dig them up somewhere.


    After that it was time for the big test. Full 4WD baby. I have never driven a 4WD truck so i was not sure what i was looking for. I am going to have to read up on that but everything worked great. 4H & 4L. Man 4L is low. Shifting is a bit jerky but think i can understand why. Also getting into and out of 4L is a bit of a grind. Literally clunky and grindy. Not sure if that is normal but i think it is. When driving I could feel the steering get really heavy as i turned tighter turns but i think this is normal since the ground was not going to give any on the streets. Drove around the block a few times and no issues.

    Off to Pep Boys for another alignment and i have to shout this out.

    I made it! I am 4WD and totally excited.
     
  13. Apr 21, 2019 at 11:38 PM
    #73
    04Pre_Runner

    04Pre_Runner Well-Known Member

    Joined:
    Feb 9, 2017
    Member:
    #210143
    Messages:
    4,856
    Gender:
    Male
    First Name:
    Andrew
    Vehicle:
    2004 DC Tacoma SR5 4WD V6
    4WD Conversion, ARB Bumper, OME Suspension
    I did exactly what you did for the VSS harness then I went ahead and put some more plastic wire looming for that extra protection. I really need to go edit my build log but life has been busy. Congrats on the conversion didn't realize you had a build thread going.
     
  14. Apr 22, 2019 at 7:24 AM
    #74
    mjhenks

    mjhenks [OP] Well-Known Member

    Joined:
    Feb 2, 2010
    Member:
    #30553
    Messages:
    483
    Gender:
    Male
    So.Cal
    Vehicle:
    04 Jade Green TRD V6 DC
    Next tasks for my truck are:

    - Level out the front end.
    - Tundra Brake upgrade
    - Re-paint hood and roof.

    I have the tundra upgrade parts already in hand. I wanted to make sure i could get the truck to go before i improved how it stops. This upgrade should take place by the end of next month.

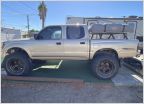
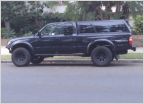
    Leveling. See images below. I knew i would be adding more weight and the rake would get worse. I held off on doing anything until the weight was added. It looks like up front i am about 2.5" lower than the rear. In the rear i have OME 5 pack leaf springs with Bilsteen shocks. Up front is stock with 1" levelers. I do not mind a slight rake and know i need to replace my front struts anyways. I figure i will be looking for OME 881's or similar but i have to do more research.


    Regarding paint. I have the typical Jade Green clear coat failure. It has really come on strong this last year so since i am keeping this truck for a while a re-spray is in order. Just figure to do the top, hood and front fenders. I am not looking for a show car. Just want to protect the metal. I have painted many cars in my life but i just don't know if i want to tackle this... We will see..

    Anyways...
     
    Area51Runner and 04Pre_Runner like this.
  15. Apr 25, 2019 at 6:43 PM
    #75
    mjhenks

    mjhenks [OP] Well-Known Member

    Joined:
    Feb 2, 2010
    Member:
    #30553
    Messages:
    483
    Gender:
    Male
    So.Cal
    Vehicle:
    04 Jade Green TRD V6 DC
    So a new issue cropped up today. Well it cropped up a few months ago and i finally figured out what it is and pulled things back apart.


    The truck has been pulling right. I just thought it was the brakes sticking and since i have a Tundra upgrade planned i was stalling. When i did the front axles i noticed the wheel wear was funny but the alignment did not show anything weird.

    Driving this week it was worse. I figured since i added a bunch of weight up front things are just worse but then i realized...

    The steering wheel was not pulling as the car drifted. That was weird...

    Turns out while i had a little play in the tie rods the entire steering rack was shifting left in its bushings and thus pulling the car right . That is why the steering wheel was rock solid as i drifted.

    This is the tread i started to figure out this little gem.

    https://www.tacomaworld.com/threads...akes-is-not-my-question.606230/#post-20462149

    To make a long story short today i pulled both outer tie rod ends and removed the bushings from the steering rack.


    Urethane bushings arrive tomorrow and MOOG tie rod ends already in hand. Looks like another alignment is coming but pretty much everything now has been replaced or rebuilt. I hope this is the end of this little adventure so i can move on to the other stuff.
     
    Area51Runner likes this.
  16. Apr 27, 2019 at 9:50 AM
    #76
    MedicMutt

    MedicMutt Purveyor of Useless Information

    Joined:
    Oct 2, 2013
    Member:
    #113680
    Messages:
    792
    Gender:
    Male
    First Name:
    Josh
    Baton Rouge, LA
    Vehicle:
    '03 DC PreRunner TRD OR; '06 Mercury Grand Marquis GS
    OME suspension, Whiteline bushings, Line-X'd Jason topper, GoRhino "Grille Guard", many more...
    You mad-man. I want to do this so badly.. I had written off the idea, but may have to follow in your footsteps now.
     
  17. Apr 27, 2019 at 10:22 AM
    #77
    mjhenks

    mjhenks [OP] Well-Known Member

    Joined:
    Feb 2, 2010
    Member:
    #30553
    Messages:
    483
    Gender:
    Male
    So.Cal
    Vehicle:
    04 Jade Green TRD V6 DC
    Thanks but there are many who went before me. I could not have done this without untold hours of research and a few TW members who answered all the stupid questions i had.
     
    Area51Runner likes this.
  18. Apr 27, 2019 at 1:10 PM
    #78
    MedicMutt

    MedicMutt Purveyor of Useless Information

    Joined:
    Oct 2, 2013
    Member:
    #113680
    Messages:
    792
    Gender:
    Male
    First Name:
    Josh
    Baton Rouge, LA
    Vehicle:
    '03 DC PreRunner TRD OR; '06 Mercury Grand Marquis GS
    OME suspension, Whiteline bushings, Line-X'd Jason topper, GoRhino "Grille Guard", many more...
    Understood, but I never once thought about the incremental process that you've taken. I'm sure you're not the first to implement it like this, but you've definitely inspired me.

    It'll be a long process, but I'm more interested now.
     
  19. Apr 27, 2019 at 1:17 PM
    #79
    mjhenks

    mjhenks [OP] Well-Known Member

    Joined:
    Feb 2, 2010
    Member:
    #30553
    Messages:
    483
    Gender:
    Male
    So.Cal
    Vehicle:
    04 Jade Green TRD V6 DC
    Finished up the steering adventure today. Wish i could say i am totally satisfied. (Much of this text is taken from the other tread i made for this topic outside my build threard)

    Urethane bushing kit was pretty easy to install. The only thing i would do different would be to lube up the outside of the bushing better. The smaller bushings went in easy without lube so i made the mistake thinking the larger would too. it did not.


    After the install the steering rack was solid but i was still pulling right. Not as bad though. Lift the front end back up and find that the left wheel still had a lot of play. I guess it is time to learn about inner tie rods.

    https://www.youtube.com/watch?v=--HcOQlv03U


    What do you think? Pretty nasty looking and a ton of water came out of one boot. Easy to replace in the end. Wish i had done that at the same time as the outers though because i had to take it all back off. MOOG again.

    Test drive again and we still pull a little. For sure it has settled down a lot but it is still there. Just not as bad. So, my options are:

    - Check out the LCA bushings. I had these installed by a shop i will never use again. (Ever feel like you got the short end of the stick???)
    - Brakes. For sure not the rear as i re-did the E-brake test. Fronts. A Tundra kit is in hand already so that will come in time.
    - Steering rack. It does have 177K miles on it. Does not feel bad and is pretty responsive. If i rock one wheel the other does move with it so i guess it is possible.


    Anyways. I am not sure what else it could be. If i am missing something please let me know.
     
  20. Apr 27, 2019 at 1:18 PM
    #80
    mjhenks

    mjhenks [OP] Well-Known Member

    Joined:
    Feb 2, 2010
    Member:
    #30553
    Messages:
    483
    Gender:
    Male
    So.Cal
    Vehicle:
    04 Jade Green TRD V6 DC

    Don't hesitate to PM me if you have questions.
     
    MedicMutt[QUOTED] likes this.

Products Discussed in

To Top